90539499 01 EM100B.qxd 7/7/08 10:05 AM Page 10
03 INSTALLING YOUR METER SENSOR
TYPE 2—ELECTRONIC WITHOPTICAL PORT ON FACE
A. Record Your Meter’s Power Factor
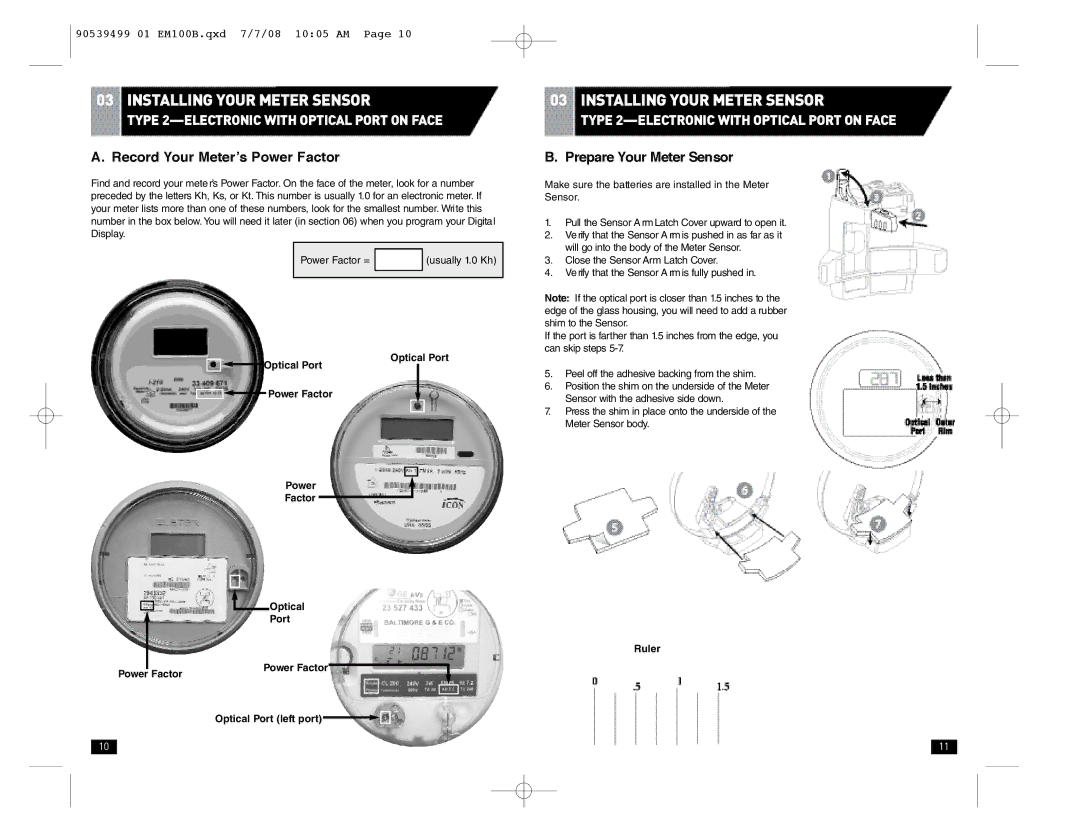
Find and record your mete r’s Power Factor. On the face of the meter, look for a number preceded by the letters Kh, Ks, or Kt. This number is usually 1.0 for an electronic meter. If your meter lists more than one of these numbers, look for the smallest number. Write this number in the box below. You will need it later (in section 06) when you program your Digital Display.
Power Factor = |
| (usually 1.0 Kh) |
| ||
|
|
|
|
|
|
Optical Port
![]() Optical Port
Optical Port
![]() Power Factor
Power Factor
Power
Factor
Optical
Port
Power Factor
Power Factor
Optical Port (left port) ![]()
![]()
03 INSTALLING YOUR METER SENSOR
TYPE
B. Prepare Your Meter Sensor
Make sure the batteries are installed in the Meter
Sensor.
1.Pull the Sensor A rm Latch Cover upward to open it.
2 . | Verify that the Sensor A rm is pushed in as far as it |
| will go into the body of the Meter Sensor. |
3 . | Close the Sensor Arm Latch Cover. |
4 . | Verify that the Sensor A rm is fully pushed in. |
Note: If the optical port is closer than 1.5 inches to the edge of the glass housing, you will need to add a rubber shim to the Sensor.
If the port is farther than 1.5 inches from the edge, you can skip steps
5 . Peel off the adhesive backing from the shim.
6 . Position the shim on the underside of the Meter Sensor with the adhesive side down .
7.Press the shim in place onto the underside of the Meter Sensor body.
Ruler
10 |
|
|
|
| 11 |
|
|
|
|
|
|
|
|
|
|
|
|
|
|
|
|
|
|
