Steps to Installing
Secure the speaker to the wall
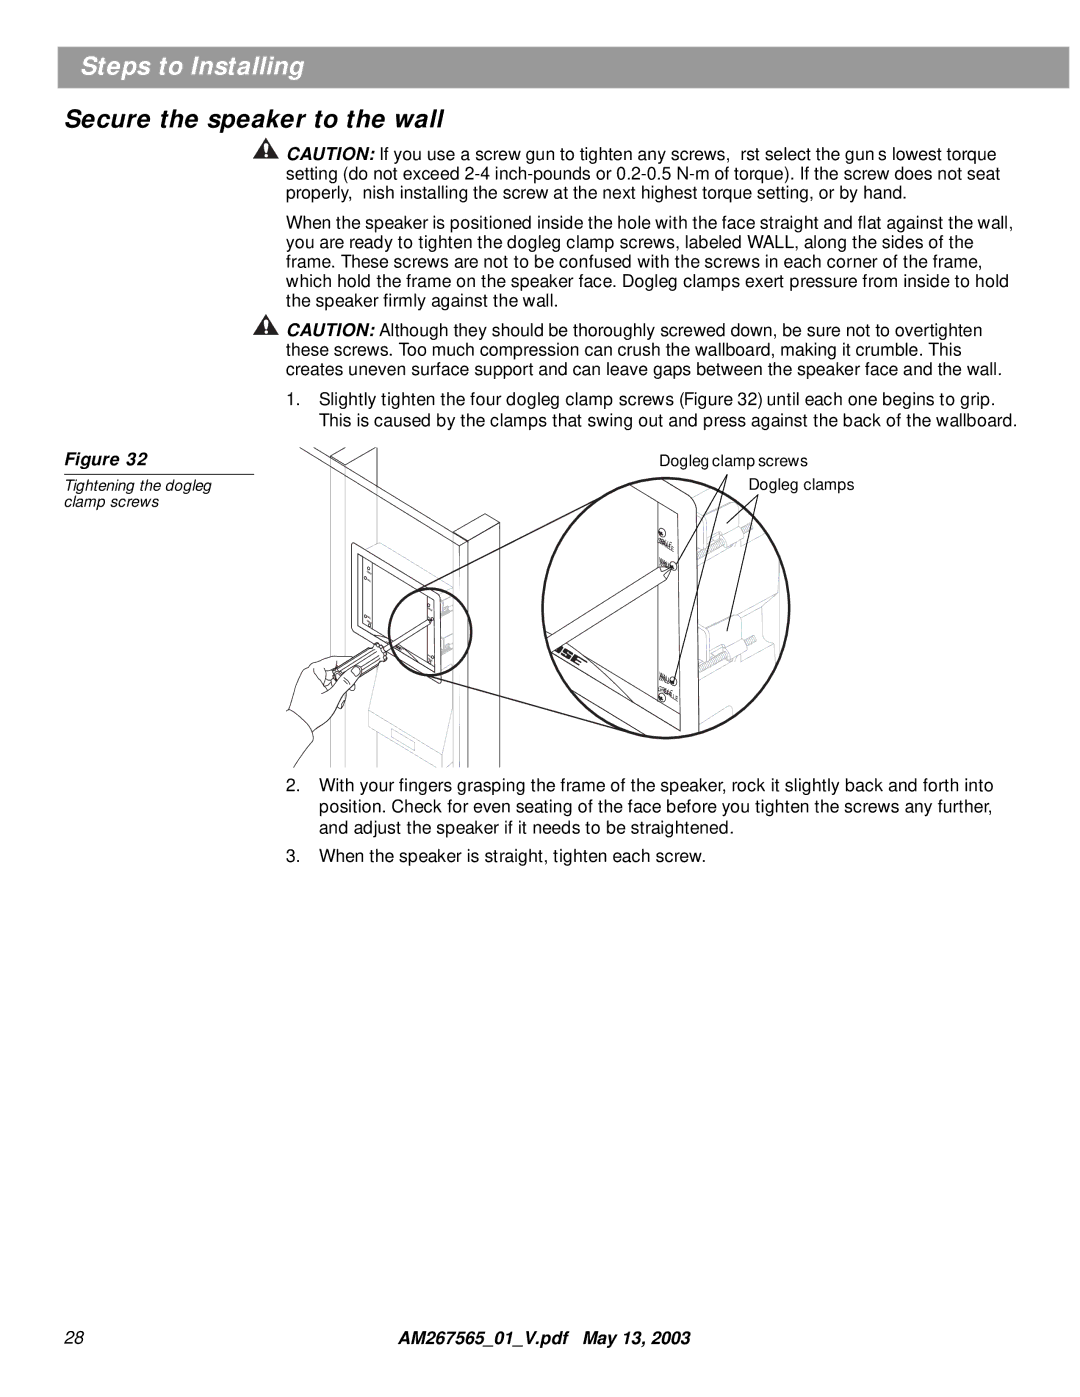
Figure 32
Tightening the dogleg clamp screws
![]() CAUTION: If you use a screw gun to tighten any screws, first select the gun’s lowest torque setting (do not exceed
CAUTION: If you use a screw gun to tighten any screws, first select the gun’s lowest torque setting (do not exceed
When the speaker is positioned inside the hole with the face straight and flat against the wall, you are ready to tighten the dogleg clamp screws, labeled WALL, along the sides of the frame. These screws are not to be confused with the screws in each corner of the frame, which hold the frame on the speaker face. Dogleg clamps exert pressure from inside to hold the speaker firmly against the wall.
![]() CAUTION: Although they should be thoroughly screwed down, be sure not to overtighten these screws. Too much compression can crush the wallboard, making it crumble. This creates uneven surface support and can leave gaps between the speaker face and the wall.
CAUTION: Although they should be thoroughly screwed down, be sure not to overtighten these screws. Too much compression can crush the wallboard, making it crumble. This creates uneven surface support and can leave gaps between the speaker face and the wall.
1.Slightly tighten the four dogleg clamp screws (Figure 32) until each one begins to grip. This is caused by the clamps that swing out and press against the back of the wallboard.
Dogleg clamp screws
Dogleg clamps
GRILLE
WALL![]()
WALL![]()
GRILLE![]()
2.With your fingers grasping the frame of the speaker, rock it slightly back and forth into position. Check for even seating of the face before you tighten the screws any further, and adjust the speaker if it needs to be straightened.
3.When the speaker is straight, tighten each screw.
28 | AM267565_01_V.pdf May 13, 2003 |