Remote control installation
The![]() Marine Remote Commander has been designed with particular attention to ease and flexibility in installation.
Marine Remote Commander has been designed with particular attention to ease and flexibility in installation.
It can be mounted in both
Once the cup is secure, you simply feed the wires thru the hole in the back of the cup (flush mount) or the lower edge of the cup (surface mount) and then insert and turn the remote until it is engaged.
FLUSH MOUNT
Follow these steps for a successful installation:
1.Select the proper location which accomodates the 3.45” overall diameter, and mark its centerpoint.
2.Drill a hole with diameter of 3.2”- 3.3”
3.Place the
groove on the rear surface of the flange of the mounting cup.
Place
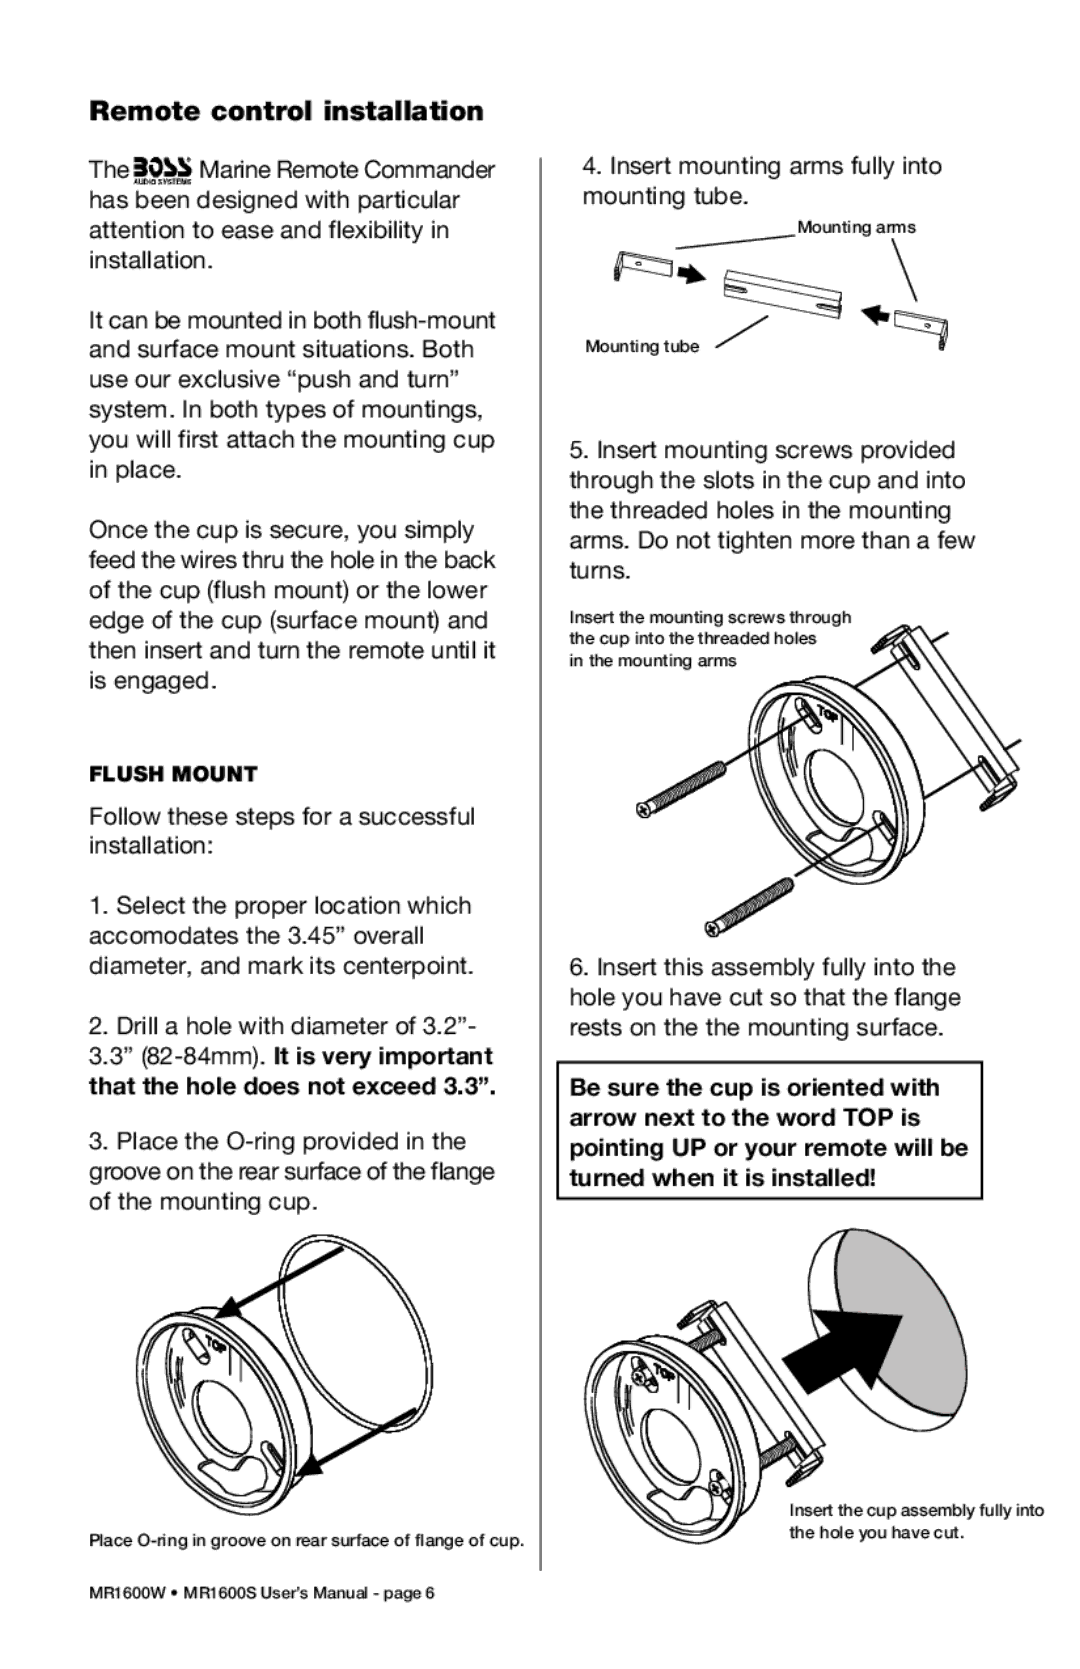
4.Insert mounting arms fully into mounting tube.
Mounting arms
Mounting tube
5.Insert mounting screws provided through the slots in the cup and into the threaded holes in the mounting arms. Do not tighten more than a few turns.
Insert the mounting screws through the cup into the threaded holes
in the mounting arms
6.Insert this assembly fully into the hole you have cut so that the flange rests on the the mounting surface.
Be sure the cup is oriented with arrow next to the word TOP is pointing UP or your remote will be turned when it is installed!
Insert the cup assembly fully into the hole you have cut.
MR1600W • MR1600S User’s Manual - page 6