Remote control installation, continued
SURFACE MOUNT
Follow these steps for a successful installation:
1.Place the mounting cup in the location you wish to install it.
Be sure the cup is oriented with arrow next to the word TOP is pointing UP or your remote will be turned when it is installed!
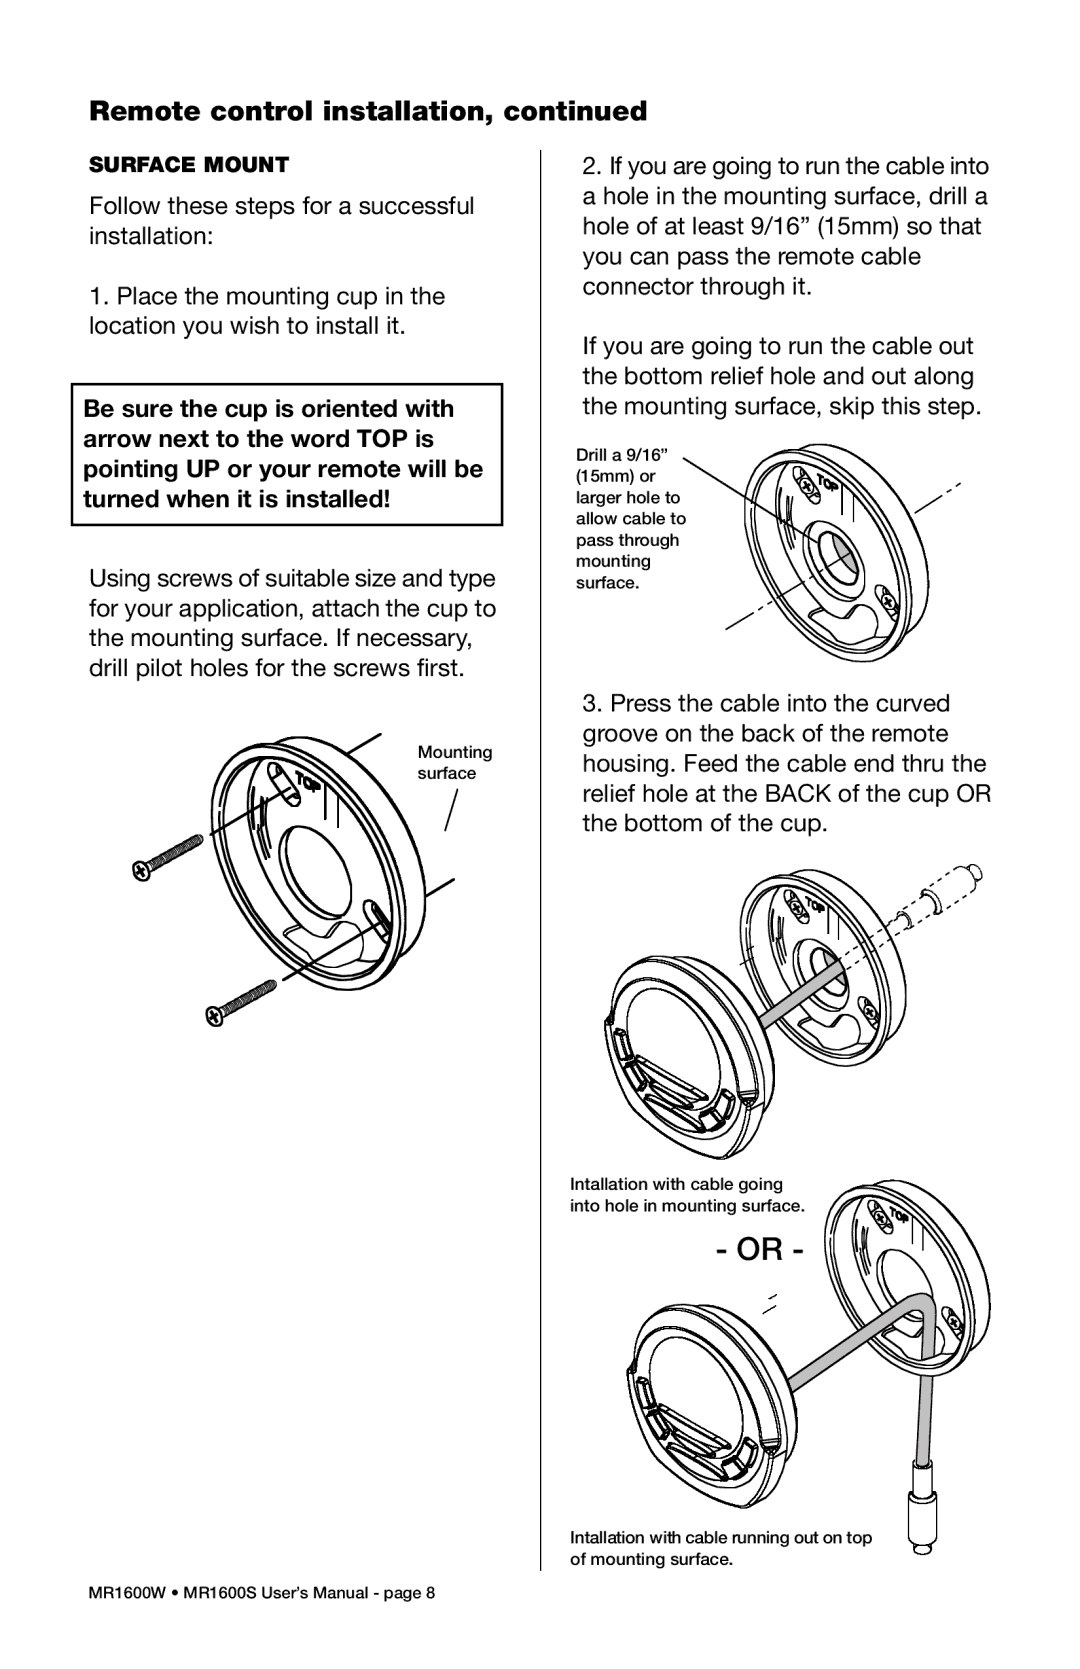
Using screws of suitable size and type for your application, attach the cup to the mounting surface. If necessary, drill pilot holes for the screws first.
Mounting surface
2.If you are going to run the cable into a hole in the mounting surface, drill a hole of at least 9/16” (15mm) so that you can pass the remote cable connector through it.
If you are going to run the cable out the bottom relief hole and out along the mounting surface, skip this step.
Drill a 9/16” (15mm) or larger hole to allow cable to pass through mounting surface.
3.Press the cable into the curved groove on the back of the remote housing. Feed the cable end thru the relief hole at the BACK of the cup OR the bottom of the cup.
Intallation with cable going into hole in mounting surface.
- OR - |
Intallation with cable running out on top of mounting surface.
MR1600W • MR1600S User’s Manual - page 8