Remote control installation, continued
7. Using your fingers, grasp the heads |
of the mounting screws and slide them |
out, away from the center of the cup. |
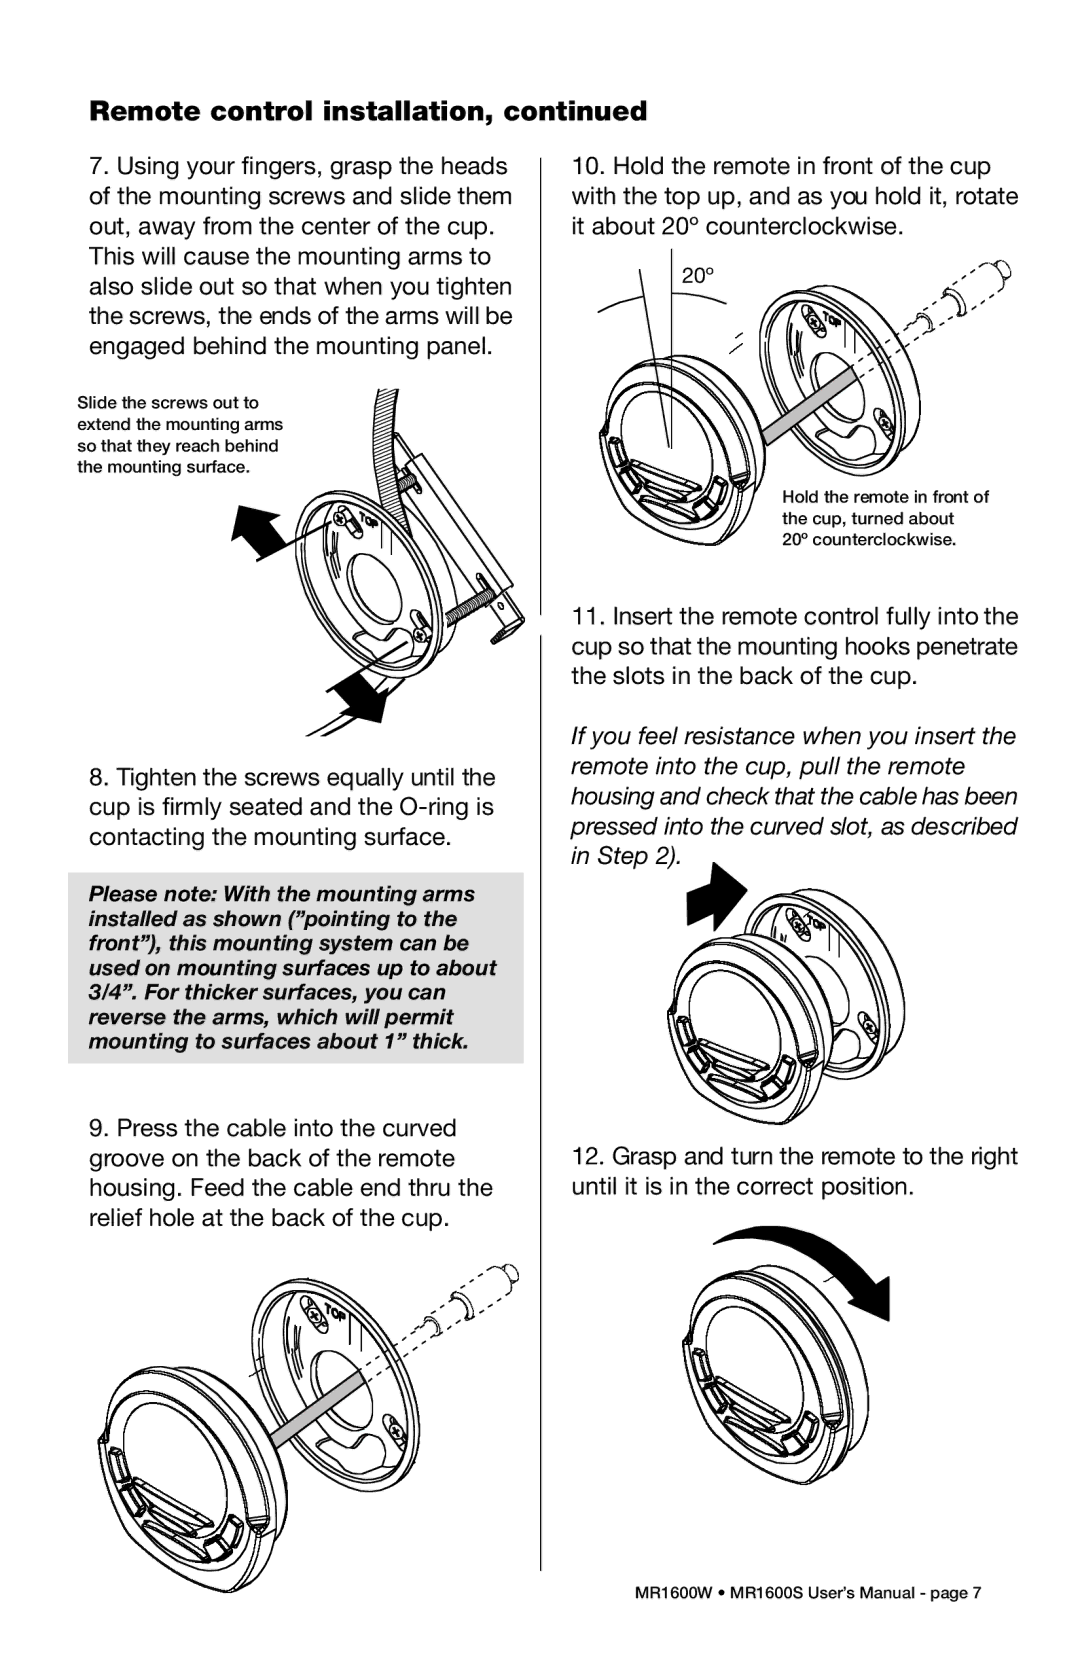
10.Hold the remote in front of the cup with the top up, and as you hold it, rotate it about 20º counterclockwise.
This will cause the mounting arms to |
also slide out so that when you tighten |
the screws, the ends of the arms will be |
engaged behind the mounting panel. |
Slide the screws out to extend the mounting arms so that they reach behind the mounting surface.
20º |
Hold the remote in front of the cup, turned about 20º counterclockwise.
8.Tighten the screws equally until the cup is firmly seated and the
Please note: With the mounting arms installed as shown (”pointing to the front”), this mounting system can be used on mounting surfaces up to about 3/4”. For thicker surfaces, you can reverse the arms, which will permit mounting to surfaces about 1” thick.
9.Press the cable into the curved groove on the back of the remote housing. Feed the cable end thru the relief hole at the back of the cup.
11.Insert the remote control fully into the cup so that the mounting hooks penetrate the slots in the back of the cup.
If you feel resistance when you insert the remote into the cup, pull the remote housing and check that the cable has been pressed into the curved slot, as described in Step 2).
12.Grasp and turn the remote to the right until it is in the correct position.
MR1600W • MR1600S User’s Manual - page 7