Retrofit Installations
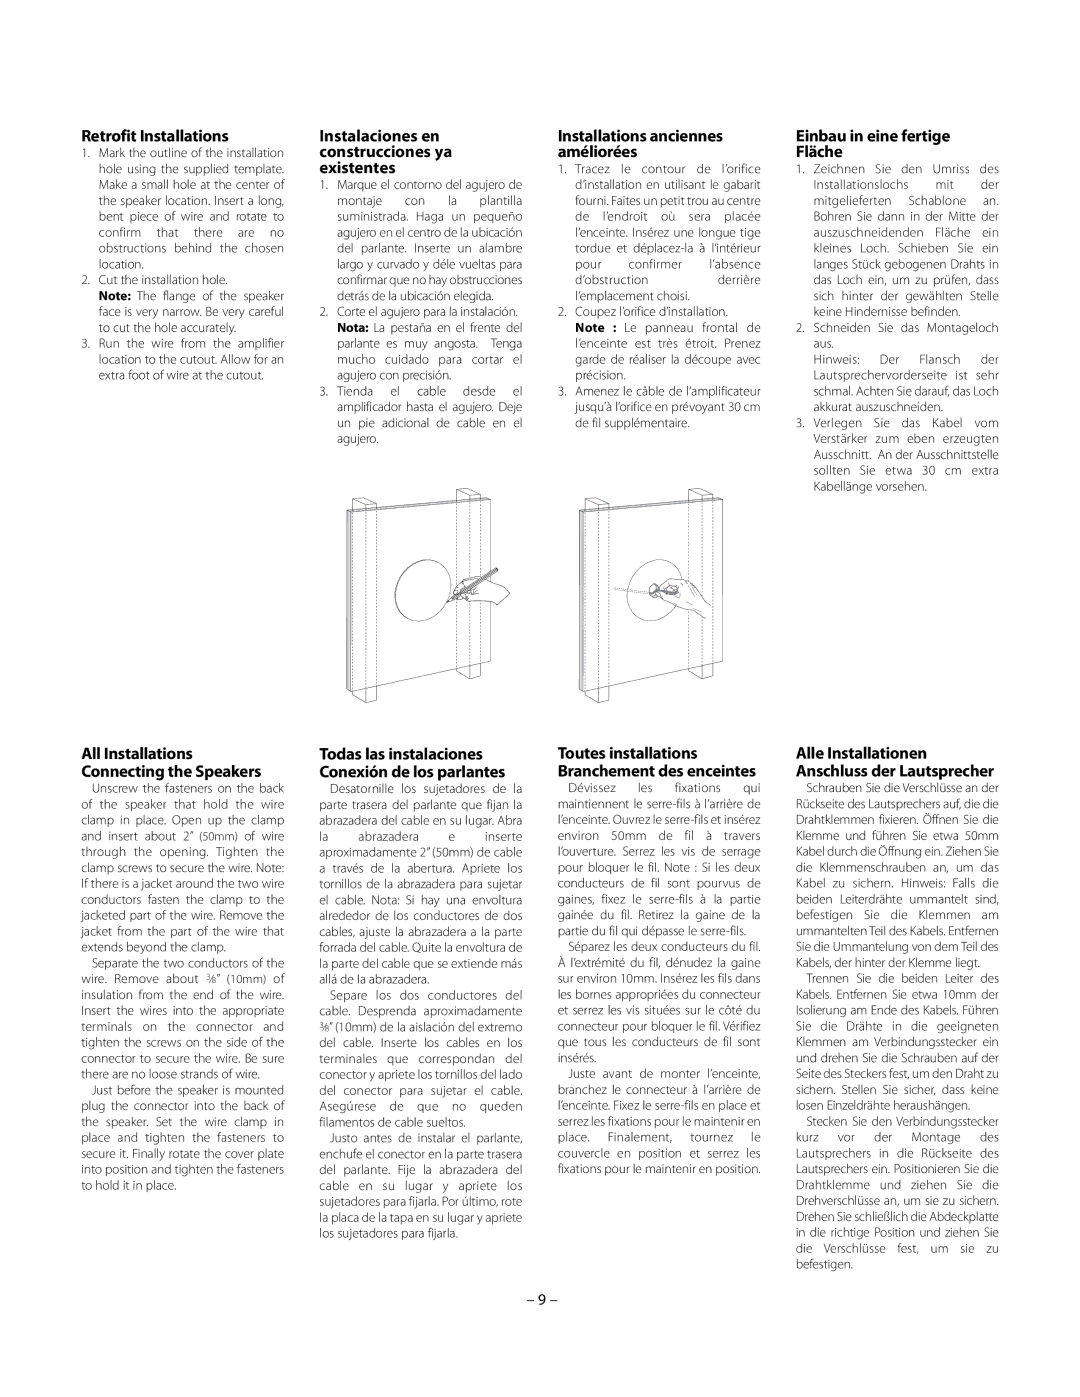
1.Mark the outline of the installation hole using the supplied template. Make a small hole at the center of the speaker location. Insert a long, bent piece of wire and rotate to confirm that there are no obstructions behind the chosen location.
2.Cut the installation hole.
Note: The flange of the speaker face is very narrow. Be very careful to cut the hole accurately.
3.Run the wire from the amplifier location to the cutout. Allow for an extra foot of wire at the cutout.
Instalaciones en | | | | | Installations anciennes | Einbau in eine fertige | |
construcciones ya | | améliorées | | Fläche | | | | |
existentes | | | | | | 1. Tracez le contour de l’orifice | 1. Zeichnen Sie den Umriss des |
1. Marque el contorno del agujero de | d’installation en utilisant le gabarit | Installationslochs | mit | der |
montaje | | con | la | plantilla | fourni. Faites un petit trou au centre | mitgelieferten | Schablone | an. |
suministrada. Haga | un | pequeño | de l’endroit où sera placée | Bohren Sie dann in der Mitte der |
agujero en el centro de la ubicación | l’enceinte. Insérez une longue tige | auszuschneidenden | Fläche | ein |
del parlante. Inserte un alambre | tordue et déplacez-la à l’intérieur | kleines Loch. Schieben Sie ein |
largo y curvado y déle vueltas para | pour | confirmer | l’absence | langes Stück gebogenen Drahts in |
confirmar que no hay obstrucciones | d’obstruction | derrière | das Loch ein, um zu prüfen, dass |
detrás de la ubicación elegida. | l’emplacement choisi. | | sich hinter der gewählten Stelle |
2. Corte el agujero para la instalación. | 2. Coupez l’orifice d’installation. | keine Hindernisse befinden. | |
Nota: La pestaña en el frente del | Note : Le panneau frontal de | 2. Schneiden Sie das Montageloch |
parlante | es | muy angosta. Tenga | l’enceinte est très étroit. Prenez | aus. | | | | |
mucho cuidado para cortar el | garde de réaliser la découpe avec | Hinweis: | Der | Flansch | der |
agujero con precisión. | | précision. | | | | | Lautsprechervorderseite ist | sehr |
3. Tienda | el | cable | | | desde el | 3. Amenez le câble de l’amplificateur | schmal. Achten Sie darauf, das Loch |
amplificador hasta el agujero. Deje | jusqu’à l’orifice en prévoyant 30 cm | akkurat auszuschneiden. | |
un pie adicional de cable en el | de fil supplémentaire. | | 3. Verlegen Sie das Kabel vom |
agujero. | | | | | | | | | | | | | Verstärker | zum | eben | erzeugten |
| | | | | | | | | | | | | | Ausschnitt. An der Ausschnittstelle |
| | | | | | | | | | | | | | sollten Sie etwa 30 cm extra |
| | | | | | | | | | | | | | Kabellänge vorsehen. | | |
| | | | | | | | | | | | | | | | | | |
All Installations Connecting the Speakers
Unscrew the fasteners on the back of the speaker that hold the wire clamp in place. Open up the clamp and insert about 2” (50mm) of wire through the opening. Tighten the clamp screws to secure the wire. Note: If there is a jacket around the two wire conductors fasten the clamp to the jacketed part of the wire. Remove the jacket from the part of the wire that extends beyond the clamp.
Separate the two conductors of the wire. Remove about 3⁄8” (10mm) of insulation from the end of the wire. Insert the wires into the appropriate terminals on the connector and tighten the screws on the side of the connector to secure the wire. Be sure there are no loose strands of wire.
Just before the speaker is mounted plug the connector into the back of the speaker. Set the wire clamp in place and tighten the fasteners to secure it. Finally rotate the cover plate into position and tighten the fasteners to hold it in place.
Todas las instalaciones Conexión de los parlantes
Desatornille los sujetadores de la parte trasera del parlante que fijan la abrazadera del cable en su lugar. Abra
la abrazadera e inserte aproximadamente 2” (50mm) de cable a través de la abertura. Apriete los tornillos de la abrazadera para sujetar el cable. Nota: Si hay una envoltura alrededor de los conductores de dos cables, ajuste la abrazadera a la parte forrada del cable. Quite la envoltura de la parte del cable que se extiende más allá de la abrazadera.
Separe los dos conductores del cable. Desprenda aproximadamente
3⁄8” (10mm) de la aislación del extremo del cable. Inserte los cables en los terminales que correspondan del conector y apriete los tornillos del lado del conector para sujetar el cable. Asegúrese de que no queden filamentos de cable sueltos.
Justo antes de instalar el parlante, enchufe el conector en la parte trasera del parlante. Fije la abrazadera del cable en su lugar y apriete los sujetadores para fijarla. Por último, rote la placa de la tapa en su lugar y apriete los sujetadores para fijarla.
Toutes installations Branchement des enceintes
Dévissez les fixations qui maintiennent le serre-fils à l’arrière de l’enceinte. Ouvrez le serre-fils et insérez environ 50mm de fil à travers l’ouverture. Serrez les vis de serrage pour bloquer le fil. Note : Si les deux conducteurs de fil sont pourvus de gaines, fixez le serre-fils à la partie gainée du fil. Retirez la gaine de la partie du fil qui dépasse le serre-fils.
Séparez les deux conducteurs du fil.
Àl’extrémité du fil, dénudez la gaine sur environ 10mm. Insérez les fils dans les bornes appropriées du connecteur et serrez les vis situées sur le côté du connecteur pour bloquer le fil. Vérifiez que tous les conducteurs de fil sont insérés.
Juste avant de monter l’enceinte, branchez le connecteur à l’arrière de l’enceinte. Fixez le serre-fils en place et serrez les fixations pour le maintenir en place. Finalement, tournez le couvercle en position et serrez les fixations pour le maintenir en position.
Alle Installationen Anschluss der Lautsprecher
Schrauben Sie die Verschlüsse an der Rückseite des Lautsprechers auf, die die Drahtklemmen fixieren. Öffnen Sie die Klemme und führen Sie etwa 50mm Kabel durch die Öffnung ein. Ziehen Sie die Klemmenschrauben an, um das Kabel zu sichern. Hinweis: Falls die beiden Leiterdrähte ummantelt sind, befestigen Sie die Klemmen am ummantelten Teil des Kabels. Entfernen Sie die Ummantelung von dem Teil des Kabels, der hinter der Klemme liegt.
Trennen Sie die beiden Leiter des Kabels. Entfernen Sie etwa 10mm der Isolierung am Ende des Kabels. Führen Sie die Drähte in die geeigneten Klemmen am Verbindungsstecker ein und drehen Sie die Schrauben auf der Seite des Steckers fest, um den Draht zu sichern. Stellen Sie sicher, dass keine losen Einzeldrähte heraushängen.
Stecken Sie den Verbindungsstecker kurz vor der Montage des Lautsprechers in die Rückseite des Lautsprechers ein. Positionieren Sie die Drahtklemme und ziehen Sie die Drehverschlüsse an, um sie zu sichern. Drehen Sie schließlich die Abdeckplatte in die richtige Position und ziehen Sie die Verschlüsse fest, um sie zu befestigen.