Aerada 1000 Series Gooseneck Faucet | Installation Instructions |
Installation Instructions - Solenoid Valves and Electronic Box (AC)
Models S53-308 and S53-309
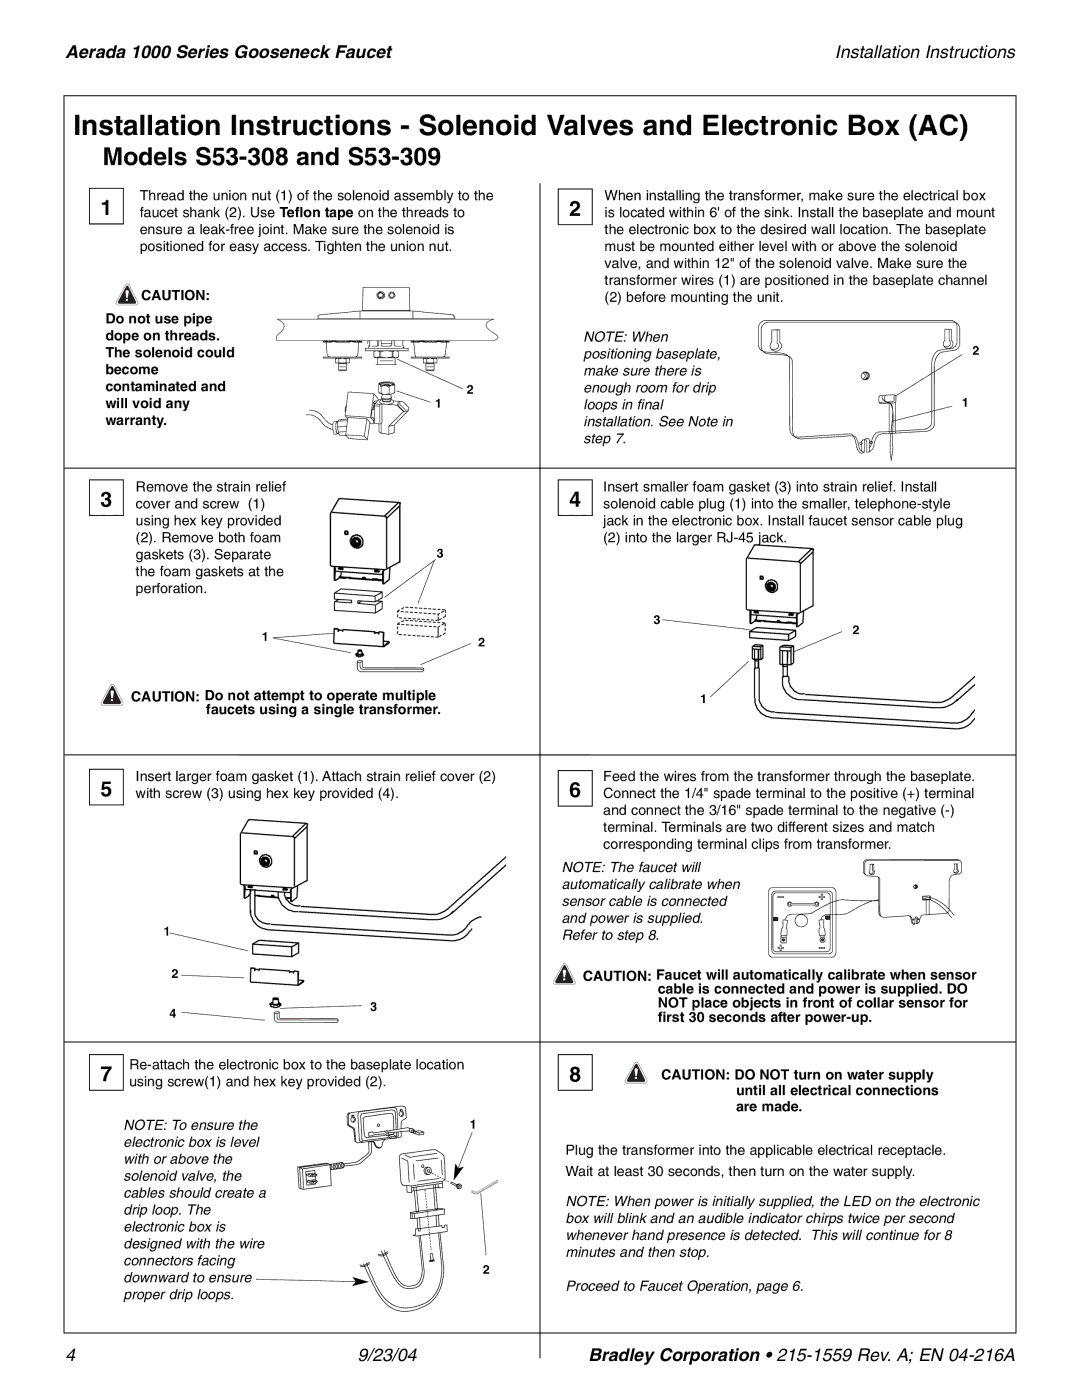
Thread the union nut (1) of the solenoid assembly to the
1 faucet shank (2). Use Teflon tape on the threads to ensure a
CAUTION: |
|
Do not use pipe |
|
dope on threads. |
|
The solenoid could |
|
become |
|
contaminated and | 2 |
will void any | 1 |
warranty. |
|
Remove the strain relief
3 cover and screw (1) using hex key provided
(2). Remove both foam
gaskets (3). Separate3 the foam gaskets at the
perforation.
1 | 2 |
|
CAUTION: Do not attempt to operate multiple faucets using a single transformer.
5 | Insert larger foam gasket (1). Attach strain relief cover (2) |
with screw (3) using hex key provided (4). |
1
2 ![]()
4 ![]()
![]() 3
3
7 |
| |
using screw(1) and hex key provided (2). |
| |
| NOTE: To ensure the | 1 |
electronic box is level with or above the solenoid valve, the cables should create a drip loop. The
electronic box is designed with the wire connectors facing
2
downward to ensure ![]() proper drip loops.
proper drip loops.
When installing the transformer, make sure the electrical box
2 is located within 6' of the sink. Install the baseplate and mount the electronic box to the desired wall location. The baseplate must be mounted either level with or above the solenoid valve, and within 12" of the solenoid valve. Make sure the transformer wires (1) are positioned in the baseplate channel
(2) before mounting the unit.
NOTE: When | 2 |
positioning baseplate, | |
make sure there is |
|
enough room for drip | 1 |
loops in final |
installation. See Note in step 7.
Insert smaller foam gasket (3) into strain relief. Install
4 solenoid cable plug (1) into the smaller,
(2) into the larger
3
2
1
Feed the wires from the transformer through the baseplate.
6 Connect the 1/4" spade terminal to the positive (+) terminal and connect the 3/16" spade terminal to the negative
NOTE: The faucet will automatically calibrate when sensor cable is connected and power is supplied. Refer to step 8.
CAUTION: Faucet will automatically calibrate when sensor cable is connected and power is supplied. DO
NOT place objects in front of collar sensor for first 30 seconds after
8![]() CAUTION: DO NOT turn on water supply until all electrical connections are made.
CAUTION: DO NOT turn on water supply until all electrical connections are made.
Plug the transformer into the applicable electrical receptacle.
Wait at least 30 seconds, then turn on the water supply.
NOTE: When power is initially supplied, the LED on the electronic box will blink and an audible indicator chirps twice per second whenever hand presence is detected. This will continue for 8 minutes and then stop.
Proceed to Faucet Operation, page 6.
4 | 9/23/04 |
Bradley Corporation •