Maintenance, Lubrication & Adjustments
Interior Adjustments (continued)
Chain Tension: Equal tension on the left and right drive chains is necessary to reduce binding ef- fects on the carriage bearings and allow for smooth movement throughout the in/out cycle. An exces- sively loose chain may enable the drive sprocket to “jump” teeth, thus providing a binding situa- tion. Conversely, an excessively tight chain may increase the drag on the drive sprockets, and thus increase the force necessary to move the platform
Threaded Rod | Locknuts |
Photo W 

Drive Chain
Inspection and Adjustment: Braun specifies a drive chain tension that requires a force gauge and metric tape measure for accurate setting, inspect- ing, or adjusting on all models of RA200 ramps. Braun recommends the Wagner Force Dial gauge model FDK 20 or FDN 100. These gauges can be found at www.wagnerforce.com.
1.Remove the bottom cover of the ramp assembly.
2.Position the ramp in the fully deployed position.
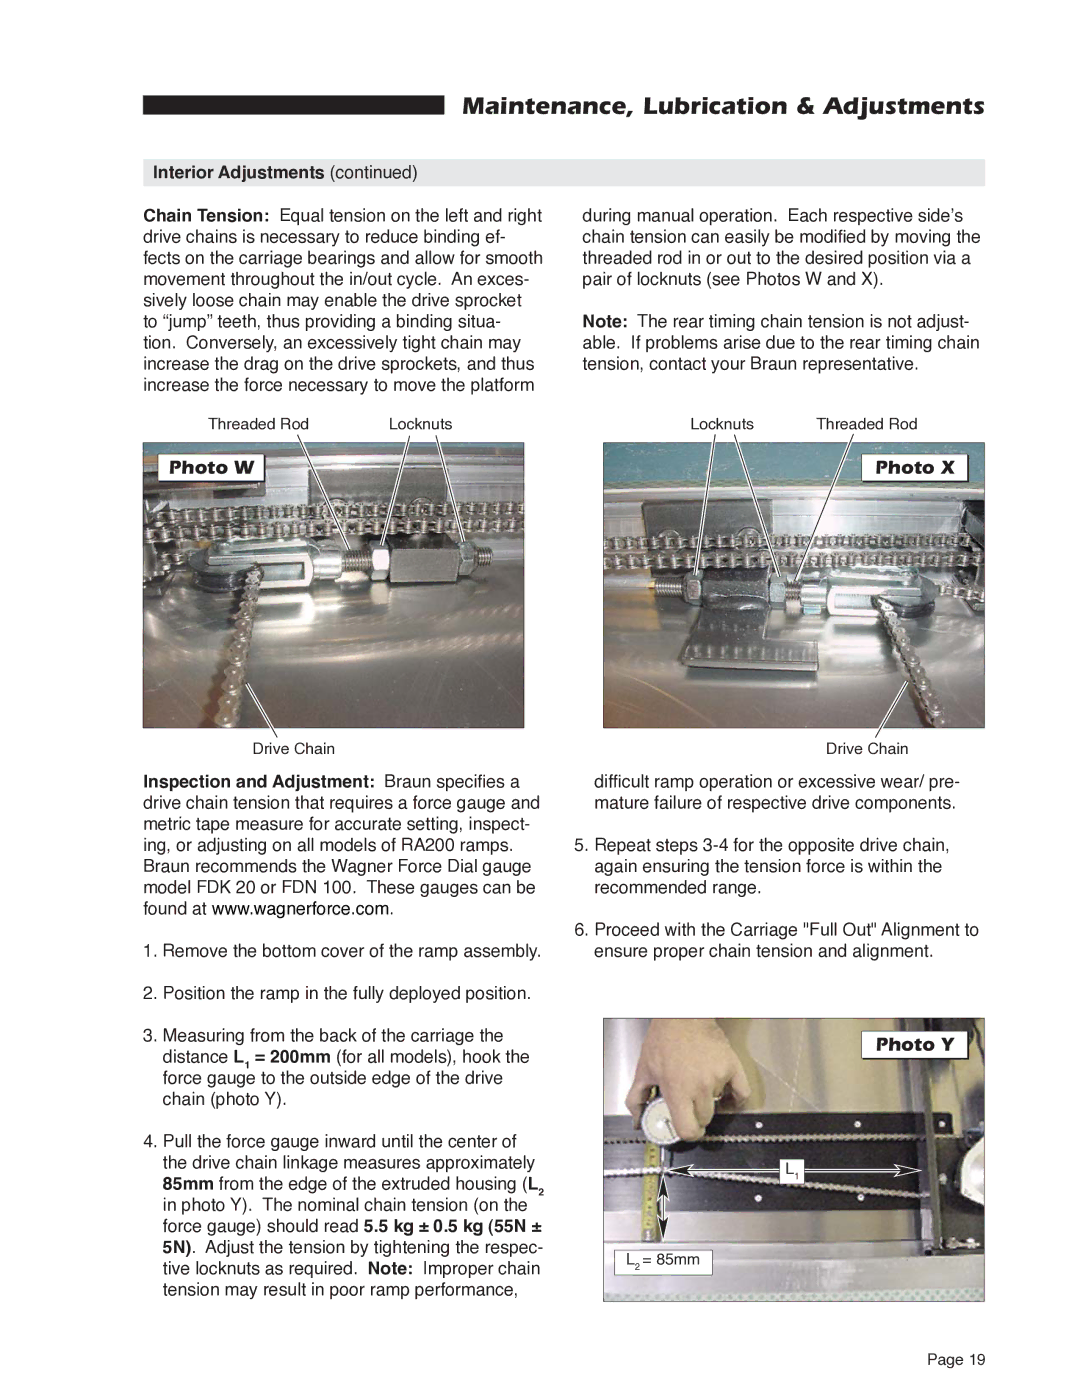
3.Measuring from the back of the carriage the
distance L1 = 200mm (for all models), hook the force gauge to the outside edge of the drive chain (photo Y).
4.Pull the force gauge inward until the center of the drive chain linkage measures approximately
85mm from the edge of the extruded housing (L2 in photo Y). The nominal chain tension (on the force gauge) should read 5.5 kg ± 0.5 kg (55N ± 5N). Adjust the tension by tightening the respec- tive locknuts as required. Note: Improper chain tension may result in poor ramp performance,
during manual operation. Each respective side’s chain tension can easily be modified by moving the threaded rod in or out to the desired position via a pair of locknuts (see Photos W and X).
Note: The rear timing chain tension is not adjust- able. If problems arise due to the rear timing chain tension, contact your Braun representative.
Locknuts | Threaded Rod |
Photo X
Drive Chain
difficult ramp operation or excessive wear/ pre- mature failure of respective drive components.
5.Repeat steps
6.Proceed with the Carriage "Full Out" Alignment to ensure proper chain tension and alignment.
Photo Y
L1
L2 = 85mm
Page 19