Carrier Only Installation
Lap-Shoulder Belt Installation
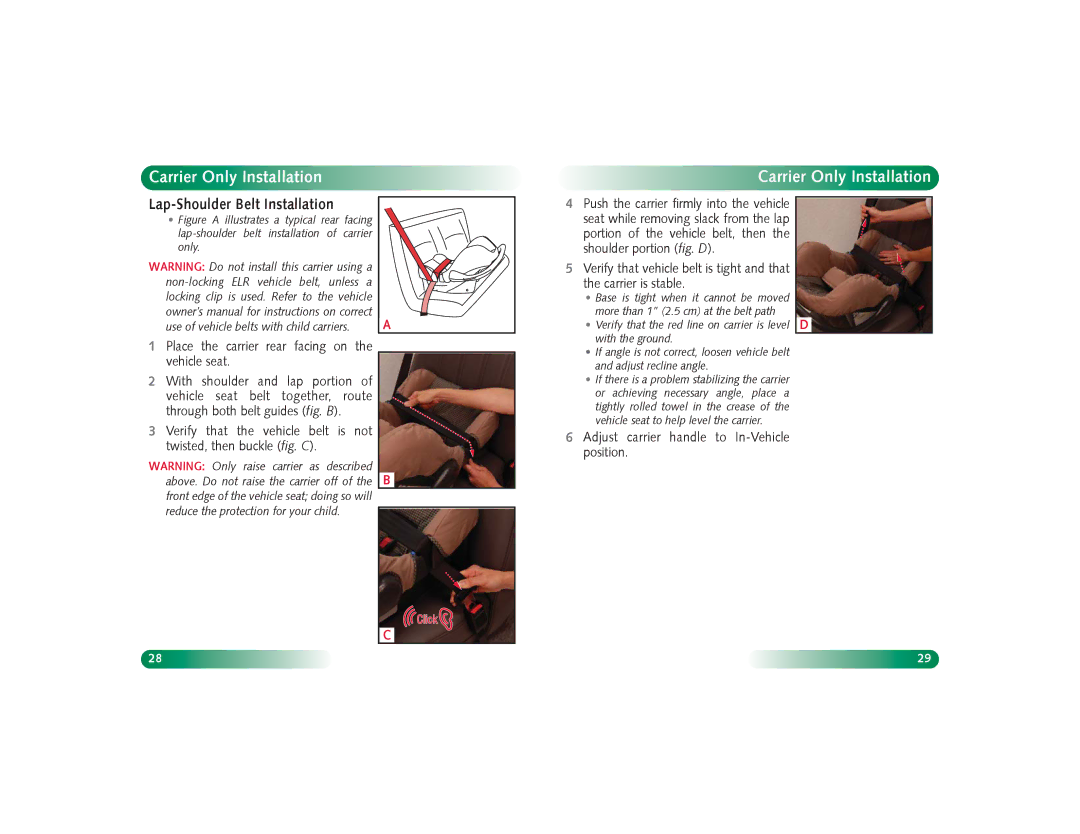
•Figure A illustrates a typical rear facing lap-shoulder belt installation of carrier only.
WARNING: Do not install this carrier using a
1Place the carrier rear facing on the vehicle seat.
2With shoulder and lap portion of vehicle seat belt together, route through both belt guides (fig. B).
3Verify that the vehicle belt is not twisted, then buckle (fig. C).
WARNING: Only raise carrier as described above. Do not raise the carrier off of the front edge of the vehicle seat; doing so will reduce the protection for your child.
A
B
C
Carrier Only Installation
4Push the carrier firmly into the vehicle seat while removing slack from the lap
portion of the vehicle belt, then the shoulder portion (fig. D).
5 Verify that vehicle belt is tight and that the carrier is stable.
•Base is tight when it cannot be moved more than 1” (2.5 cm) at the belt path
• Verify that the red line on carrier is level D with the ground.
•If angle is not correct, loosen vehicle belt and adjust recline angle.
•If there is a problem stabilizing the carrier or achieving necessary angle, place a tightly rolled towel in the crease of the vehicle seat to help level the carrier.
6 Adjust carrier handle to
28 | 29 |
