Base Installation
Base Installation
Lap Belt Installation
•Figure A illustrates a typical base lap belt only installation.
•Remove carrier before installing base.
1Insert Vehicle Belt Installation Spacers and ISOFIX Protective Cap (pgs.
2Place foot prop in Installation Mode.
•Always use foot prop when base is installed in vehicle!
3Place the base on the vehicle seat with the
4Place the ISOFIX Connectors, with protective cap installed, in the seat bight (where the seat back and seat cushion meet).
5Open
6Slide vehicle belt under both belt guides (fig. C).
7Verify that the vehicle belt is not twisted, then buckle (fig. D).
A |
B
C
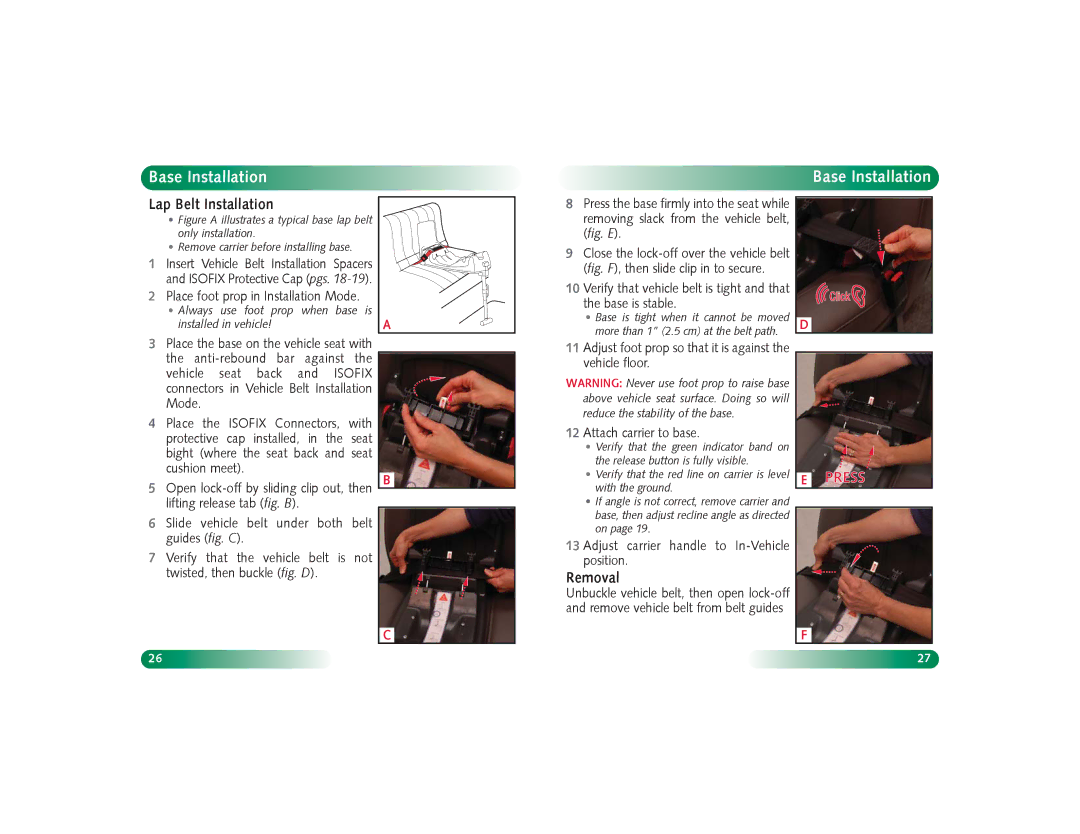
8Press the base firmly into the seat while removing slack from the vehicle belt, (fig. E).
9Close the
10Verify that vehicle belt is tight and that the base is stable.
•Base is tight when it cannot be moved more than 1” (2.5 cm) at the belt path.
11Adjust foot prop so that it is against the vehicle floor.
WARNING: Never use foot prop to raise base above vehicle seat surface. Doing so will reduce the stability of the base.
12 Attach carrier to base.
•Verify that the green indicator band on the release button is fully visible.
•Verify that the red line on carrier is level with the ground.
•If angle is not correct, remove carrier and base, then adjust recline angle as directed on page 19.
13 Adjust carrier handle to
Removal
Unbuckle vehicle belt, then open
D
E
F
26 | 27 |