SERVICE (cont.)

DIGITAL BREW TIMER

P3047

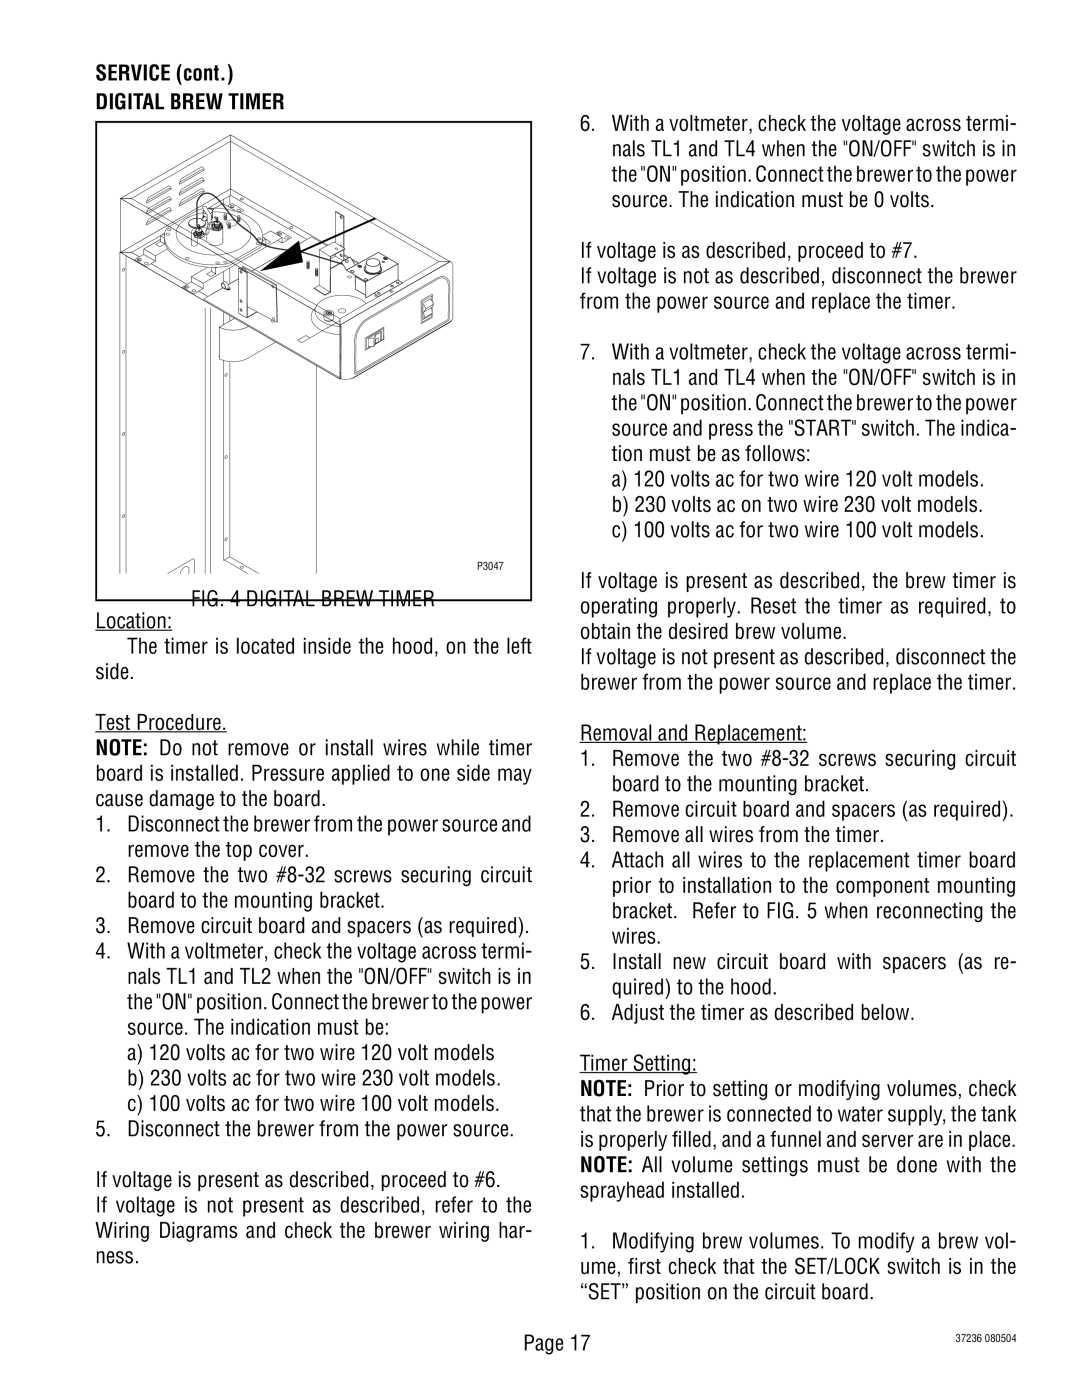
FIG. 4 DIGITAL BREW TIMER

Location:

The timer is located inside the hood, on the left side.

Test Procedure.

NOTE: Do not remove or install wires while timer board is installed. Pressure applied to one side may cause damage to the board.

1.Disconnect the brewer from the power source and remove the top cover.

2.Remove the two #8-32 screws securing circuit board to the mounting bracket.

3.Remove circuit board and spacers (as required).

4.With a voltmeter, check the voltage across termi- nals TL1 and TL2 when the "ON/OFF" switch is in the "ON" position. Connect the brewer to the power source. The indication must be:

a)120 volts ac for two wire 120 volt models

b)230 volts ac for two wire 230 volt models.

c)100 volts ac for two wire 100 volt models.

5.Disconnect the brewer from the power source.

If voltage is present as described, proceed to #6.

If voltage is not present as described, refer to the Wiring Diagrams and check the brewer wiring har- ness.

6.With a voltmeter, check the voltage across termi- nals TL1 and TL4 when the "ON/OFF" switch is in the "ON" position. Connect the brewer to the power source. The indication must be 0 volts.

If voltage is as described, proceed to #7.

If voltage is not as described, disconnect the brewer from the power source and replace the timer.

7.With a voltmeter, check the voltage across termi- nals TL1 and TL4 when the "ON/OFF" switch is in the "ON" position. Connect the brewer to the power source and press the "START" switch. The indica- tion must be as follows:

a)120 volts ac for two wire 120 volt models.

b)230 volts ac on two wire 230 volt models.

c)100 volts ac for two wire 100 volt models.

If voltage is present as described, the brew timer is operating properly. Reset the timer as required, to obtain the desired brew volume.

If voltage is not present as described, disconnect the brewer from the power source and replace the timer.

Removal and Replacement:

1.Remove the two #8-32 screws securing circuit board to the mounting bracket.

2.Remove circuit board and spacers (as required).

3.Remove all wires from the timer.

4.Attach all wires to the replacement timer board prior to installation to the component mounting bracket. Refer to FIG. 5 when reconnecting the wires.

5.Install new circuit board with spacers (as re- quired) to the hood.

6.Adjust the timer as described below.

Timer Setting:

NOTE: Prior to setting or modifying volumes, check that the brewer is connected to water supply, the tank is properly filled, and a funnel and server are in place. NOTE: All volume settings must be done with the sprayhead installed.

1.Modifying brew volumes. To modify a brew vol- ume, first check that the SET/LOCK switch is in the “SET” position on the circuit board.

Page 17

37236 080504


Page 17
Image 17
Bunn TB3Q-LP service manual Digital Brew Timer, If voltage is as described, proceed to #7

TB3Q, TB3Q-LP specifications

The Bunn TB6Q, TB3-LP, TB6, TB3Q, and TB3Q-LP coffee brewers are a popular series of commercial machines designed for high efficiency and optimal performance in busy environments such as cafes, restaurants, and offices. These machines are crafted with a focus on quality, dependability, and advanced brewing technology to deliver a superior coffee experience.

One of the standout features across the Bunn TB series is the ability to brew large quantities of coffee quickly. The TB6Q, for instance, can brew up to 6 gallons of coffee per hour. This high volume brewing capability ensures that establishments can keep up with demand, especially during peak hours. Additionally, the machines come with a unique design that incorporates a pre-infusion feature, allowing for the coffee grounds to be evenly saturated before brewing begins, enhancing the flavor extraction process.

The TB3-LP model is designed for low-profile applications where counter space may be limited. Despite its compact design, it still offers impressive performance, brewing up to 3.8 gallons per hour. The low-profile feature makes it an ideal choice for settings that require efficiency and space optimization without compromising on the quality of the brew.

Another notable member of the series, the TB3Q and TB3Q-LP, feature a quick brew ratio, allowing users to brew up to 3 gallons of coffee in just a few minutes. These models are equipped with easy-to-use controls for simplified operation, making them perfect for staff training and user accessibility.

All models in the TB series include a hot water faucet, allowing users to dispense hot water for tea or other hot beverages quickly. This versatility adds significant value, especially in multi-beverage settings.

Regarding durability, the Bunn TB series is constructed with high-quality materials, ensuring longevity and reliability. The machines also feature internal components that are easy to access for maintenance, thus reducing downtime and improving the overall efficiency of the machine.

In terms of technology, these brewers often incorporate advanced diagnostics to promptly identify service needs or issues. The machines come with a precise brewing temperature control system that ensures each cup is brewed at the optimal temperature for maximum flavor extraction.

Overall, Bunn's TB6Q, TB3-LP, TB6, TB3Q, and TB3Q-LP coffee brewers represent the culmination of advanced brewing technology and practical design for commercial coffee solutions. Their efficiency, quality, and ease of use make them a staple in many establishments, solidifying Bunn's reputation as a leader in the coffee brewing industry.