INSTALLING THE BRIM-WT1
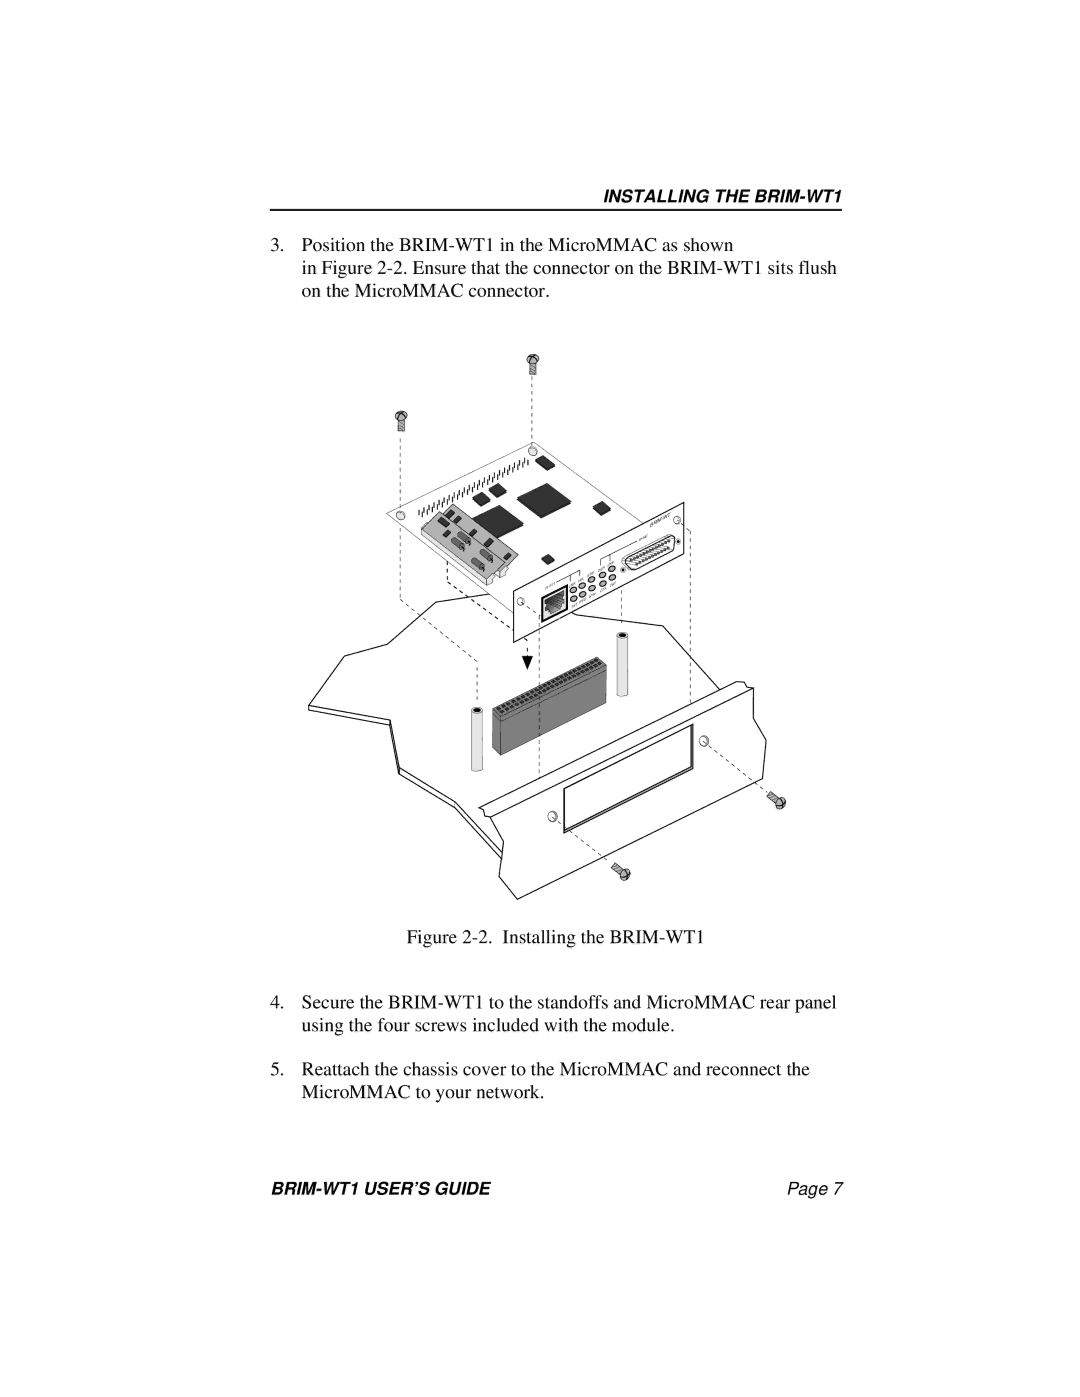
3.Position the
in Figure
SYNC
|
| LNK |
|
| DSR |
|
| STB |
|
| YEL |
T1/FT1 | LNK | TST |
| CTS | |
|
| |
|
| SYN |
|
| RED |
| TST |
|
Figure 2-2. Installing the BRIM-WT1
4.Secure the BRIM-WT1 to the standoffs and MicroMMAC rear panel using the four screws included with the module.
5.Reattach the chassis cover to the MicroMMAC and reconnect the MicroMMAC to your network.
Page 7 |