Sports Bar Canopy | Owner’s Manual |
Awning Installation
With the canopy installation nearly complete, the awning must be installed and wired. It should be noted that all screws that are used for the installation of the awning are
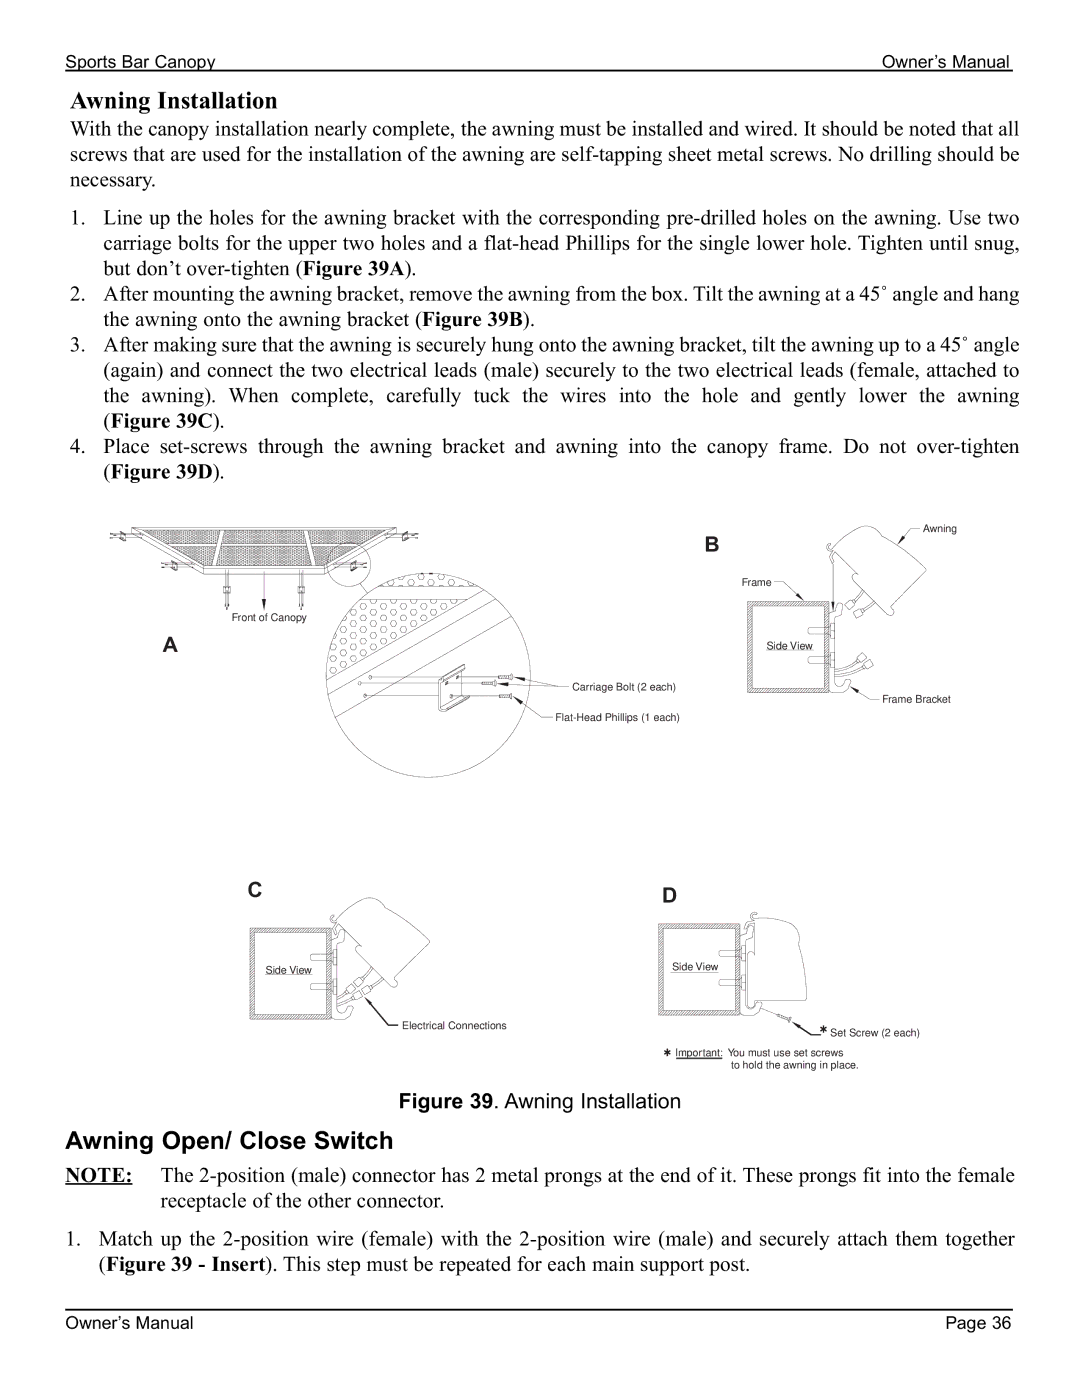
1.Line up the holes for the awning bracket with the corresponding
2.After mounting the awning bracket, remove the awning from the box. Tilt the awning at a 45˚ angle and hang the awning onto the awning bracket (Figure 39B).
3.After making sure that the awning is securely hung onto the awning bracket, tilt the awning up to a 45˚ angle (again) and connect the two electrical leads (male) securely to the two electrical leads (female, attached to the awning). When complete, carefully tuck the wires into the hole and gently lower the awning (Figure 39C).
4.Place
B
![]() Awning
Awning
Frame
Front of Canopy
A
Side View
![]()
![]() Carriage Bolt (2 each)
Carriage Bolt (2 each)
![]() Frame Bracket
Frame Bracket
![]()
C |
| D |
| Side View | Side View |
|
| |
|
| Electrical Connections |
|
| Set Screw (2 each) |
|
| Important: You must use set screws |
|
| to hold the awning in place. |
Figure 39. Awning Installation
Awning Open/ Close Switch
NOTE: The
1.Match up the
Owner’s Manual | Page 36 |