LAG SCREW INSTALLATION
NOTE: We recommend that the ceiling box be of sufficient capacity to support the weight of the fan and light fixture under any conditions.
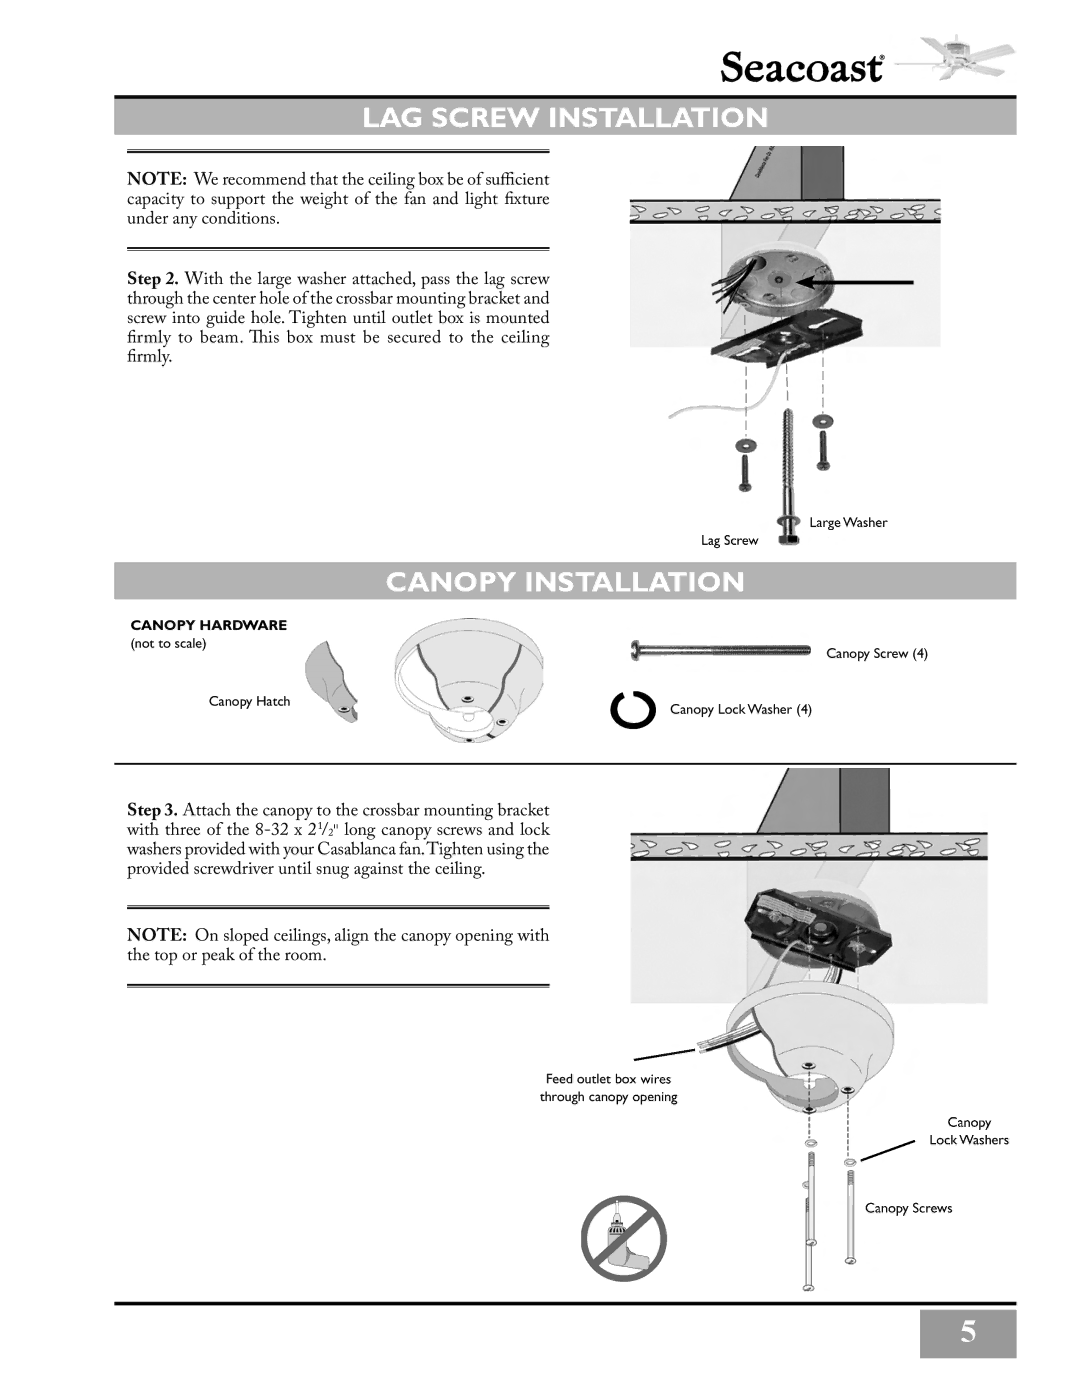
Step 2. With the large washer attached, pass the lag screw through the center hole of the crossbar mounting bracket and screw into guide hole. Tighten until outlet box is mounted
firmly to beam. This box must be secured to the ceiling firmly.
CANOPY INSTALLATION
CANOPY HARDWARE
(not to scale)
Canopy Screw (4)
Canopy Hatch | Canopy |
| Canopy Lock Washer (4) |
Step 3. Attach the canopy to the crossbar mounting bracket with three of the
NOTE: On sloped ceilings, align the canopy opening with the top or peak of the room.
Feed outlet bo![]() through canopy
through canopy ![]()
![]() ers
ers
5