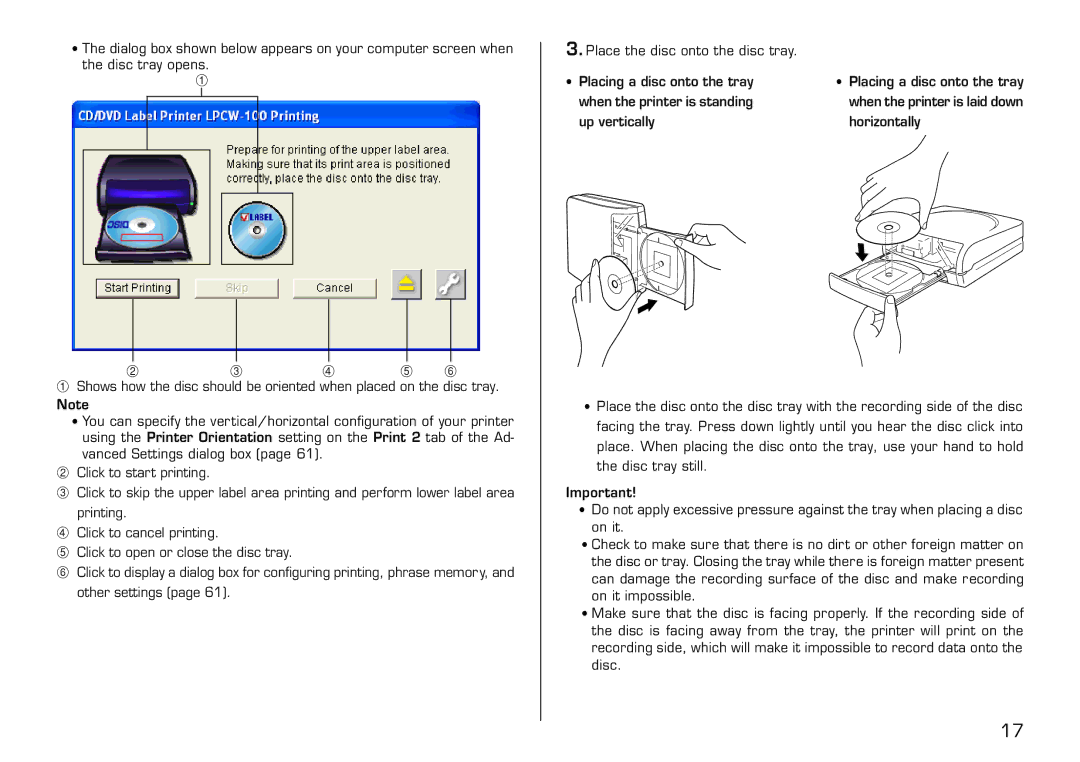
•The dialog box shown below appears on your computer screen when
the disc tray opens. 1
2 | 3 | 4 | 5 | 6 |
1Shows how the disc should be oriented when placed on the disc tray. Note
•You can specify the vertical/horizontal configuration of your printer using the Printer Orientation setting on the Print 2 tab of the Ad- vanced Settings dialog box (page 61).
2Click to start printing.
3Click to skip the upper label area printing and perform lower label area
printing.
4Click to cancel printing.
5Click to open or close the disc tray.
6Click to display a dialog box for configuring printing, phrase memor y, and other settings (page 61).
3.Place the disc onto the disc tray.
• Placing a disc onto the tray | • Placing a disc onto the tray |
when the printer is standing | when the printer is laid down |
up vertically | horizontally |
•Place the disc onto the disc tray with the recording side of the disc facing the tray. Press down lightly until you hear the disc click into place. When placing the disc onto the tray, use your hand to hold the disc tray still.
Important!
•Do not apply excessive pressure against the tray when placing a disc on it.
•Check to make sure that there is no dirt or other foreign matter on the disc or tray. Closing the tray while there is foreign matter present can damage the recording surface of the disc and make recording on it impossible.
•Make sure that the disc is facing properly. If the recording side of the disc is facing away from the tray, the printer will print on the recording side, which will make it impossible to record data onto the disc.
17
