Instruction Manual | Plasma Display Electric |
|
|
INSPECT AND TEST THE UNIT BEFORE INSTALLING
Inspect The Unit
1.Carefully inspect the Plasma Display Electric
NOTE: Read all assembly instructions before starting assem- bly.
2.Carefully inspect PUL components for damage, checking verti- cal extrusion arms to make sure they are parallel.
IMPORTANT: Before mounting the lift in the furniture/cabinet, make the following tests to be sure that it operates properly and has not been damaged in shipping.
Test The Unit
1.Set the PUL on a clean, level surface.
2.Connect the motor control box to the control circuit housing (see Figure 1, Figure 2, and Figure 3).
3.Install two terminal blocks in control box (see Figure 2).
NOTE: The lift is supplied with a momentary push button on the end of a cable to help you pretest the operation.
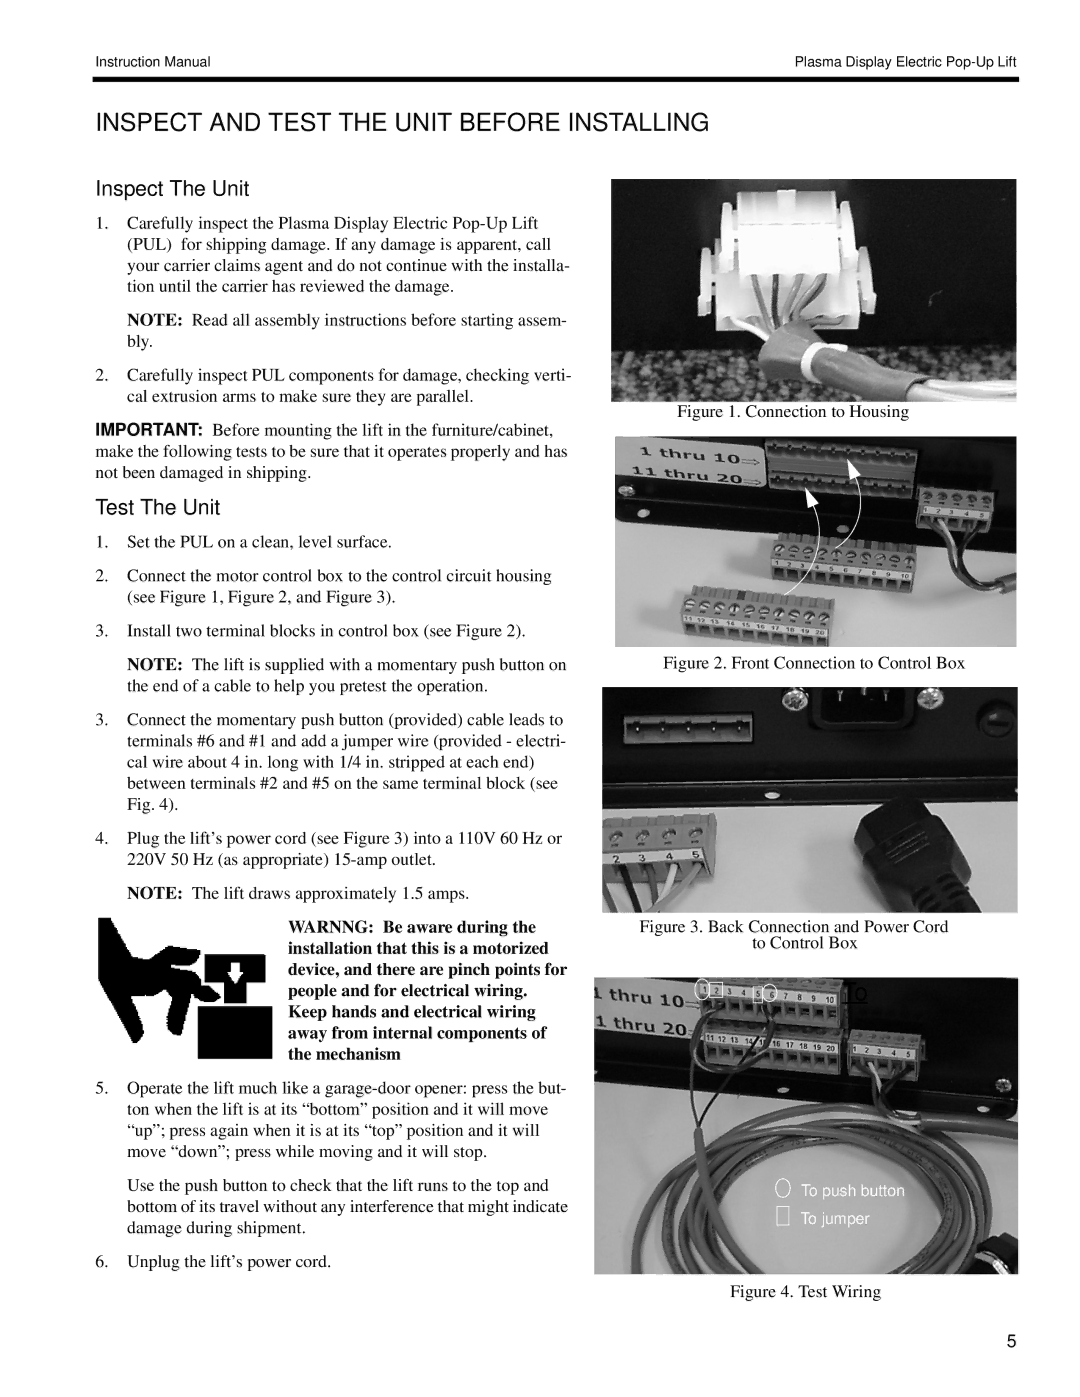
3.Connect the momentary push button (provided) cable leads to terminals #6 and #1 and add a jumper wire (provided - electri- cal wire about 4 in. long with 1/4 in. stripped at each end) between terminals #2 and #5 on the same terminal block (see Fig. 4).
4.Plug the lift’s power cord (see Figure 3) into a 110V 60 Hz or 220V 50 Hz (as appropriate)
NOTE: The lift draws approximately 1.5 amps.
WARNNG: Be aware during the installation that this is a motorized device, and there are pinch points for people and for electrical wiring. Keep hands and electrical wiring away from internal components of the mechanism
5.Operate the lift much like a
Use the push button to check that the lift runs to the top and bottom of its travel without any interference that might indicate damage during shipment.
6.Unplug the lift’s power cord.
Figure 1. Connection to Housing
Figure 2. Front Connection to Control Box
Figure 3. Back Connection and Power Cord to Control Box
To
To push button
To jumper
Figure 4. Test Wiring
5