VIDEO INPUT
3 Store
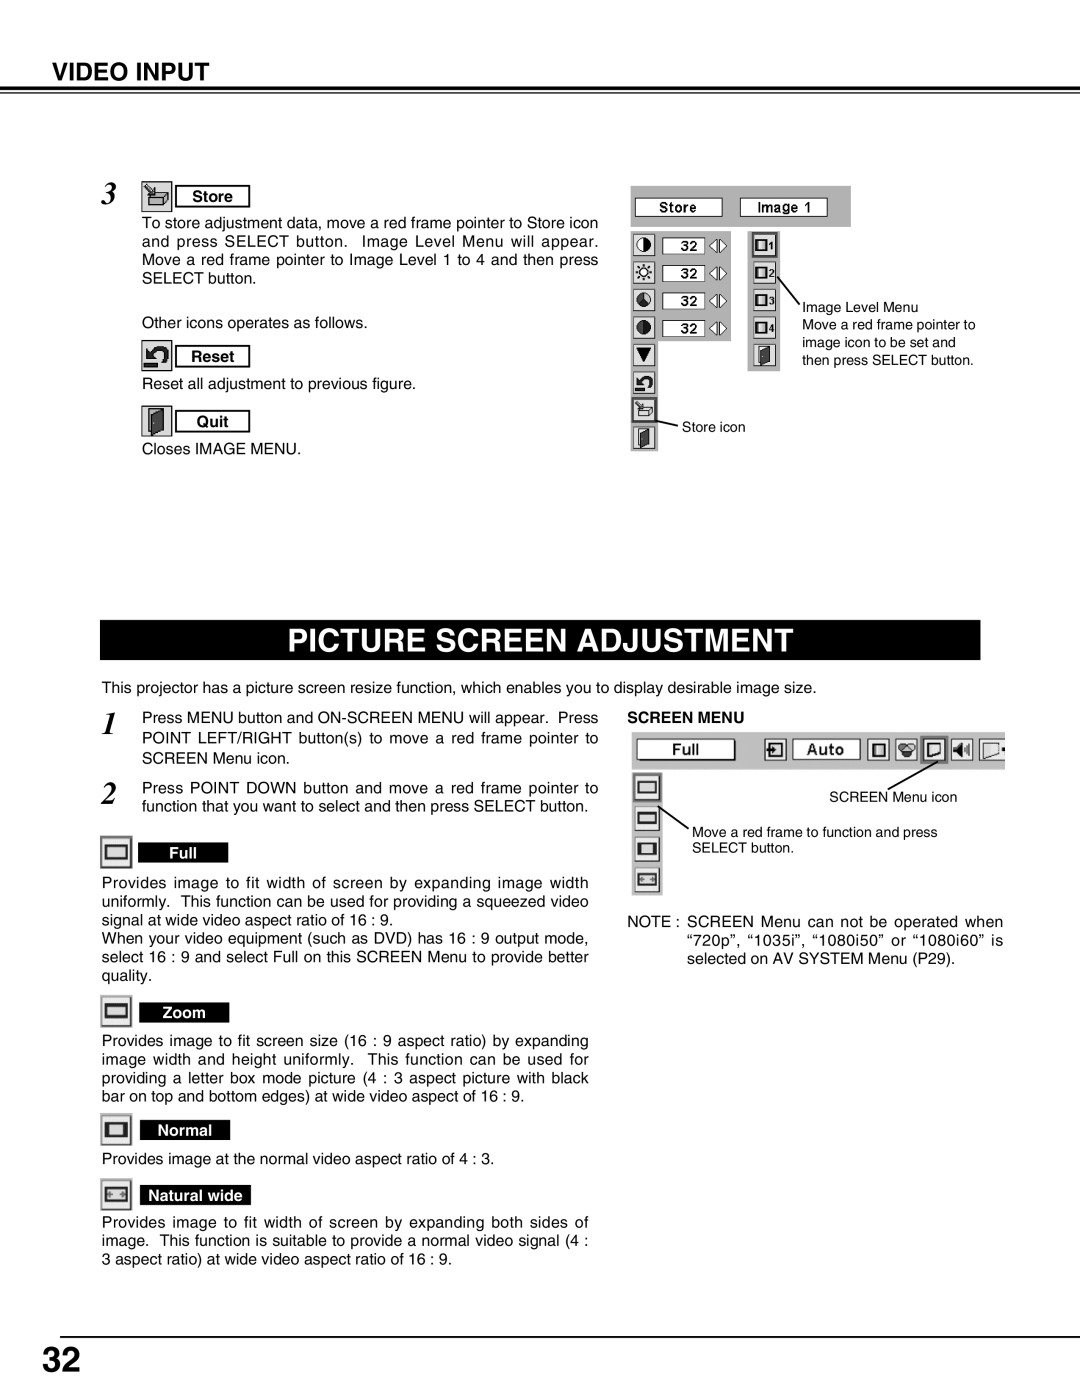
To store adjustment data, move a red frame pointer to Store icon and press SELECT button. Image Level Menu will appear. Move a red frame pointer to Image Level 1 to 4 and then press SELECT button.
Other icons operates as follows.
Reset
Reset all adjustment to previous figure.
Quit | Store icon |
|
Closes IMAGE MENU.
Image Level Menu
Move a red frame pointer to image icon to be set and then press SELECT button.
PICTURE SCREEN ADJUSTMENT
This projector has a picture screen resize function, which enables you to display desirable image size.
1 | Press MENU button and |
| POINT LEFT/RIGHT button(s) to move a red frame pointer to |
| SCREEN Menu icon. |
2 | Press POINT DOWN button and move a red frame pointer to |
function that you want to select and then press SELECT button. |
Full
Provides image to fit width of screen by expanding image width uniformly. This function can be used for providing a squeezed video signal at wide video aspect ratio of 16 : 9.
When your video equipment (such as DVD) has 16 : 9 output mode,
select 16 : 9 and select Full on this SCREEN Menu to provide better quality.
Zoom
Provides image to fit screen size (16 : 9 aspect ratio) by expanding image width and height uniformly. This function can be used for providing a letter box mode picture (4 : 3 aspect picture with black bar on top and bottom edges) at wide video aspect of 16 : 9.
Normal
Provides image at the normal video aspect ratio of 4 : 3.
Natural wide
Provides image to fit width of screen by expanding both sides of image. This function is suitable to provide a normal video signal (4 : 3 aspect ratio) at wide video aspect ratio of 16 : 9.
SCREEN MENU
SCREEN Menu icon
Move a red frame to function and press
SELECT button.
NOTE : SCREEN Menu can not be operated when “720p”, “1035i”, “1080i50” or “1080i60” is selected on AV SYSTEM Menu (P29).
32