SETTING
Lamp counter reset
Be sure to reset Lamp Counter when Lamp Assembly is replaced. When Lamp Replace Counter is reset, LAMP REPLACE indicator stops lighting.
1 | Turn projector on, press MENU button and |
| MENU will appear. Press POINT LEFT/RIGHT button(s) to |
| move a red frame pointer to SETTING Menu icon. |
2 | Press POINT DOWN button to move a red frame pointer to |
| “Lamp counter reset” and then press SELECT button. |
3 | Move arrow to replaced lamp number (Lamp 1 or Lamp 2) and |
| then press SELECT button. Message "Lamp replace counter |
| Reset?" is displayed. Move pointer to [Yes] and then press |
| SELECT button. |
| NOTE: Be sure to reset correct lamp number otherwise LAMP |
| REPLACE indicator continues lighting. |
4 | Another confirmation dialog box appears and select [Yes] to |
reset Lamp Replace Counter. |
Do not reset Lamp Replace Counter except after Projection lamp is replaced.
1 2
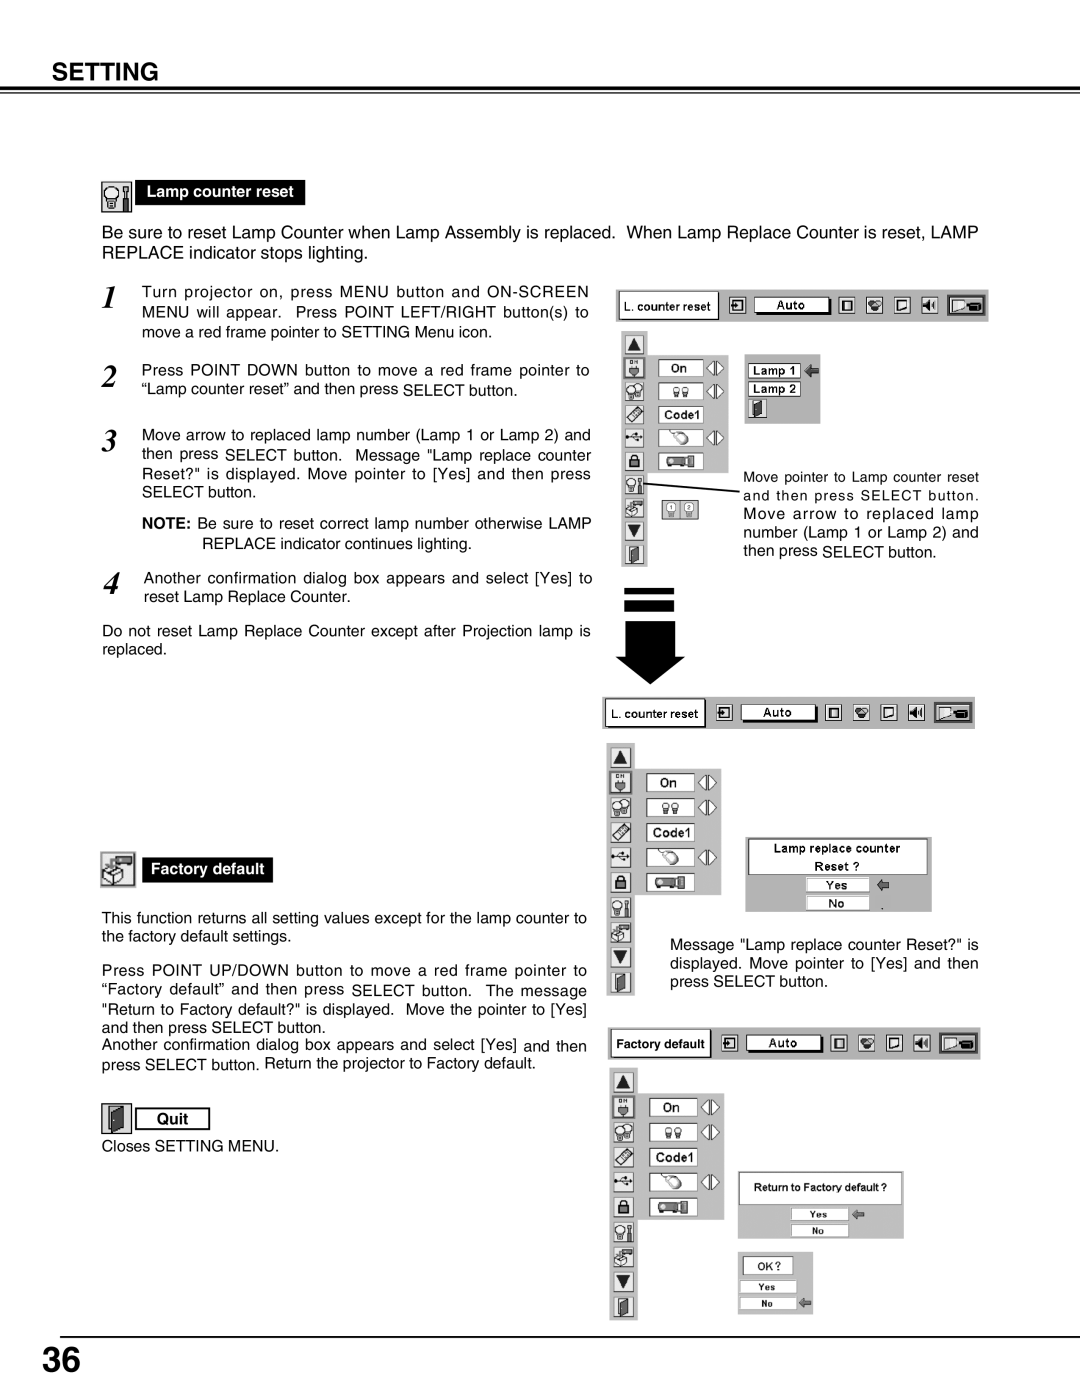
Move pointer to Lamp counter reset and then press SELECT button.
Move arrow to replaced lamp number (Lamp 1 or Lamp 2) and then press SELECT button.
Factory default
This function returns all setting values except for the lamp counter to the factory default settings.
Press POINT UP/DOWN button to move a red frame pointer to “Factory default” and then press SELECT button. The message "Return to Factory default?" is displayed. Move the pointer to [Yes] and then press SELECT button.
Another confirmation dialog box appears and select [Yes] and then press SELECT button. Return the projector to Factory default.
Quit
Closes SETTING MENU.
Message "Lamp replace counter Reset?" is displayed. Move pointer to [Yes] and then press SELECT button.
Factory default
36