Figure 8 Advanced Settings Tab
Step 2 In the Host Name field, enter a name for the switch module. The host name is limited to 31 characters; embedded spaces are not allowed.
Step 3 In the System Date and System Time fields, enter the current date and time, or use the down arrows to select them.
Step 4 In the Time Zone field, use the down arrow to choose your time zone. Step 5 Click Enable in the Daylight Savings Time field to enable this feature.
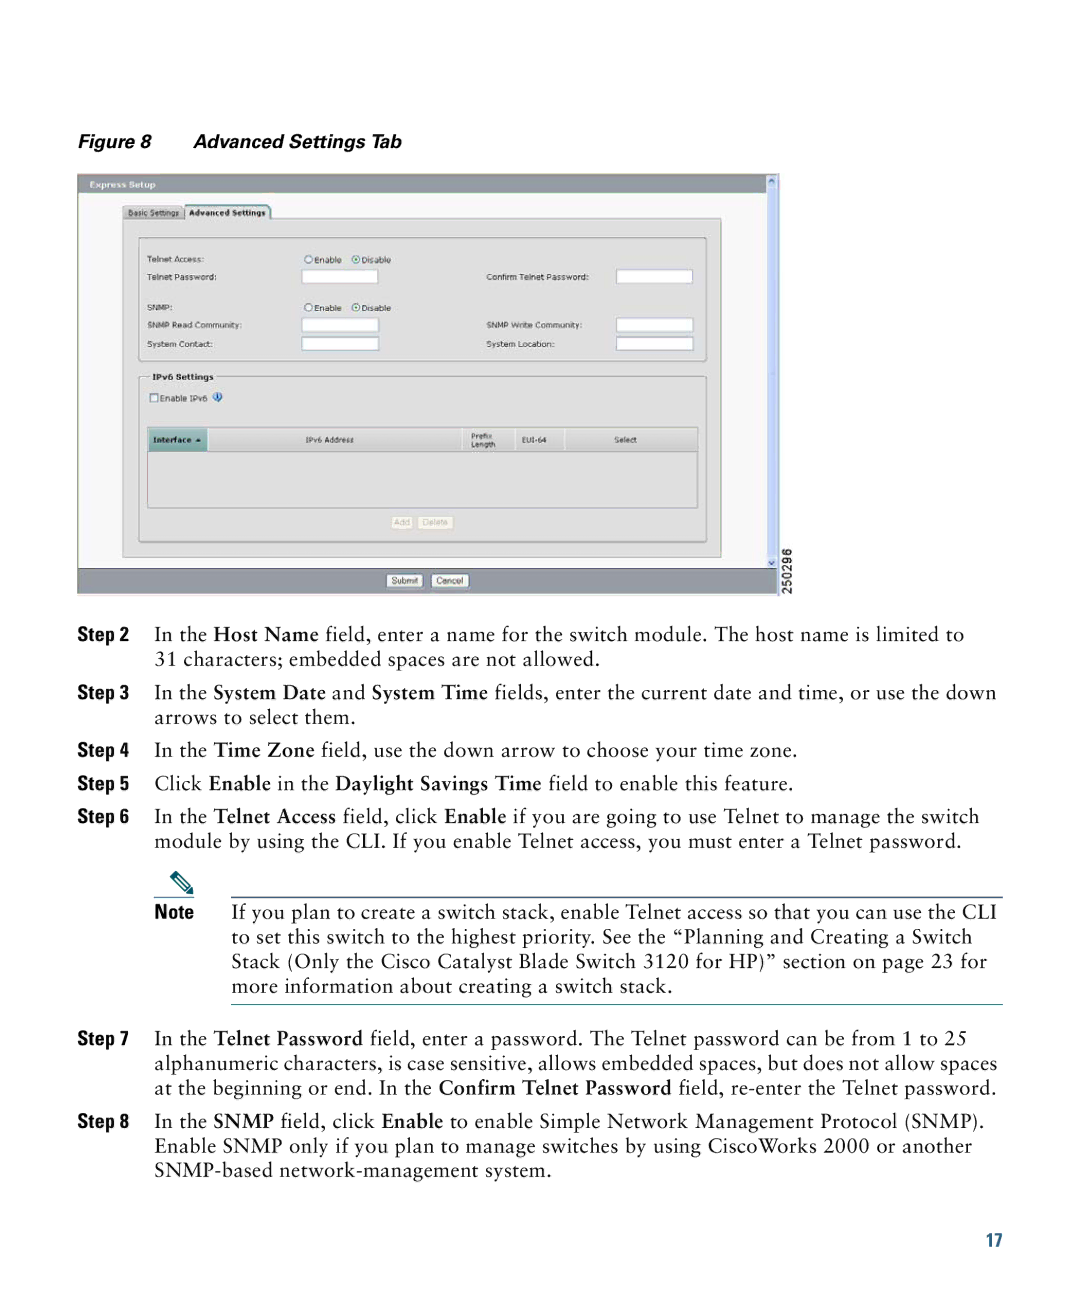
Step 6 In the Telnet Access field, click Enable if you are going to use Telnet to manage the switch module by using the CLI. If you enable Telnet access, you must enter a Telnet password.
Note If you plan to create a switch stack, enable Telnet access so that you can use the CLI to set this switch to the highest priority. See the “Planning and Creating a Switch Stack (Only the Cisco Catalyst Blade Switch 3120 for HP)” section on page 23 for more information about creating a switch stack.
Step 7 In the Telnet Password field, enter a password. The Telnet password can be from 1 to 25 alphanumeric characters, is case sensitive, allows embedded spaces, but does not allow spaces at the beginning or end. In the Confirm Telnet Password field,
Step 8 In the SNMP field, click Enable to enable Simple Network Management Protocol (SNMP). Enable SNMP only if you plan to manage switches by using CiscoWorks 2000 or another
17