Installing a Content Engine 510 or 565 Unit
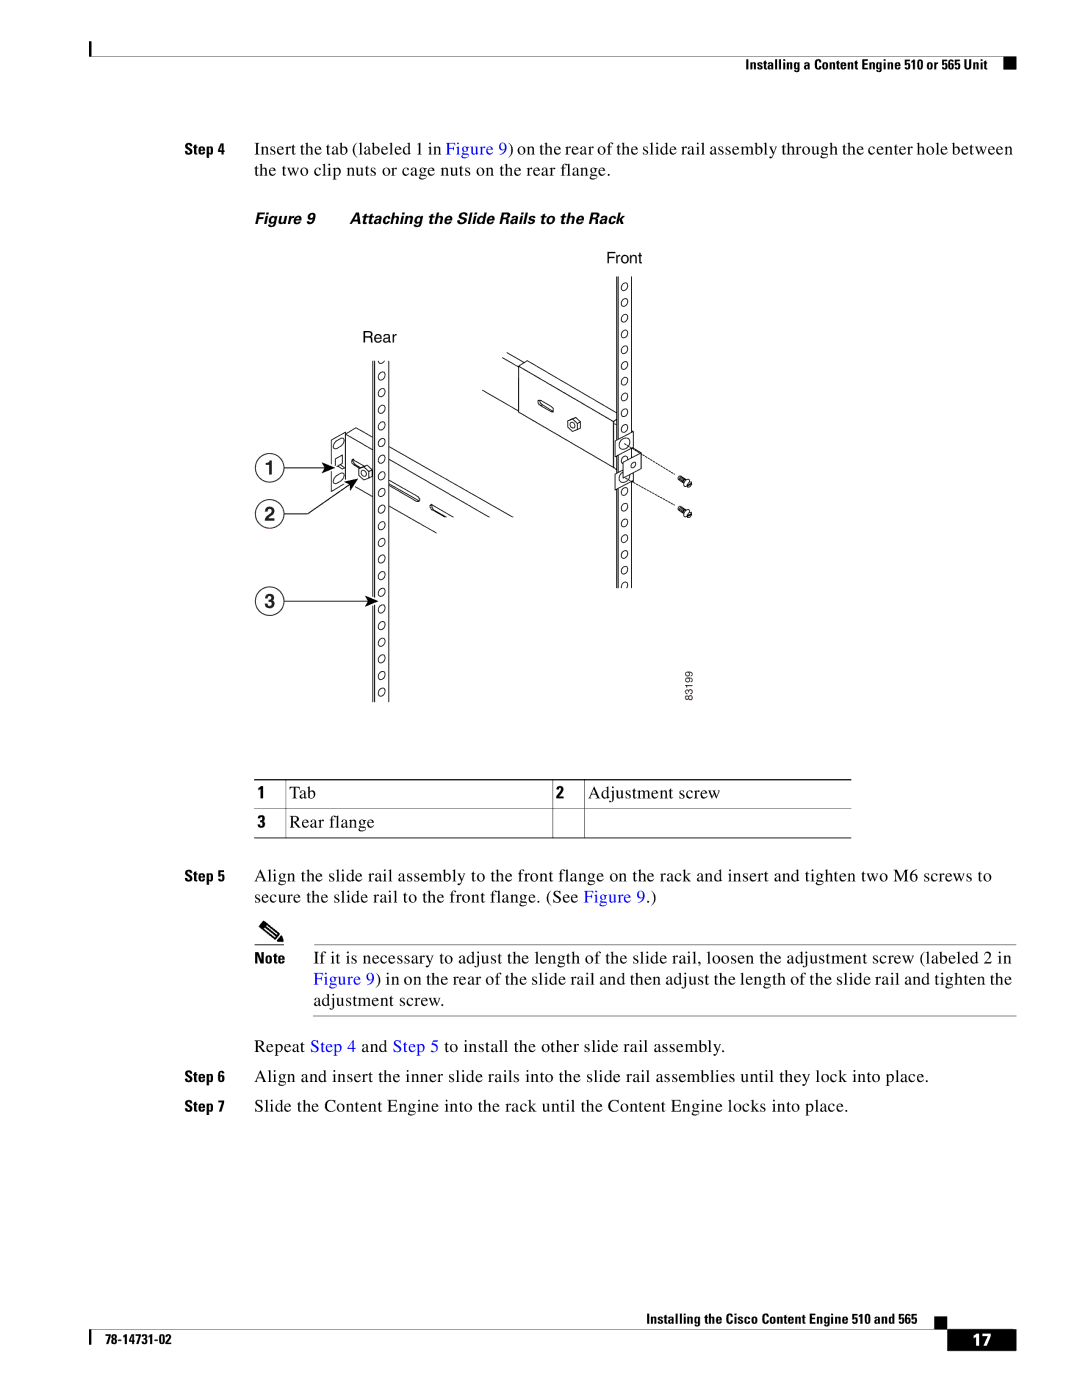
Step 4 Insert the tab (labeled 1 in Figure 9) on the rear of the slide rail assembly through the center hole between the two clip nuts or cage nuts on the rear flange.
Figure 9 Attaching the Slide Rails to the Rack
Front
Rear
1
2 ![]()
3
83199
1
3
Tab | 2 Adjustment screw |
Rear flange
Step 5 Align the slide rail assembly to the front flange on the rack and insert and tighten two M6 screws to secure the slide rail to the front flange. (See Figure 9.)
Note If it is necessary to adjust the length of the slide rail, loosen the adjustment screw (labeled 2 in Figure 9) in on the rear of the slide rail and then adjust the length of the slide rail and tighten the adjustment screw.
Repeat Step 4 and Step 5 to install the other slide rail assembly.
Step 6 Align and insert the inner slide rails into the slide rail assemblies until they lock into place. Step 7 Slide the Content Engine into the rack until the Content Engine locks into place.
Installing the Cisco Content Engine 510 and 565
| 17 |
| |
|
|