Installing a Content Engine 510 or 565 Unit
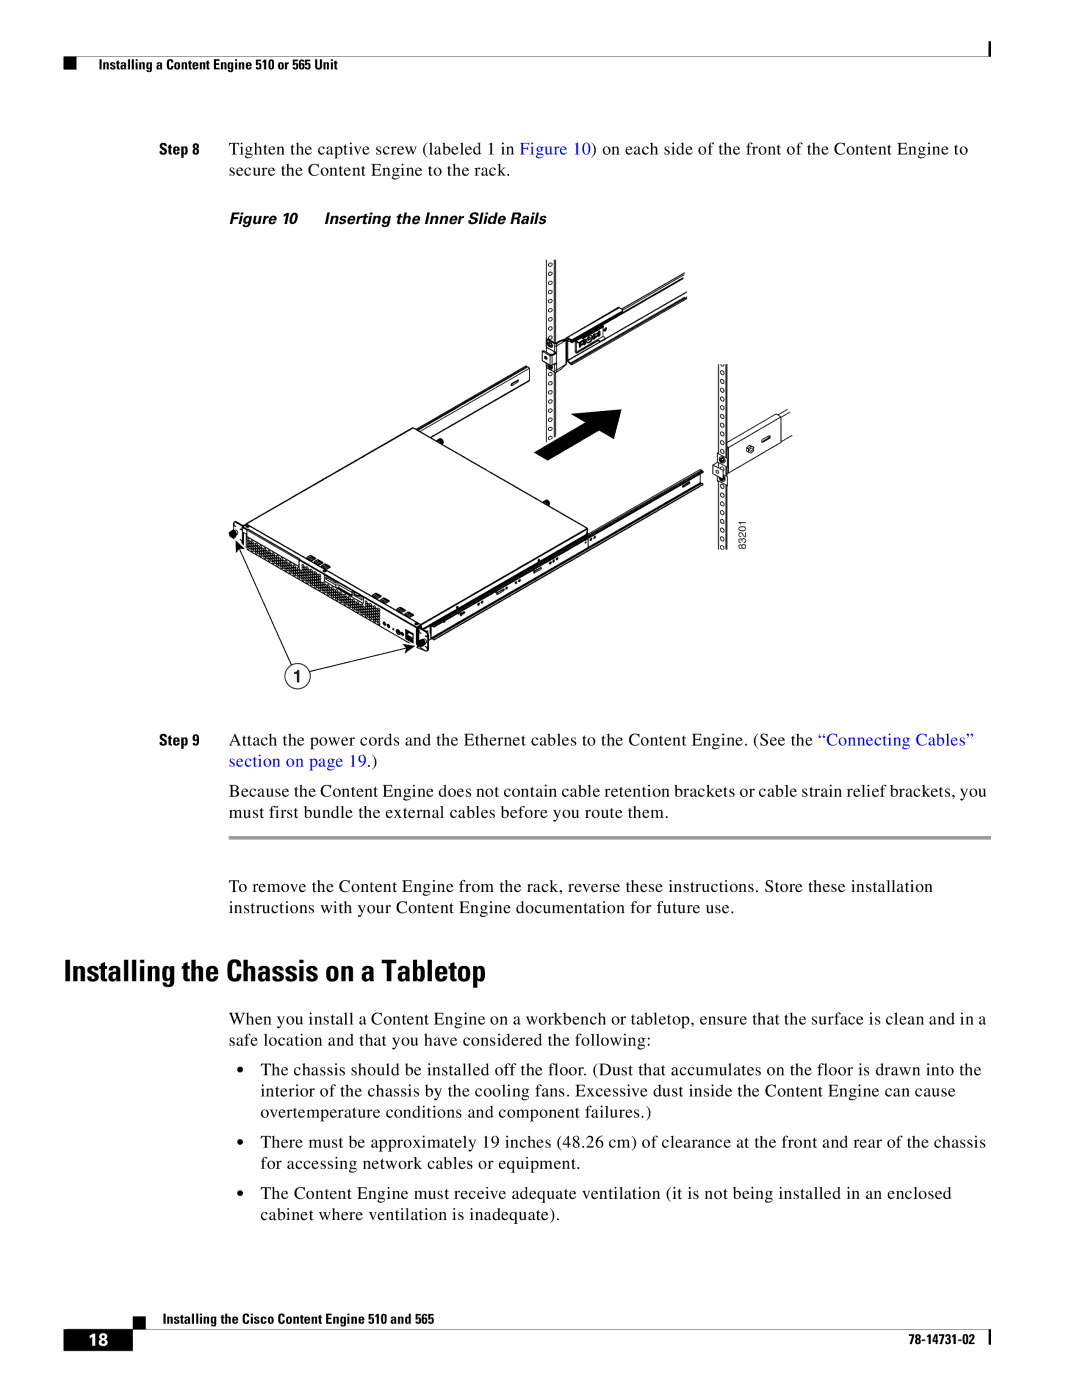
Step 8 Tighten the captive screw (labeled 1 in Figure 10) on each side of the front of the Content Engine to secure the Content Engine to the rack.
Figure 10 Inserting the Inner Slide Rails
83201
1
Step 9 Attach the power cords and the Ethernet cables to the Content Engine. (See the “Connecting Cables” section on page 19.)
Because the Content Engine does not contain cable retention brackets or cable strain relief brackets, you must first bundle the external cables before you route them.
To remove the Content Engine from the rack, reverse these instructions. Store these installation instructions with your Content Engine documentation for future use.
Installing the Chassis on a Tabletop
When you install a Content Engine on a workbench or tabletop, ensure that the surface is clean and in a safe location and that you have considered the following:
•The chassis should be installed off the floor. (Dust that accumulates on the floor is drawn into the interior of the chassis by the cooling fans. Excessive dust inside the Content Engine can cause overtemperature conditions and component failures.)
•There must be approximately 19 inches (48.26 cm) of clearance at the front and rear of the chassis for accessing network cables or equipment.
•The Content Engine must receive adequate ventilation (it is not being installed in an enclosed cabinet where ventilation is inadequate).
Installing the Cisco Content Engine 510 and 565
18 |
| |
|