
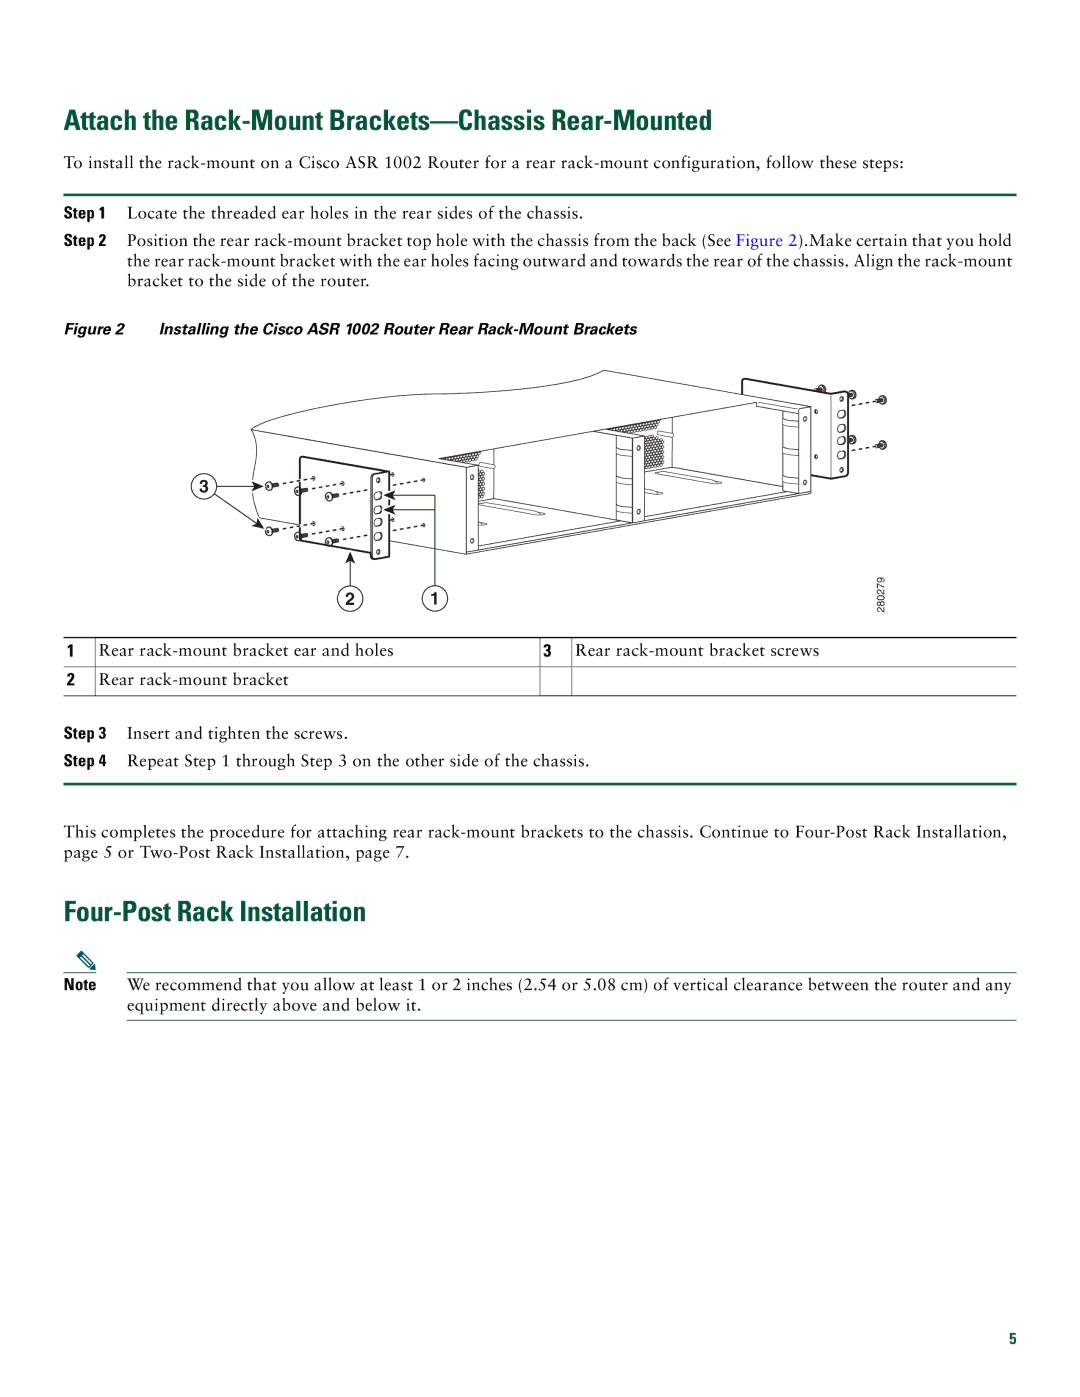
ASR1002 specifications
Cisco Systems ASR1002: An Overview of Main Features, Technologies, and CharacteristicsThe Cisco ASR1002 router is part of the Aggregation Services Router (ASR) series, renowned for its flexibility and robustness in handling a wide variety of enterprise and service provider applications. Designed for high performance and scalability, the ASR1002 delivers advanced routing capabilities while ensuring efficient resource utilization and minimal operational costs.
One of the standout features of the ASR1002 is its modular architecture. The router supports an extensive range of interfaces and services, allowing organizations to tailor the device to their specific networking requirements. With up to 2GB of onboard memory and the ability to support various WAN technologies, the ASR1002 is well-equipped to handle demanding data workloads.
The ASR1002 offers a performance of up to 2 Gbps of throughput, making it suitable for small to mid-sized businesses needing reliable internet access and robust connectivity. It supports Cisco's Advanced IP Services and offers secure and scalable VPN solutions, enabling organizations to connect multiple sites securely and efficiently.
In addition to its high-speed capabilities, the ASR1002 incorporates advanced security features including Integrated Threat Control, which utilizes Cisco's extensive security technologies to safeguard corporate networks from external and internal threats. It also supports firewall services, intrusion prevention, and secure access protocols, ensuring comprehensive security coverage.
The ASR1002 employs advanced routing technologies like multi-protocol label switching (MPLS) and Border Gateway Protocol (BGP), enabling effective traffic management and seamless integration into existing network infrastructures. This versatility makes it an ideal choice for organizations looking to improve network efficiency and effectiveness.
Another critical characteristic of the ASR1002 is its environmental efficiency. The router is designed with power-saving features and optimizes cooling, contributing to reduced energy costs. With its compact form factor, the ASR1002 can be deployed in various environments without taking up significant space.
Overall, the Cisco ASR1002 stands out as a highly capable and adaptable router, blending advanced features, robust performance, and secure networking capabilities. It caters to the evolving needs of modern enterprises, enabling seamless connectivity and enhancing network reliability. Whether for a small business or a larger enterprise branch, the ASR1002 provides an optimized solution for contemporary networking challenges.