Chapter 2 Installing the Router

Installing the Router

Tip When choosing a location for wall-mounting the router, consider cable limitations and wall structure.

To mount the router on a wall, follow these steps:

Step 1 Remove the screws on the sides of the routers.

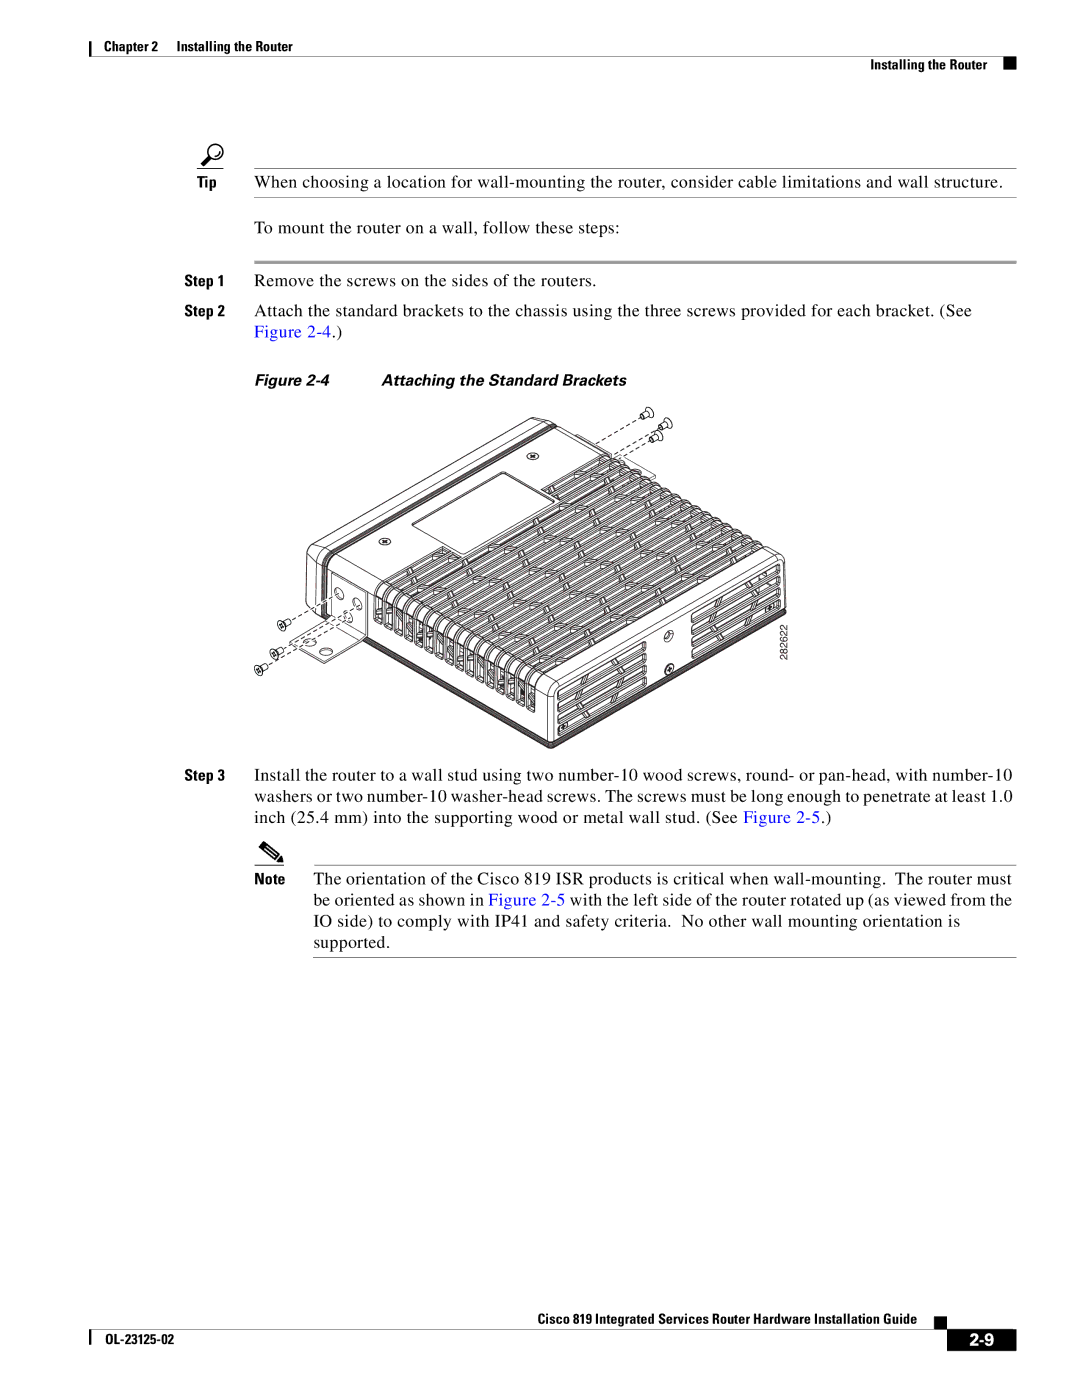
Step 2 Attach the standard brackets to the chassis using the three screws provided for each bracket. (See Figure 2-4.)

Figure 2-4 Attaching the Standard Brackets

282622

Step 3 Install the router to a wall stud using two number-10 wood screws, round- or pan-head, with number-10 washers or two number-10 washer-head screws. The screws must be long enough to penetrate at least 1.0 inch (25.4 mm) into the supporting wood or metal wall stud. (See Figure 2-5.)

Note The orientation of the Cisco 819 ISR products is critical when wall-mounting. The router must be oriented as shown in Figure 2-5with the left side of the router rotated up (as viewed from the IO side) to comply with IP41 and safety criteria. No other wall mounting orientation is supported.

Cisco 819 Integrated Services Router Hardware Installation Guide


OL-23125-02

2-9


Page 53
Image 53
Cisco Systems C819HK9, C819GUK9, C819G4GAK9 manual Attaching the Standard Brackets