Chapter 2 Installing the Router
Installing the Router
To attach the Cisco 819 ISR to a
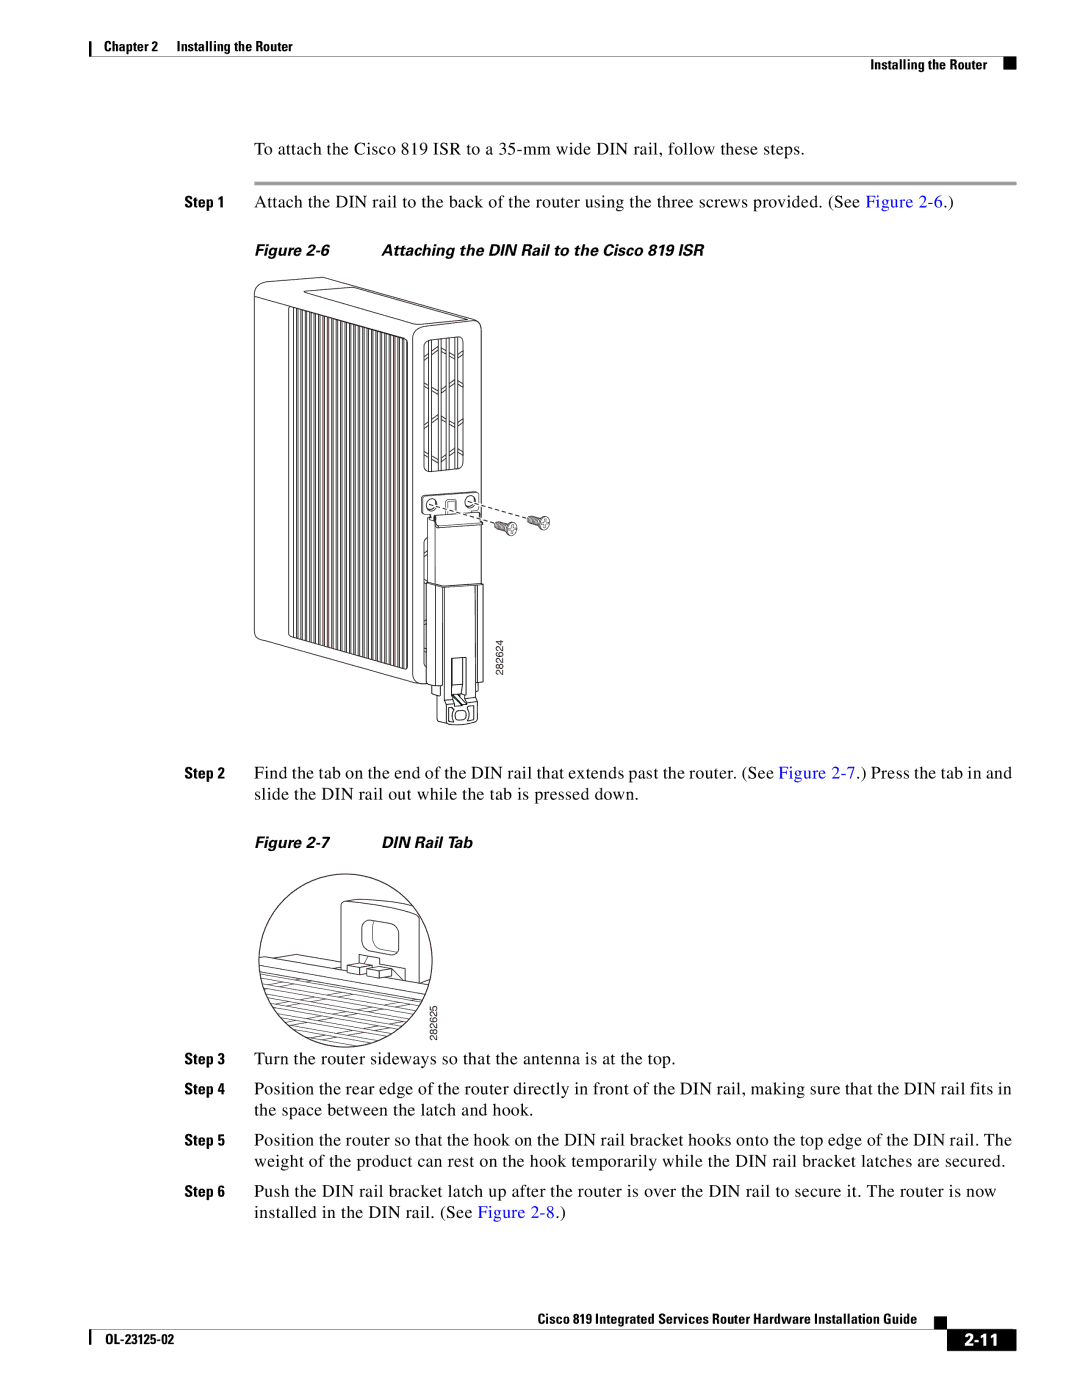
Step 1 Attach the DIN rail to the back of the router using the three screws provided. (See Figure
Figure 2-6 Attaching the DIN Rail to the Cisco 819 ISR
282624
Step 2 Find the tab on the end of the DIN rail that extends past the router. (See Figure
Figure | DIN Rail Tab |
| 282625 |
Step 3 | Turn the router sideways so that the antenna is at the top. |
Step 4 | Position the rear edge of the router directly in front of the DIN rail, making sure that the DIN rail fits in |
| the space between the latch and hook. |
Step 5 Position the router so that the hook on the DIN rail bracket hooks onto the top edge of the DIN rail. The weight of the product can rest on the hook temporarily while the DIN rail bracket latches are secured.
Step 6 Push the DIN rail bracket latch up after the router is over the DIN rail to secure it. The router is now installed in the DIN rail. (See Figure
|
| Cisco 819 Integrated Services Router Hardware Installation Guide |
|
| |
|
|
| |||
|
|
|
| ||
|
|
|
| ||