
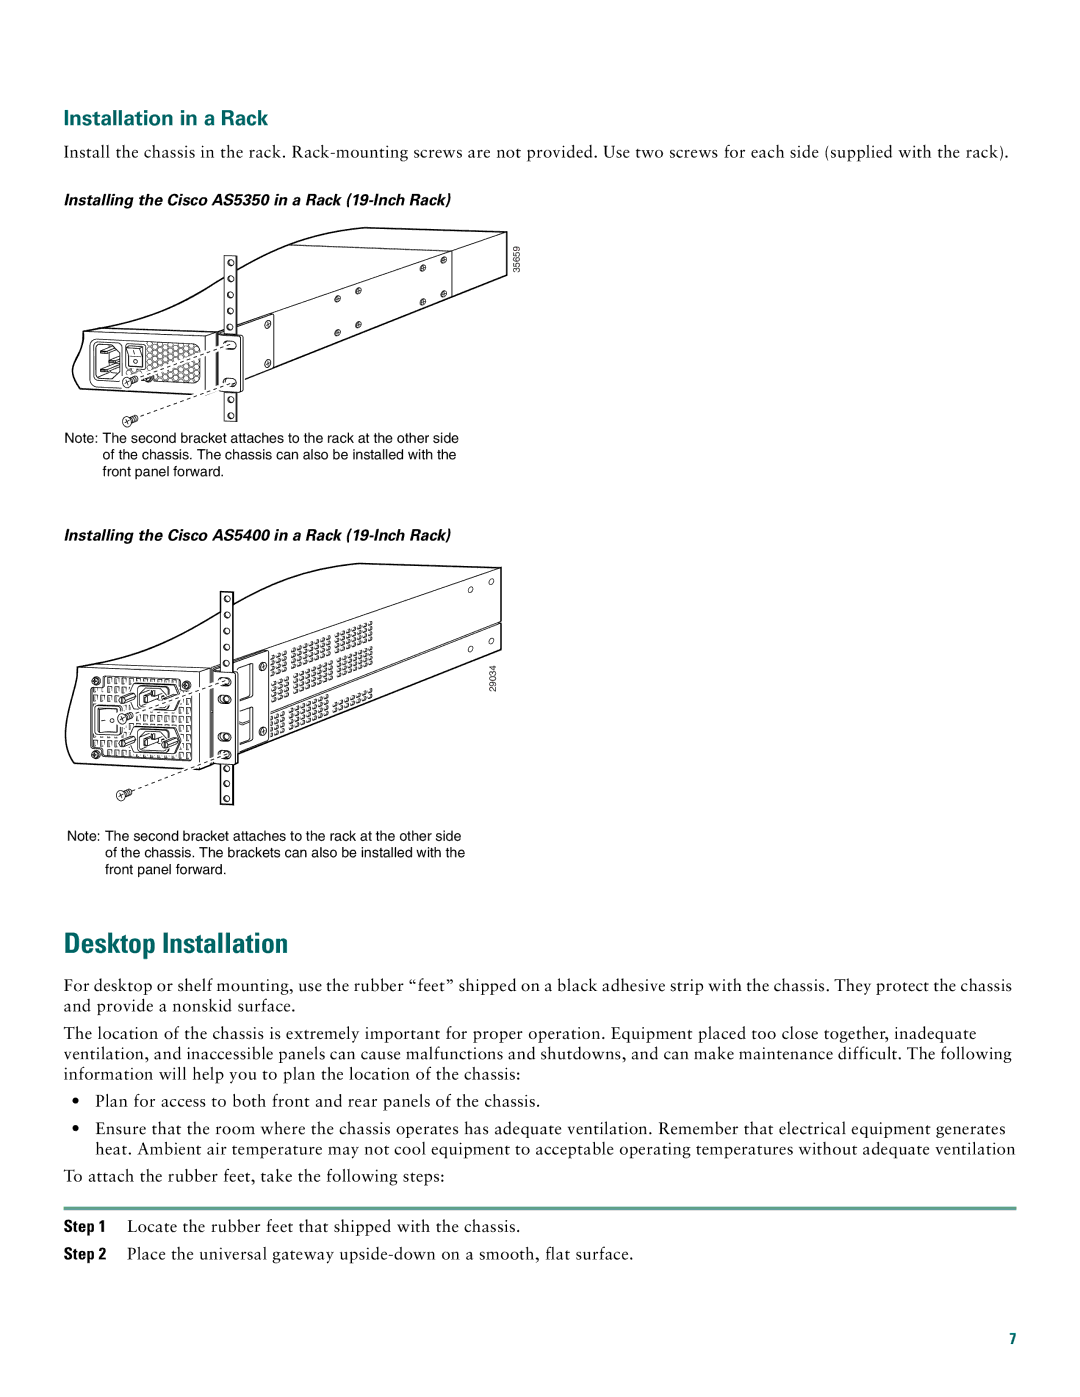
Cisco AS5400, Cisco AS5350 specifications
Cisco Systems is a global leader in networking and telecommunications technology, and its AS5350 and AS5400 models are prominent offerings in their product line. These devices cater primarily to service providers and large enterprises looking for advanced VoIP, data, and multimedia capabilities.The Cisco AS5350 is a versatile voice gateway that supports a wide range of protocols including VoIP and PSTN (Public Switched Telephone Network). Designed for scalability, it can handle numerous simultaneous calls, making it an ideal solution for businesses that require robust communication systems. Some of its main features include built-in support for various signaling protocols such as SIP (Session Initiation Protocol) and H.323, which allow seamless integration with existing networks. Additionally, the AS5350 is equipped with high-density digital signal processors (DSPs) that enable efficient call processing and transcoding, ensuring high-quality voice transmission.
On the other hand, the Cisco AS5400 takes this functionality a step further by offering enhanced capabilities suited for more demanding environments. It supports both voice and data services, allowing service providers to deliver a comprehensive solution that includes voice calls, multimedia applications, and broadband services. The AS5400 features a modular design, allowing users to adapt the device to specific needs by adding or removing modules as required. This modularity enhances flexibility and future-proofs the system against evolving technology demands.
Both the AS5350 and AS5400 incorporate advanced security features to protect sensitive communications and data. Features such as encryption, secure signaling, and network access controls are essential for enterprises looking to safeguard their operations in an increasingly vulnerable digital landscape. These gateways also support Quality of Service (QoS) protocols, ensuring that voice traffic is prioritized over other types of data, thereby maintaining call clarity even in times of high data demand.
In conclusion, the Cisco AS5350 and AS5400 are compelling solutions that showcase Cisco's commitment to delivering reliable and high-performance telecommunications devices. By offering state-of-the-art technology, robust features, and a modular approach to scalability, businesses and service providers can ensure they remain competitive in the ever-evolving telecommunications landscape. Whether it is for voice, data, or multimedia applications, these gateways deliver the performance and flexibility needed to meet current and future challenges.