Chapter 4:
Bi-Admin Management
Overview
The PrintServer is managed by a utility program called Bi-Admin on the PrintServer’s Setup CD. Fully compatible with Windows 98, Me, 2000, and XP, Bi-Admin allows you to change the PrintServer’s internal settings, check the unit’s status, and perform basic diagnostic tests.
Note that the Bi-Admin program must be installed only on the network administrator’s computer. First, you will install Bi-Admin on your computer. Then, you will be able to use the management utility.
Bi-Admin Installation
1.If you have not already done so, insert the Setup CD- ROM into the PC’s CD-ROM drive. The Setup CD-ROM should run automatically. If it does not, click Start and choose Run. In the box that appears, enter D:\ setupWizard.exe (if “D” is the letter of your CD-ROM drive).
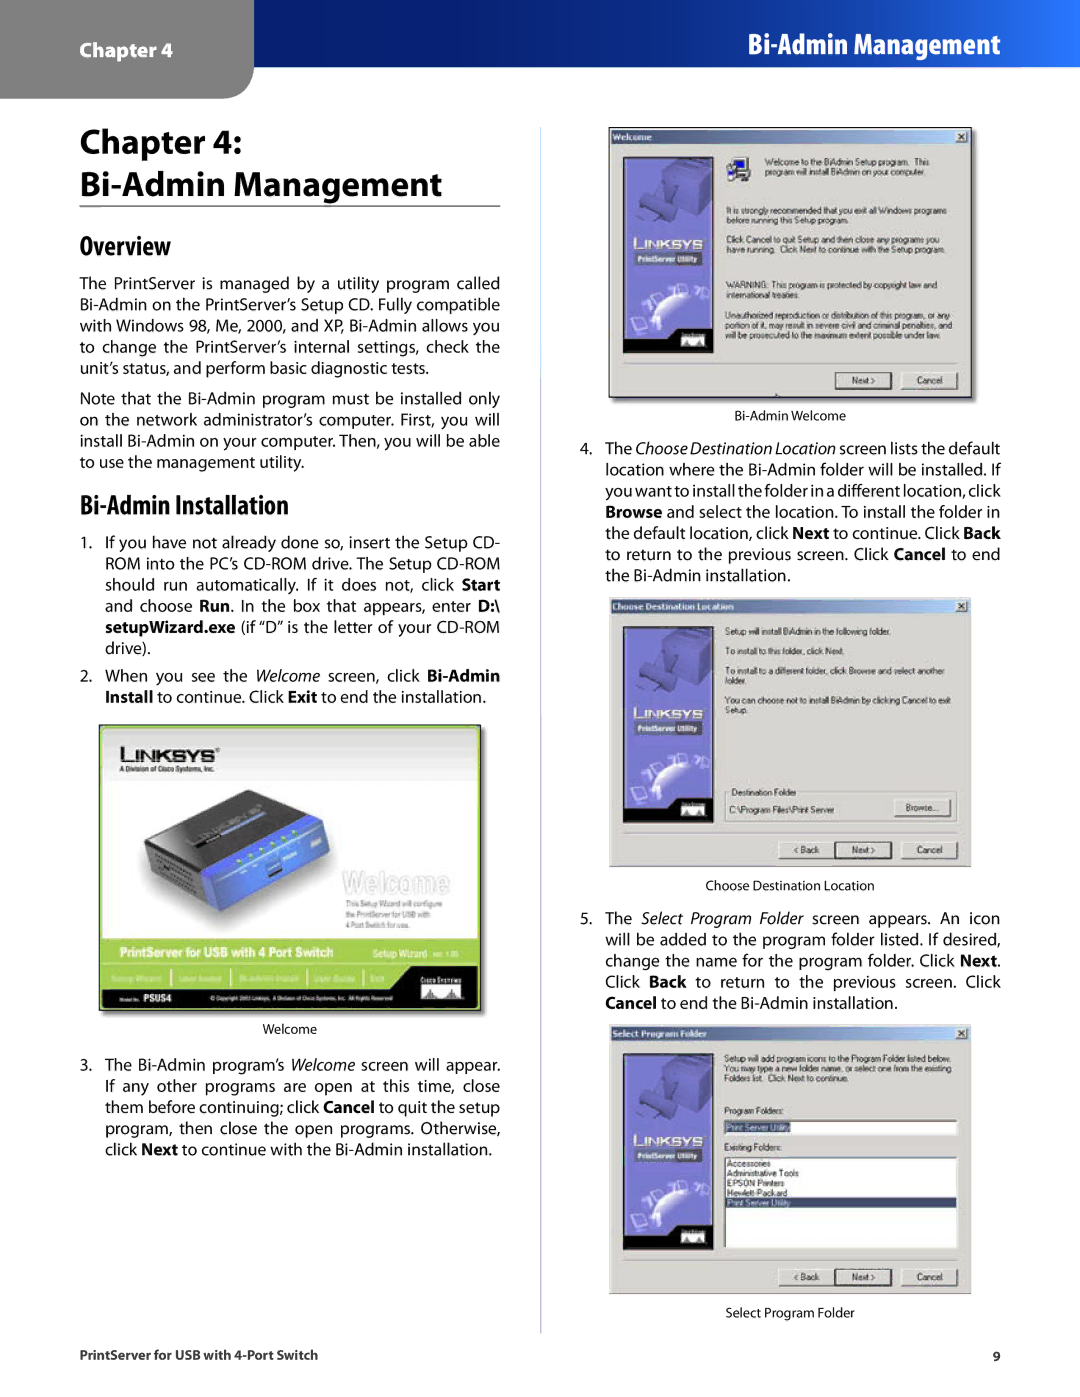
2.When you see the Welcome screen, click Bi-Admin Install to continue. Click Exit to end the installation.
Welcome
3.The Bi-Admin program’s Welcome screen will appear. If any other programs are open at this time, close them before continuing; click Cancel to quit the setup program, then close the open programs. Otherwise, click Next to continue with the Bi-Admin installation.
PrintServer for USB with 4-Port Switch
Bi-Admin Welcome
4.The Choose Destination Location screen lists the default location where the Bi-Admin folder will be installed. If you want to install the folder in a different location, click Browse and select the location. To install the folder in the default location, click Next to continue. Click Back to return to the previous screen. Click Cancel to end the Bi-Admin installation.
Choose Destination Location
5.The Select Program Folder screen appears. An icon will be added to the program folder listed. If desired, change the name for the program folder. Click Next. Click Back to return to the previous screen. Click Cancel to end the Bi-Admin installation.
Select Program Folder
9

