Chapter 4
6.When the
Setup Complete
Starting the Bi-Admin Management Utility
1.To start the
2.When the
Connected Protocol
3.The
Searching for device
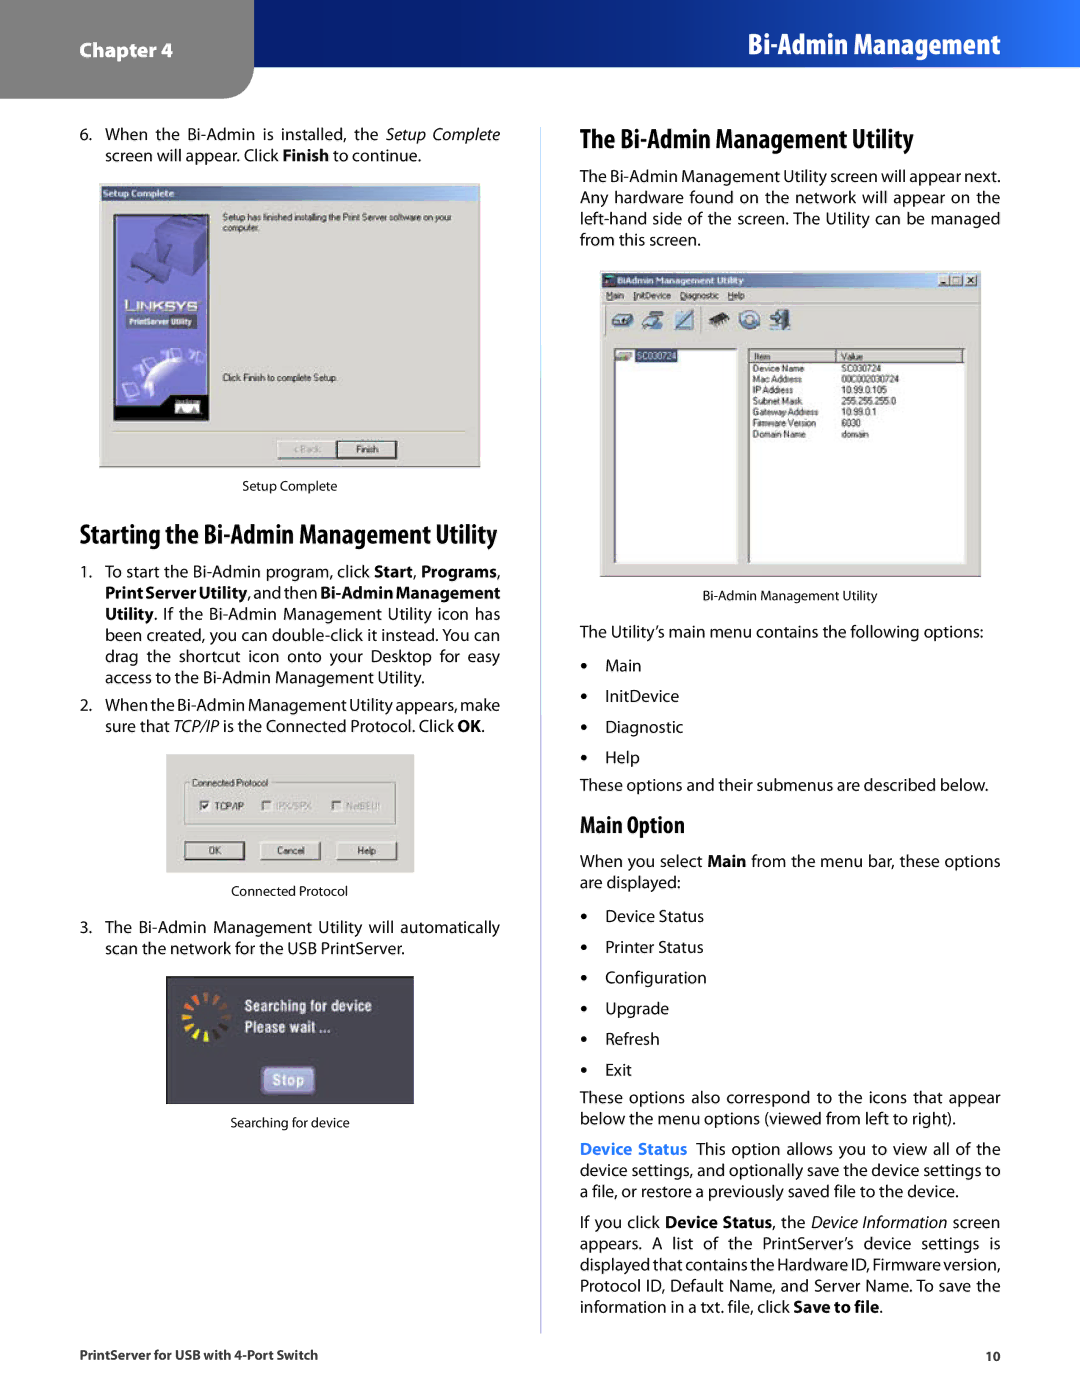
The Bi-Admin Management Utility
The
The Utility’s main menu contains the following options:
•• Main
•• InitDevice
•• Diagnostic
•• Help
These options and their submenus are described below.
Main Option
When you select Main from the menu bar, these options are displayed:
•• Device Status
•• Printer Status
•• Configuration
•• Upgrade
•• Refresh
•• Exit
These options also correspond to the icons that appear below the menu options (viewed from left to right).
Device Status This option allows you to view all of the device settings, and optionally save the device settings to a file, or restore a previously saved file to the device.
If you click Device Status, the Device Information screen appears. A list of the PrintServer’s device settings is displayed that contains the Hardware ID, Firmware version, Protocol ID, Default Name, and Server Name. To save the information in a txt. file, click Save to file.
PrintServer for USB with | 10 |