Chapter 3
Internet Printing Protocol
Chapter 3:
Internet Printing Protocol
Overview
Internet Printing Protocol (IPP) is a new standards- based system to allow remote printing from a PC to any accessible printer. Normally, the printer will be attached to a computer or other device that functions as an IPP Server. For client PCs, it is necessary to install a compatible IPP Client program. The Client must also know the IP Address or URL of the IPP Server.
The PrintServer contains the necessary firmware to act as an IPP Server. No additional configuration is necessary. However, the following requirements must be met:
•• The PrintServer must have a valid IP Address. For printing via the Internet, the PrintServer’s IP Address must be external (allocated by your ISP), rather than an IP Address on your local LAN.
•• Any Router, Gateway, or Firewall linking your LAN to the Internet must NOT block the IPP protocol. (IPP Protocol uses Port Services 631/TCP.)
•• You must advise clients of the correct URL or IP Address of the IPP Server. To use a URL rather than an IP Address, you need to register the domain name for the URL.
•• Unless clients are using Windows 2000, you must provide your clients with the supplied IPP Client software. If it is not convenient to provide the
Windows IPP Client Setup
Installation using setup.exe
1.Run this program, located at d:\driver\ipp\setup.exe, to unzip the included files.
2.The IPP Setup program will then run.
3.Follow the prompts to complete the installation.
IPP Client Configuration for Windows 98, Me, 2000, and XP
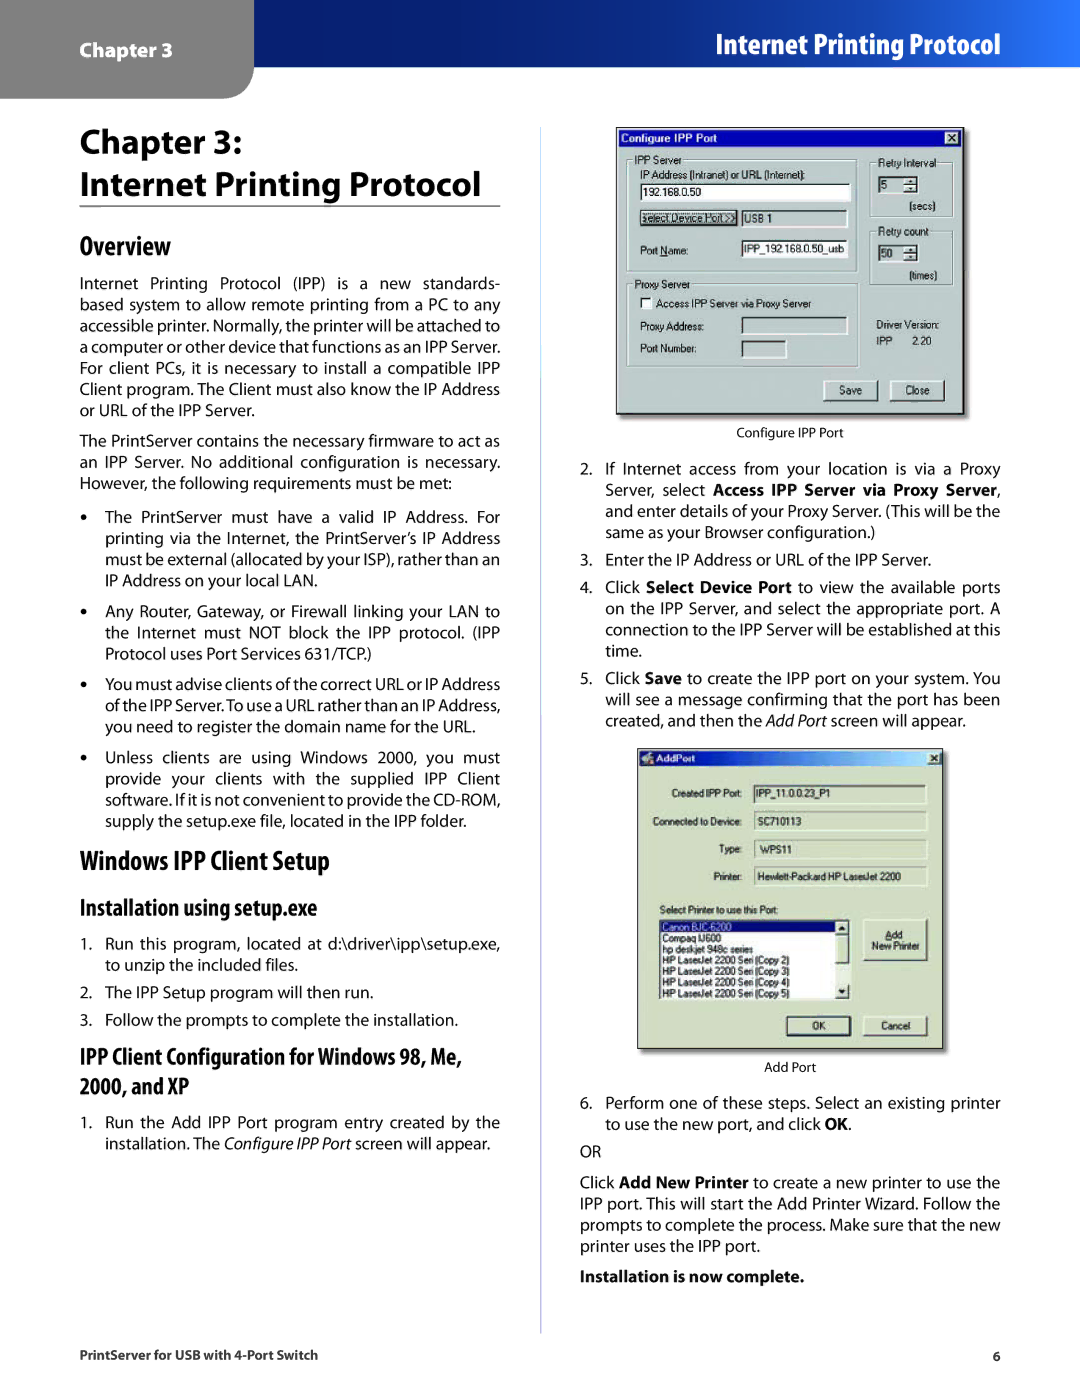
1.Run the Add IPP Port program entry created by the installation. The Configure IPP Port screen will appear.
Configure IPP Port
2.If Internet access from your location is via a Proxy Server, select Access IPP Server via Proxy Server, and enter details of your Proxy Server. (This will be the same as your Browser configuration.)
3.Enter the IP Address or URL of the IPP Server.
4.Click Select Device Port to view the available ports on the IPP Server, and select the appropriate port. A connection to the IPP Server will be established at this time.
5.Click Save to create the IPP port on your system. You will see a message confirming that the port has been created, and then the Add Port screen will appear.
Add Port
6.Perform one of these steps. Select an existing printer to use the new port, and click OK.
OR
Click Add New Printer to create a new printer to use the IPP port. This will start the Add Printer Wizard. Follow the prompts to complete the process. Make sure that the new printer uses the IPP port.
Installation is now complete.
PrintServer for USB with | 6 |