Presario 1600 Series
Models: 1683, 1685, 1687, 1688, 1690, 1692, 1693, and 1694
Before You Begin |
| Specifications |
| Parts Catalog |
|
|
|
|
|
|
|
|
|
|
Removal Sequence |
| Troubleshooting |
| Battery Operations |
|
|
|
|
|
|
|
|
| Index |
Product Description |
| Pin Assignments |
| |
|
|
|
|
|
Removal and Replacement
Prior to conducting any removal and/or replacement procedures, you should review and IMPORTANT: fully understand the section titled "Before You Begin".
Removal | Removing the Display Panel |
Sequence | Assembly |
Cables and | (steps 10 |
Connectors | |
|
|
|
|
Battery Pack |
|
|
|
|
|
Palmrest |
|
Cover with |
|
Touch Pad |
|
|
|
![]() Heatspreader
Heatspreader![]()
![]() Keyboard
Keyboard
![]() Processor
Processor
![]() Hard Drive
Hard Drive
DVD or
CD Drive
Battery
Charger
Board
![]() Modem
Modem
Display Panel
Assembly
Upper CPU
Cover
Speaker
Assembly
Diskette
Drive
Fan
Assembly
System
Board
Dip Switch
Settings
Memory
Module
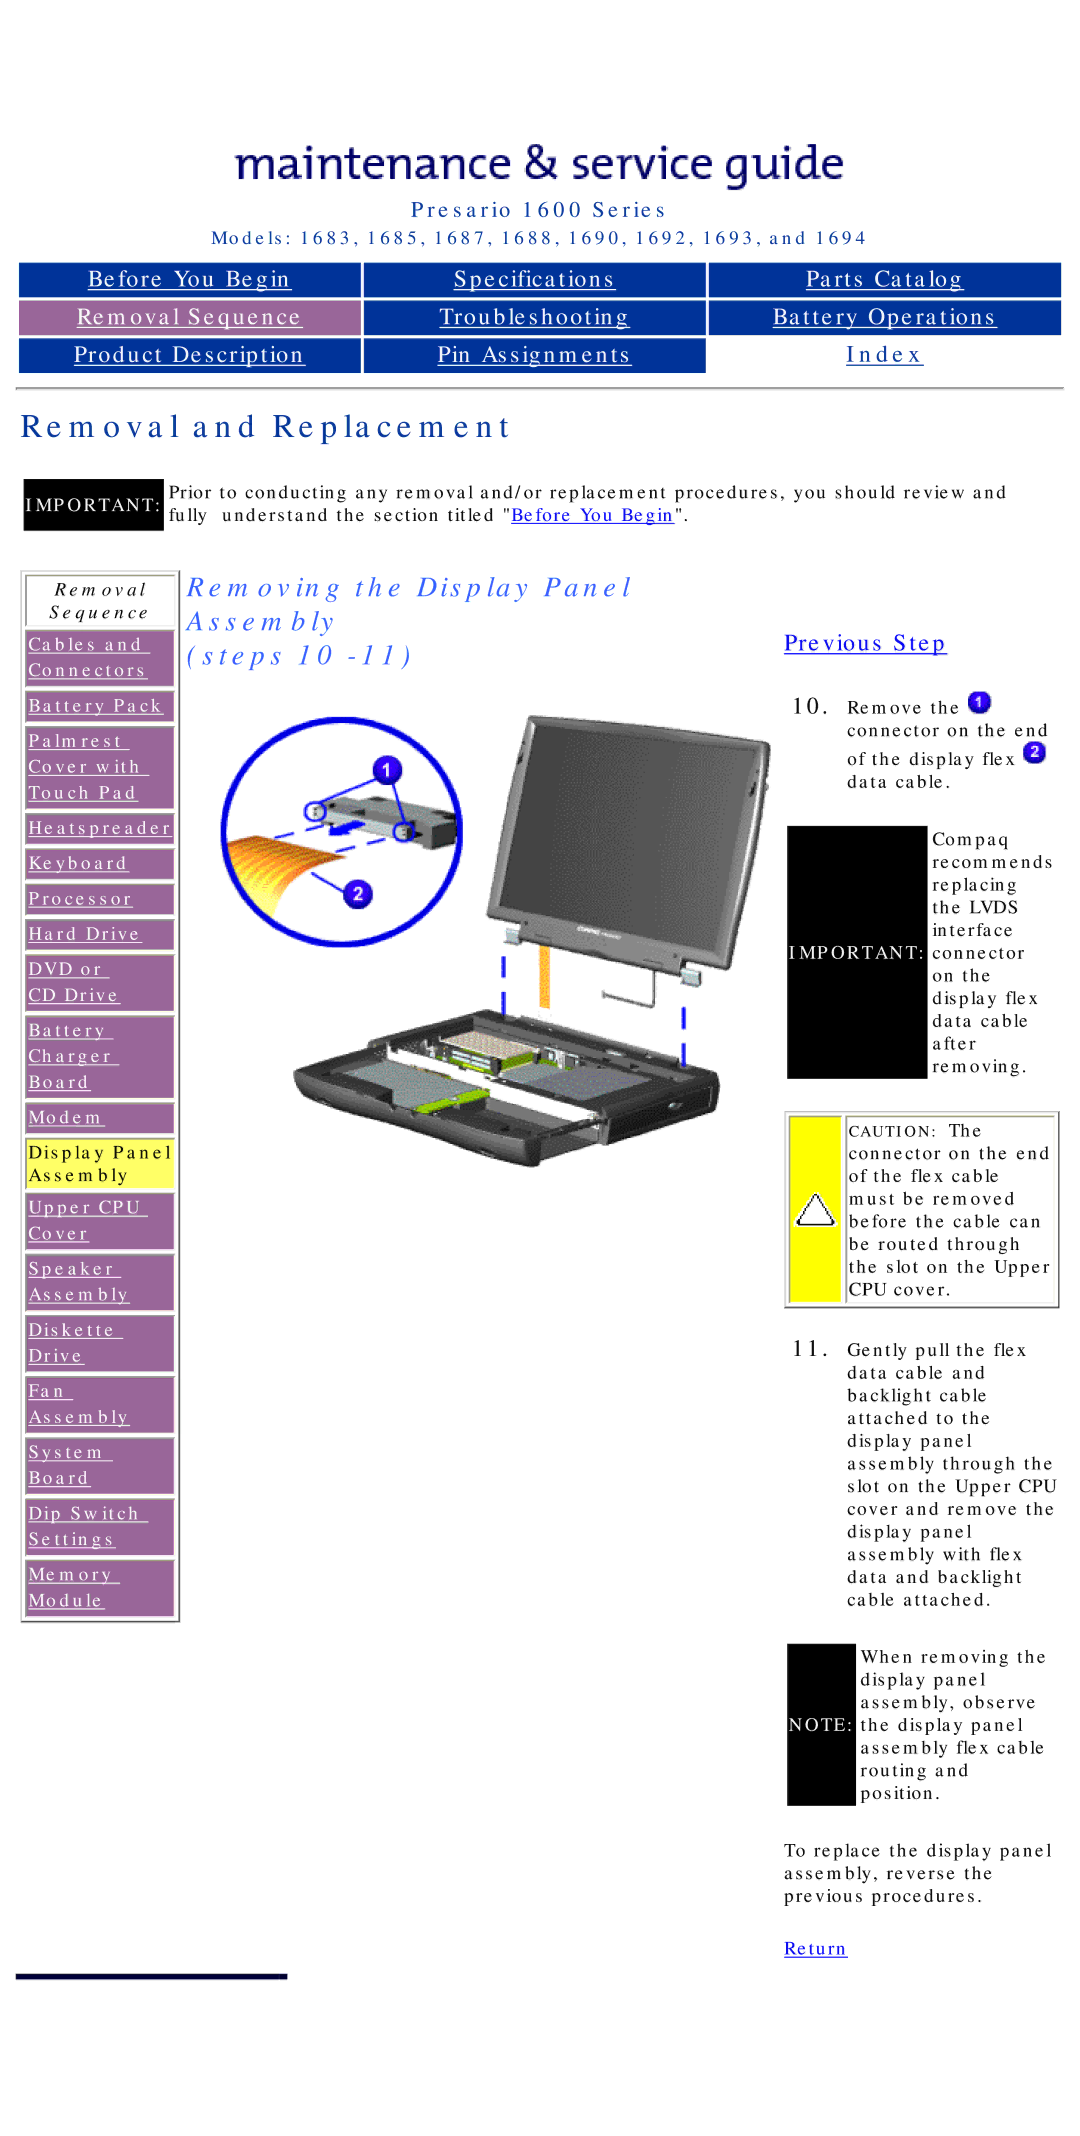
Previous Step
10.Remove the ![]() connector on the end of the display flex
connector on the end of the display flex ![]() data cable.
data cable.
Compaq recommends replacing the LVDS interface
IMPORTANT: connector on the display flex data cable after removing.
CAUTION: The connector on the end of the flex cable must be removed before the cable can be routed through the slot on the Upper CPU cover.
11.Gently pull the flex data cable and backlight cable attached to the display panel assembly through the slot on the Upper CPU cover and remove the display panel assembly with flex data and backlight cable attached.
When removing the display panel assembly, observe
NOTE: the display panel assembly flex cable routing and position.
To replace the display panel assembly, reverse the previous procedures.