Page 8 of 21
WR 3M
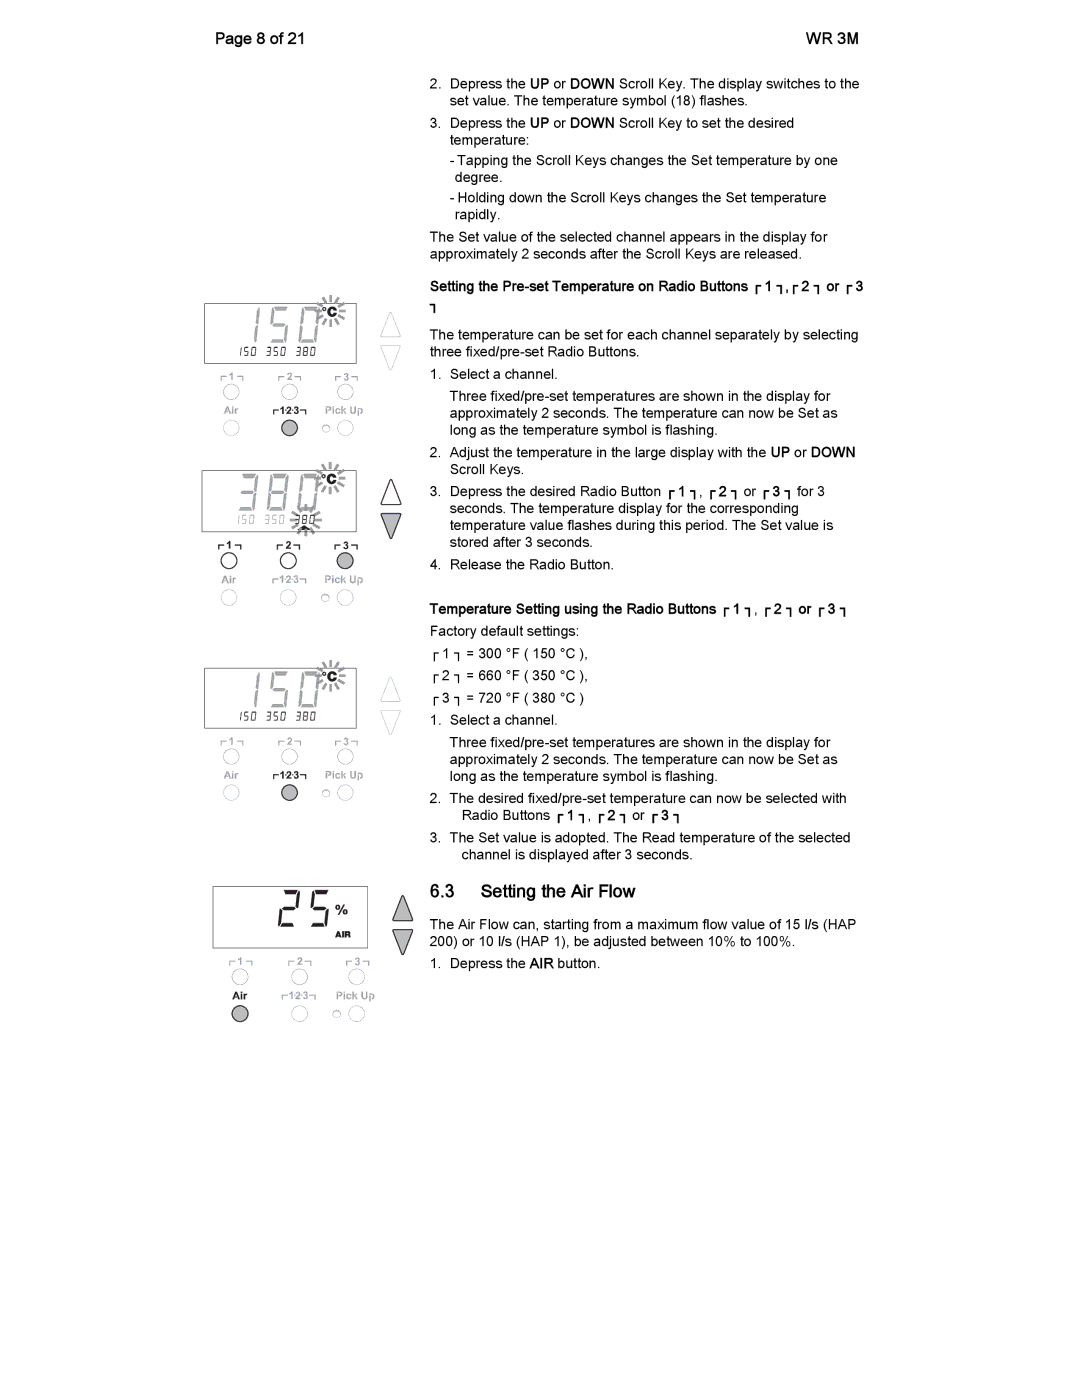
2.Depress the UP or DOWN Scroll Key. The display switches to the set value. The temperature symbol (18) flashes.
3.Depress the UP or DOWN Scroll Key to set the desired temperature:
-Tapping the Scroll Keys changes the Set temperature by one degree.
-Holding down the Scroll Keys changes the Set temperature rapidly.
The Set value of the selected channel appears in the display for approximately 2 seconds after the Scroll Keys are released.
Setting the Pre-set Temperature on Radio Buttons ┌ 1 ┐,┌ 2 ┐ or ┌ 3
┐
The temperature can be set for each channel separately by selecting three
1.Select a channel.
Three
2.Adjust the temperature in the large display with the UP or DOWN Scroll Keys.
3.Depress the desired Radio Button ┌ 1 ┐, ┌ 2 ┐ or ┌ 3 ┐ for 3 seconds. The temperature display for the corresponding temperature value flashes during this period. The Set value is stored after 3 seconds.
4.Release the Radio Button.
Temperature Setting using the Radio Buttons ┌ 1 ┐, ┌ 2 ┐ or ┌ 3 ┐
Factory default settings:
┌1 ┐ = 300 °F ( 150 °C ),
┌2 ┐ = 660 °F ( 350 °C ),
┌3 ┐ = 720 °F ( 380 °C )
1. Select a channel.
Three
2.The desired
3.The Set value is adopted. The Read temperature of the selected channel is displayed after 3 seconds.
6.3Setting the Air Flow
The Air Flow can, starting from a maximum flow value of 15 l/s (HAP
200)or 10 l/s (HAP 1), be adjusted between 10% to 100%. 1. Depress the AIR button.
