Contents
Sears, Roebuck and Co., Hoffman Estates, lL 60179 USA
Operator’s Manual
Warranty
Table of Contents
Motor
Product Specifications
Blade Size
Rotating Table
Support and Clamp Work
Symbols
Prohibition
Always Wear EYE
Power Tool Safety
General Safety Instructions Before Using this Power Tool
DANGER
Specific Safety Instructions for this Compound Miter SAW
Compound Miter SAW Safety
Page
Double Insulated
Power Supply and Motor Specifications
Motor Safety Protection Important
Minimum Gauge for Extension Cords AWG
Guidelines for Extension Cords
Accessories
Accessories and Attachments
Recommended Accessories
Combination Square Must be True
Tools Needed for Assembly
Supplied Not supplied
Carton Contents
Know Your Sliding Compound Miter SAW
Glossary of Terms
Revolutions PER Minute RPM
Woodworking Terms
Installing the Support Bracket FIG. a
Assembly and Adjustments
Installing the Miter Handle FIG. B
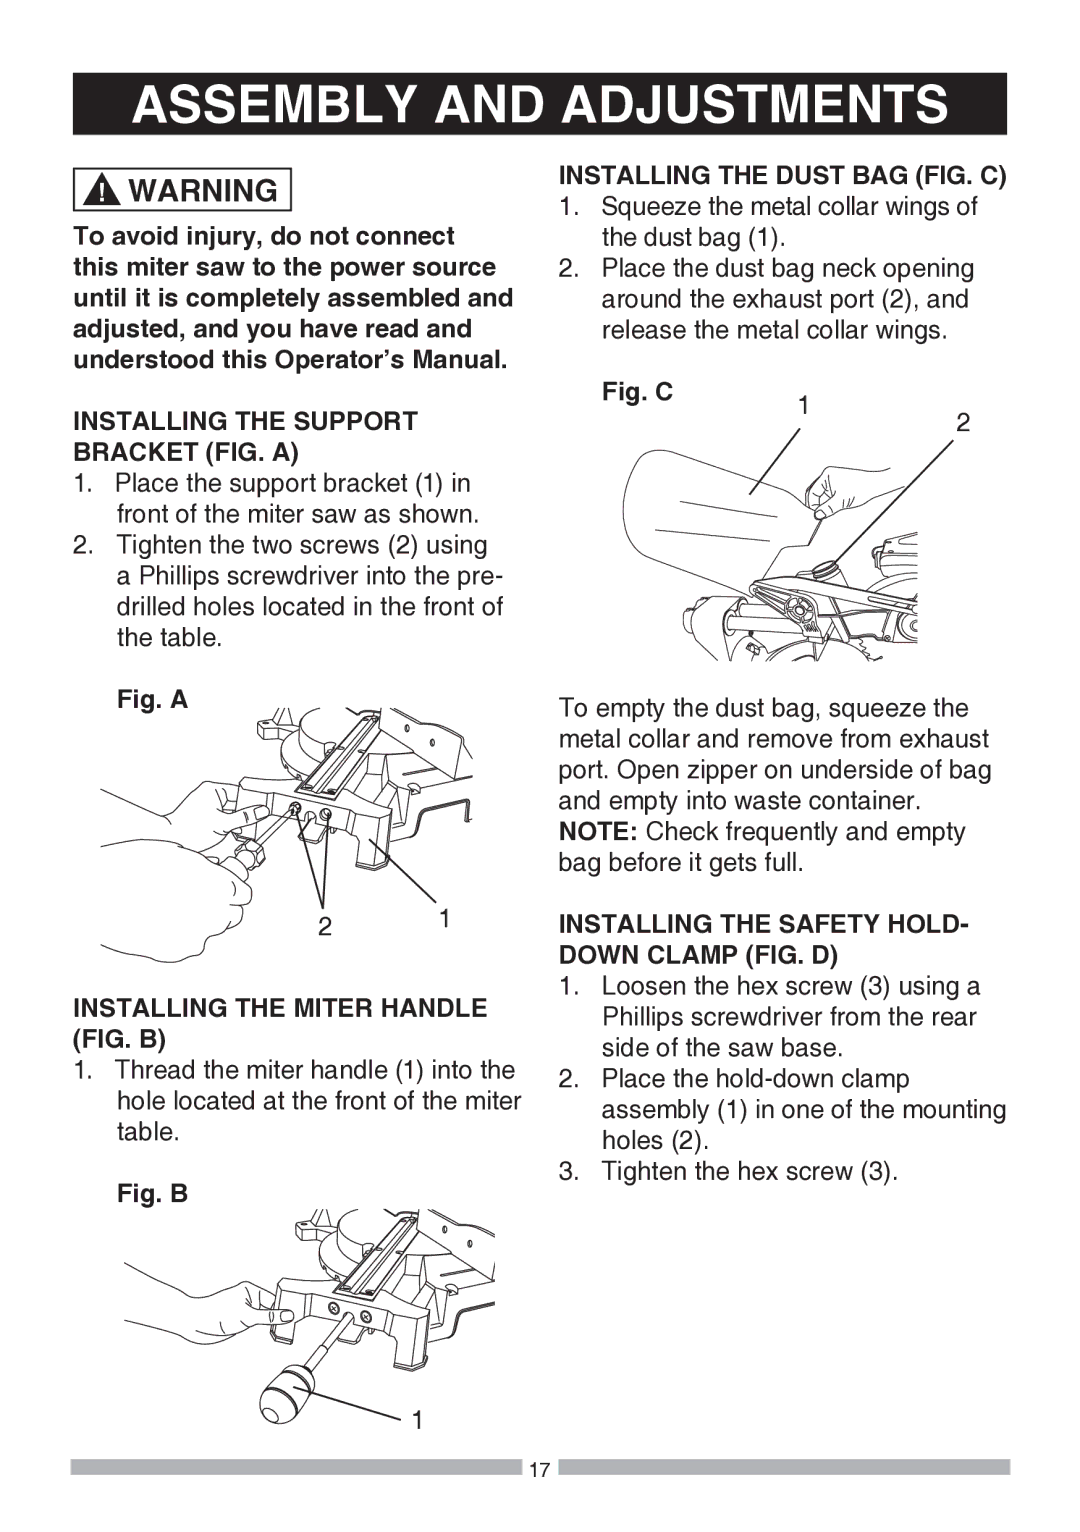
Installing the Dust BAG FIG. C
Unlocking the Slide Carriage FIG. F
SAW Blade Wrench FIG. E
Releasing Cutting Head FIG. G
Mounting the Miter SAW FIG. I, J
Removing and Installing the Table Insert FIG. H
Blade
Removing or Installing
Un-plug the miter saw before changing/installing the blade
Installing Blade FIG. K, L, M
Avoid Direct EYE Contact
Laser Guide FIG. N
Laser Beam
Fig. O Bevel Pointer Adjustment Fig. P
Bevel Stop Adjustments FIG. O, P, Q
Adjusting Fence Squareness FIG. S
Miter Angle Adjustment FIG. R
Miter Scale Indicator Adjustment FIG. R
Fig. S
Adjusting Cutting Depth FIG. T
Requirements and Safety Before Each USE Inspect Your SAW
Assembly and Adjustments
Troubleshooting Guide for adjustment if necessary
Operation
Inspect Your Workpiece
Dress for Safety
Plan Your Work
Do not OVER-REACH
When SAW is Running
Never cut freehand
USE Extra Caution with Large or ODD Shaped Workpieces
Finishing a cut
Body and Hand Position FIG. U
Before freeing jammed material
Basic SAW Operations
Before Leaving the SAW
Sliding Carriage System FIG. W
Miter CUT FIG
Compound CUT FIG. Z
Bevel CUT FIG. Y
Rough Cutting a Dado FIG. CC
To Slide Cut Wide Boards Fig. AA
Cutting Bowed Material FIG. BB
Fig. CC
Cutting Crown Molding FIG. GG, HH
Bevel/Miter Settings
Only When the Angle Between the Walls Equals
Inside corner-Left side
KEY Bevel Miter Type of CUT Setting
Inside corner-Right side
Outside corner-Left side
Crown Molding Chart
Maintenance
Maintenance
Replacing Carbon Brushes FIG
Lower Blade Guard
Sawdust
Debris from entering eyes when Removing sawdust from unit
Wear proper eye protection to keep
Lubrication FIG. JJ, KK
Troubleshooting Guide
EYE Protection
Parts List for SAW Schematic
Parts List
4 in. Compound Miter SAW Model no
Schematic
Description Size Qty
Parts List for Motor
SU-HOGAR R
Sears Parts & Repair Service Center
LE-FOYER MC