TO REMOVE/REPLACETHETHROATPLATE
See Figure 10.
[] Lower the blade by turning the height/bevel adjusting handwheel counterclockwise.
[] To remove the throat plate, place your index finger in the hole and lift the front end pulling the throat plate out toward the front of the saw.
[] To reinstall the throat plate, slip the tab into the slot at the back of the saw and push down to secure in place.
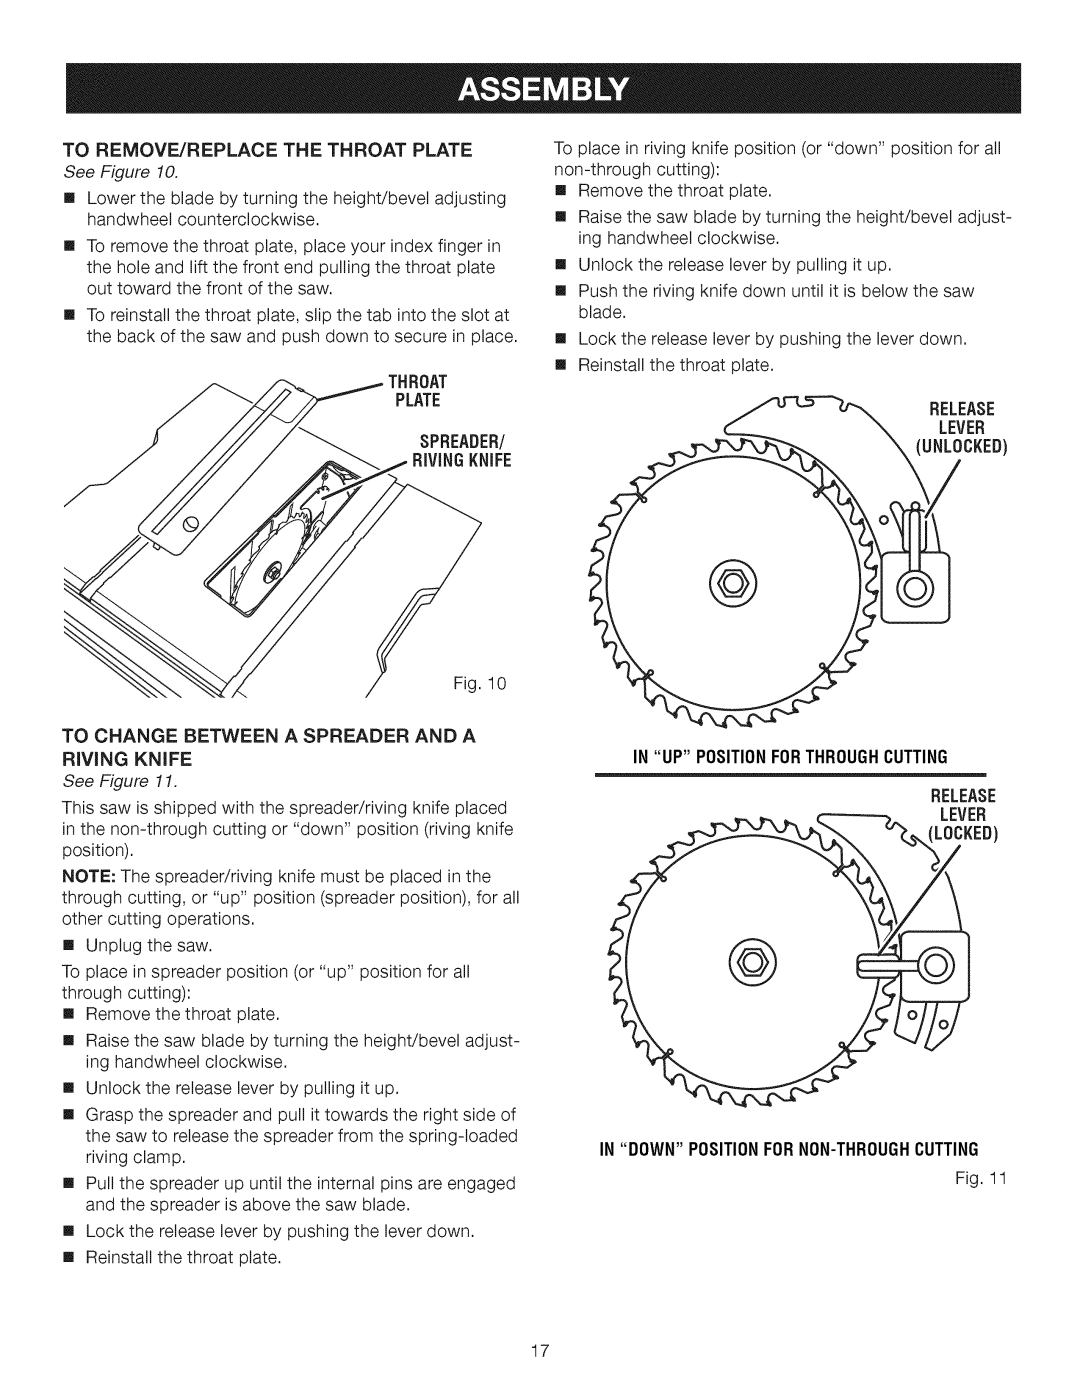
PLATE
SPREADER/
RiViNG KNIFE
10
TO CHANGE BETWEEN A SPREADER AND A RIVING KNIFE
See Figure 11.
This saw is shipped with the spreader/riving knife placed in the
NOTE: The spreader/riving knife must be placed in the through cutting, or "up" position (spreader position), for all other cutting operations.
[] Unplug the saw.
To place in spreader position (or "up" position for all through cutting):
[] Remove the throat plate.
[] Raise the saw blade by turning the height/bevel adjust- ing handwheel clockwise.
[] Unlock the release lever by pulling it up.
[] Grasp the spreader and pull it towards the right side of the saw to release the spreader from the
[] Pull the spreader up until the internal pins are engaged and the spreader is above the saw blade.
[] Lock the release lever by pushing the lever down.
[] Reinstall the throat plate.
To place in riving knife position (or "down" position for all
[] Remove the throat plate.
[] Raise the saw blade by turning the height/bevel adjust- ing handwheel clockwise.
[] Unlock the release lever by pulling it up.
[] Push the riving knife down until it is below the saw blade.
[] Lock the release lever by pushing the lever down.
[] Reinstall the throat plate.
_(URELEASE
LEVER
NLOCKED)
IN "UP" POSITIONFORTHROUGHCUTTING
RELEASE
LEVER
IN "DOWN" POSITIONFOR
Fig. 11
17