ATTACHING THE LEGS TO THE TABLE TOP
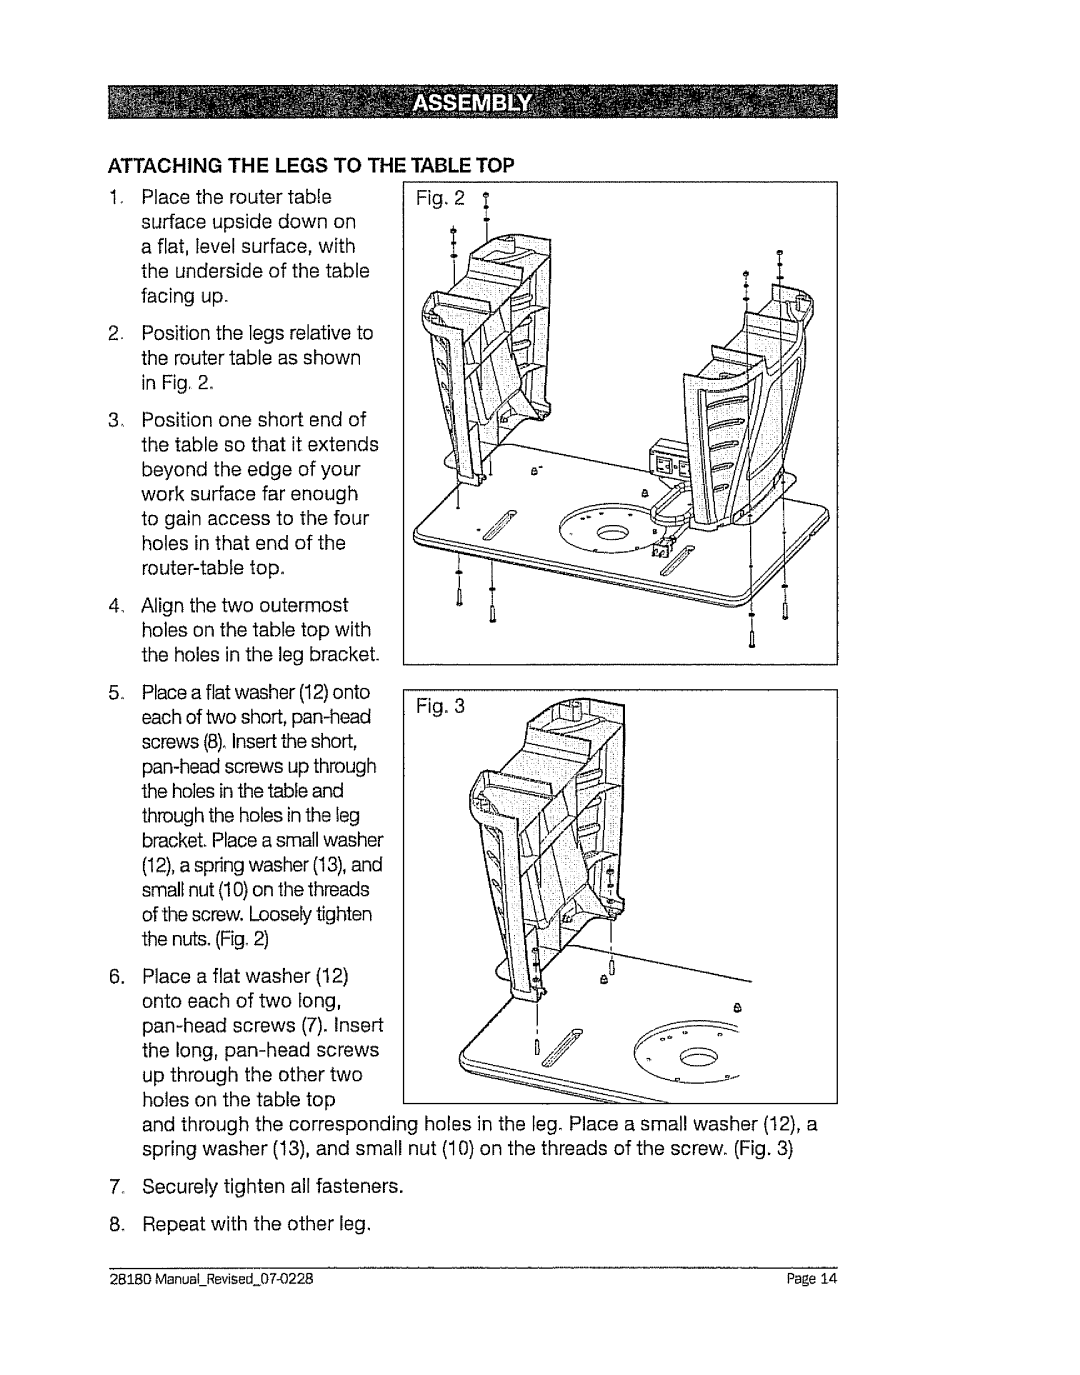
. Place the router tableFig, 2 surface upside down on
a flat, level surface, with the underside of the table
facing up.
,Position the legs relative to the router table as shown
in Fig, 2.
3_ Position one short end of the table so that it extends beyond the edge of your work surface far enough
to gain access to the four holes in that end of the
,Align the two outermost holes on the table top with the holes in the leg bracket.
. | Place a flat washer (12) onto |
| each of two short, |
| screws (8),Insert the short, |
| |
| the holes in the table and |
| through the holes in the leg |
| brackeL Place a small washer |
| (12). a spring washer (13), and |
| small nut (10) on the threads |
| of the screw. Loosely tighten |
| the nuts. (Fig. 2) |
,Place a flat washer (12) onto each of two long,
and through the corresponding holes in the leg. Place a small washer (12), a spring washer (13). and small nut (10) on the threads of the screw. (Fig. 3)
7.Securely tighten all fasteners.
8.Repeat with the other leg,
28180 ManuaLRevisad_074:)228 | Page 14 |