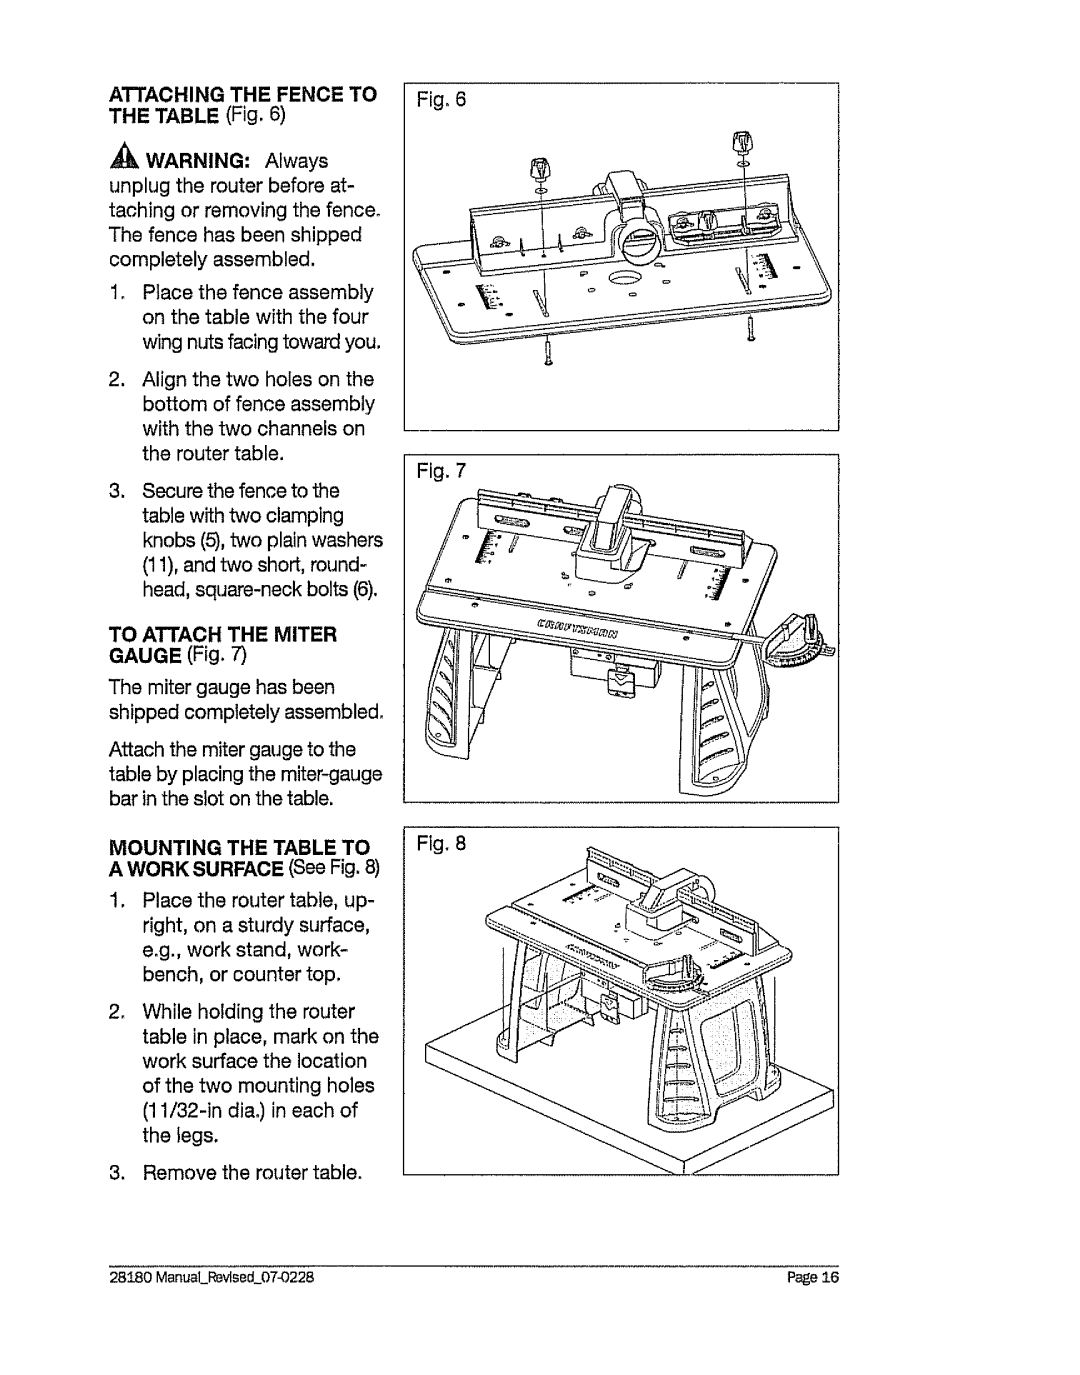
ATTACHING THE FENCE TO Fig. 6 THE TABLE (Fig. 6)
,_ WARNING" Always unplug the router before at- taching or removing the fence° The fence has been shipped completely assembled.
1.Place the fence assembly on the table with the four
wing nuts facing toward you.
=Align the two holes on the bottom of fence assembly with the two channels on the router table.
Fig. 7
3_ Secure the fence to the table with two clamping knobs (5), two plain washers (11), and two short, round- head,
TO ATTACH THE MITER
GAUGE (Fig. 7)
The miter gauge has been shipped completely assembled.
Attach the miter gauge to the table by placing the
MOUNTING THE TABLE TO Fig. 8 A WORK SURFACE (See Fig. 8)
1.Place the router table, up- right, on a sturdy surface, e.g., work stand, work- bench, or counter top.
. While holding the router table in place, mark on the work surface the location of the two mounting holes
3.Remove the router table.
28180 ManuaLRevlsed_07_9228 | Page 16 |