ADJUSTING THE FENCE
The fence enables you to sup- port and guide the work piece,.
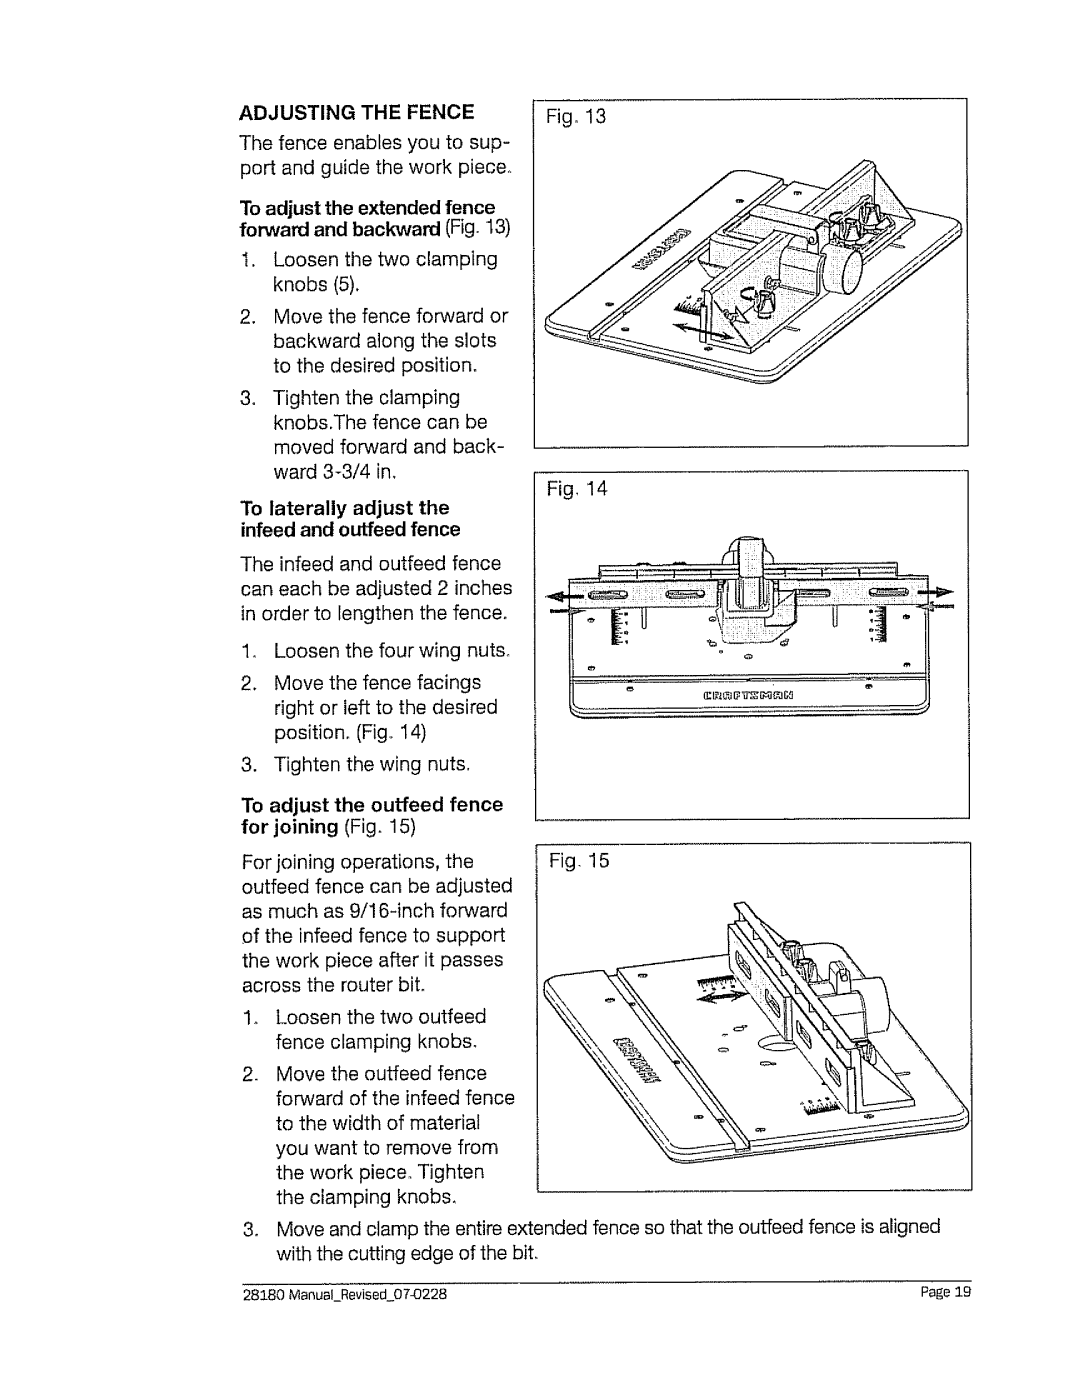
To adjust the extended fence forward and backward (Fig, 13)
1.Loosen the two clamping knobs (5).
2.Move the fence forward or backward along the slots to the desired position,
3, Tighten the clamping knobs.The fence can be moved forward and back- ward
Fig_ 13
Fig, 'I 4
To laterally adjust the infeed and ouffeed fence
The infeed and outfeed fence can each be adjusted 2 inches in order to lengthen the fence°
1.Loosen the four wing nut&
2.Move the fence facings right or left to the desired position. (Fig° 14)
3.Tighten the wing nuts.
To adjust the outfeed fence for joining (Fig. 15)
For joining operations, the Fig. 15 outfeed fence can be adjusted
as much as
°Loosen the two outfeed fence clamping knobs.
2_ Move the outfeed fence forward of the infeed fence to the width of material you want to remove from the work piece. Tighten the clamping knobs.
3_ Move and clamp the entire extended fence so that the outfeed fence is aligned with the cutting edge of the bit.
28180 ManuaLRevised 07.0228 | Page 19 |