EURO 25 | 15 |
INSTALLATION INSTRUCTIONS - Continued
GLASS DOOR
WARNING: Glass door is fragile. Do not strike or abuse glass. Do not operate appliance with broken glass. Do not attempt to fix a broken glass door. It must be replaced with an identical one from the manufacturer. Do not attempt to remove the glass door when the appliance is hot.
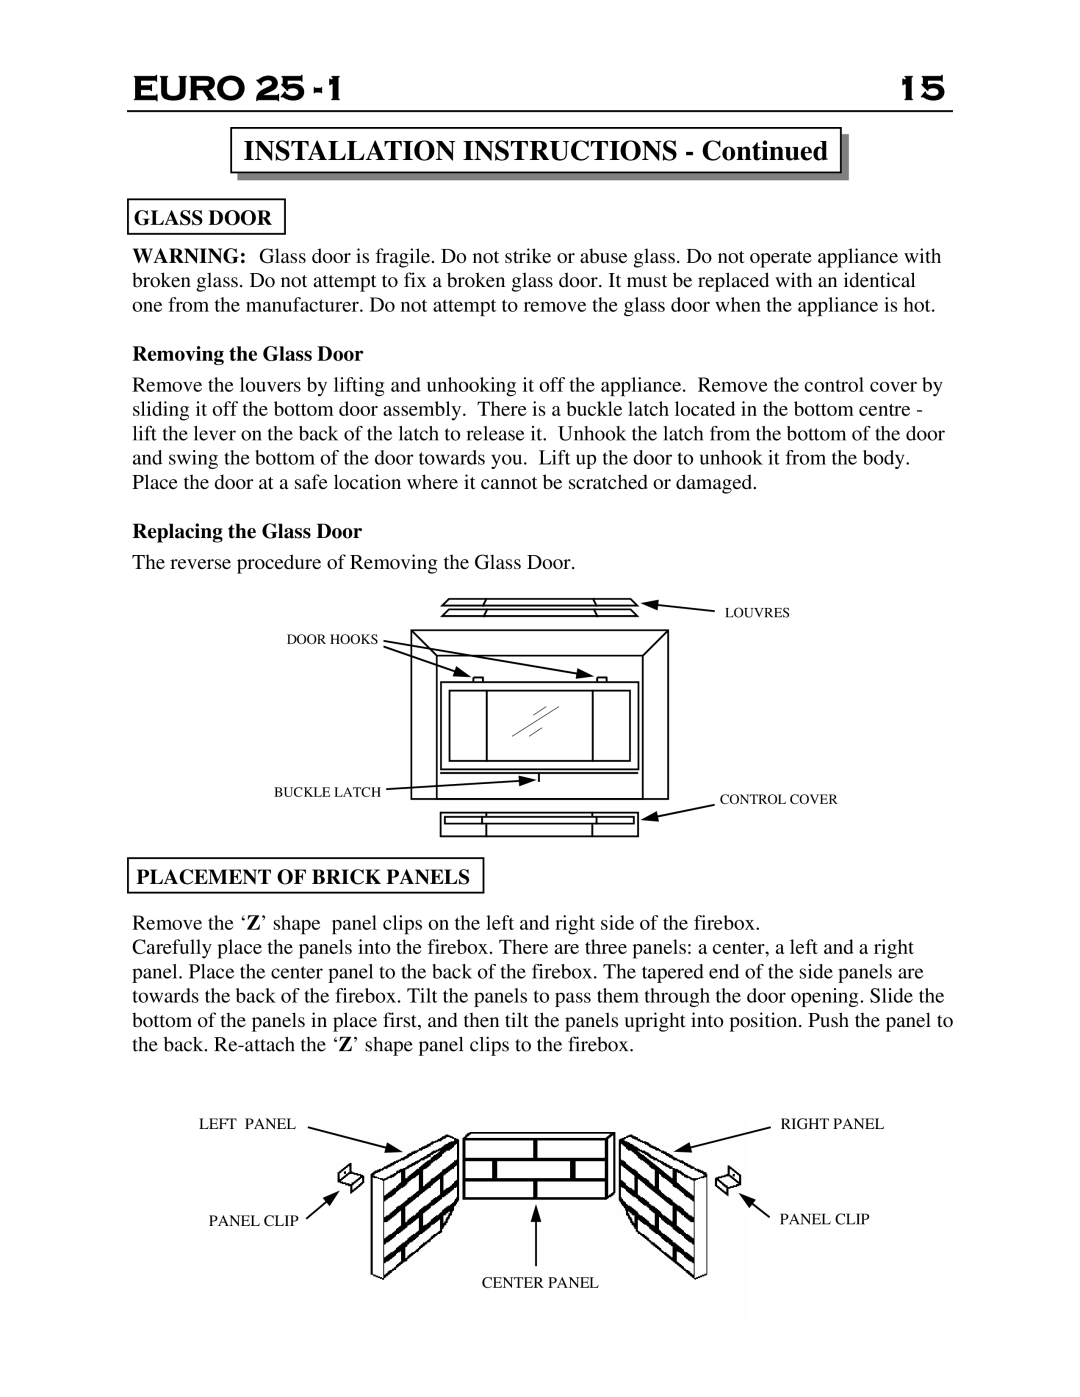
Removing the Glass Door
Remove the louvers by lifting and unhooking it off the appliance. Remove the control cover by sliding it off the bottom door assembly. There is a buckle latch located in the bottom centre - lift the lever on the back of the latch to release it. Unhook the latch from the bottom of the door and swing the bottom of the door towards you. Lift up the door to unhook it from the body. Place the door at a safe location where it cannot be scratched or damaged.
Replacing the Glass Door
The reverse procedure of Removing the Glass Door.
LOUVRES
DOOR HOOKS
BUCKLE LATCH | CONTROL COVER |
|
PLACEMENT OF BRICK PANELS
Remove the ‘Z’ shape panel clips on the left and right side of the firebox.
Carefully place the panels into the firebox. There are three panels: a center, a left and a right panel. Place the center panel to the back of the firebox. The tapered end of the side panels are towards the back of the firebox. Tilt the panels to pass them through the door opening. Slide the bottom of the panels in place first, and then tilt the panels upright into position. Push the panel to the back.
LEFT PANEL | RIGHT PANEL |
PANEL CLIP | PANEL CLIP |
CENTER PANEL