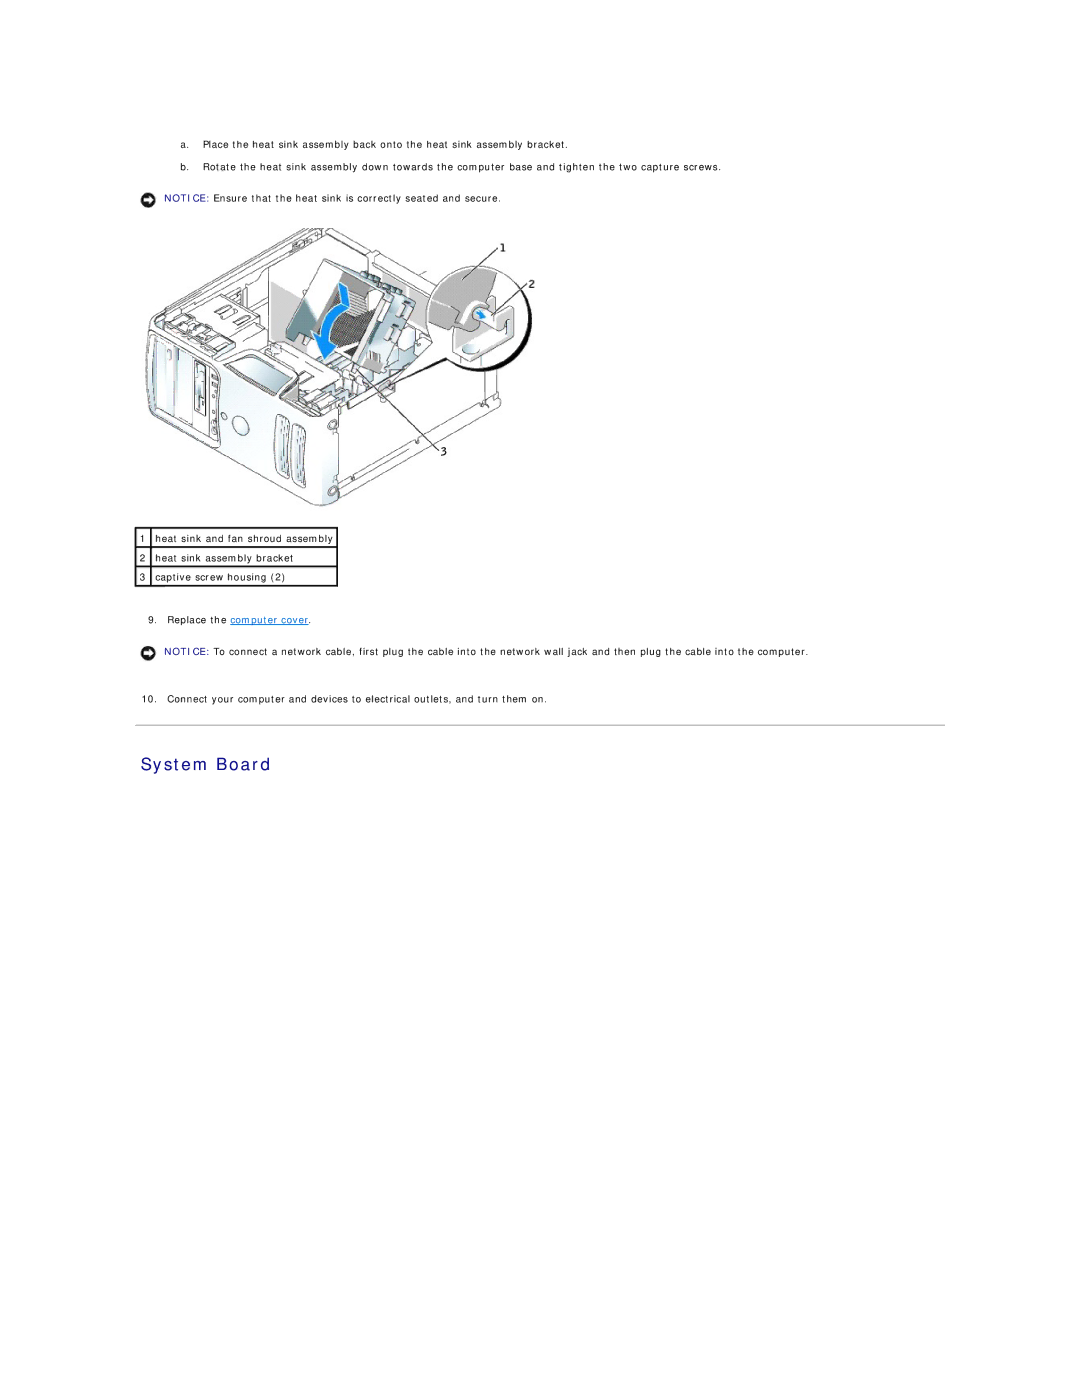
a.Place the heat sink assembly back onto the heat sink assembly bracket.
b.Rotate the heat sink assembly down towards the computer base and tighten the two capture screws.
NOTICE: Ensure that the heat sink is correctly seated and secure.
1heat sink and fan shroud assembly
2heat sink assembly bracket
3captive screw housing (2)
9.Replace the computer cover.
NOTICE: To connect a network cable, first plug the cable into the network wall jack and then plug the cable into the computer.
10. Connect your computer and devices to electrical outlets, and turn them on.