Removing and Installing Parts: Dell Dimension E520 Service Manual
CD/DVD Drive
CAUTION: Before you begin any of the procedures in this section, follow the safety instructions located in the Product Information Guide.
CAUTION: To guard against electrical shock, always unplug your computer from the electrical outlet before removing the cover.
Removing a CD/DVD Drive
1.Follow the procedures in Before You Begin.
2.Remove the computer cover (see Removing the Computer Cover).
3.Remove the drive panel (see Removing the Drive Panel).
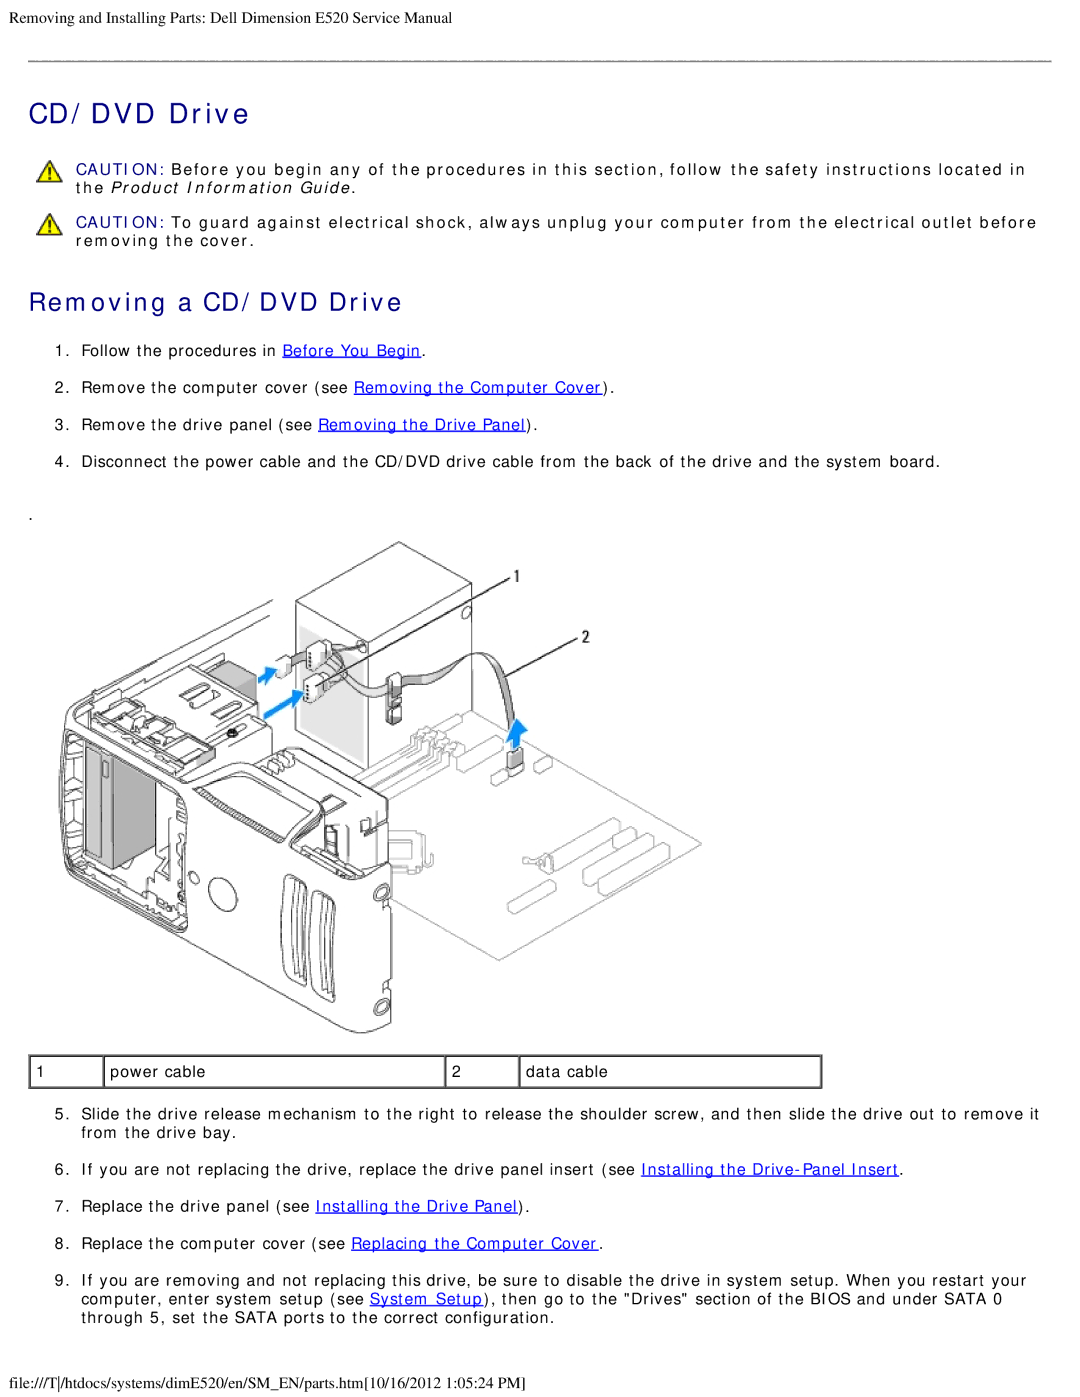
4.Disconnect the power cable and the CD/DVD drive cable from the back of the drive and the system board.
.
1 | power cable | 2 | data cable |
5.Slide the drive release mechanism to the right to release the shoulder screw, and then slide the drive out to remove it from the drive bay.
6.If you are not replacing the drive, replace the drive panel insert (see Installing the
7.Replace the drive panel (see Installing the Drive Panel).
8.Replace the computer cover (see Replacing the Computer Cover.
9.If you are removing and not replacing this drive, be sure to disable the drive in system setup. When you restart your computer, enter system setup (see System Setup), then go to the "Drives" section of the BIOS and under SATA 0 through 5, set the SATA ports to the correct configuration.
file:///T/htdocs/systems/dimE520/en/SM_EN/parts.htm[10/16/2012 1:05:24 PM]
