Installing the Display Assembly
1.Install the screws that secure the display assembly in place.
2.Insert the
3.Route the LVDS cable along its compartment and connect the connector to the system board.
4.Connect the antenna cables to their connectors.
5.Install :
a)palmrest
b)right access panel
c)optical drive
d)keyboard
e)keyboard trim
f)access panel
g)battery
h)SD memory card
6.Follow the procedures in After Working Inside Your Computer.
Removing the Right Support Frame
1.Follow the procedures in Before Working Inside Your Computer.
2.Remove:
a)SD memory card
b)battery
c)access panel
d)keyboard trim
e)optical drive
f)hard drive
g)right base panel
h)palmrest
i)display assembly
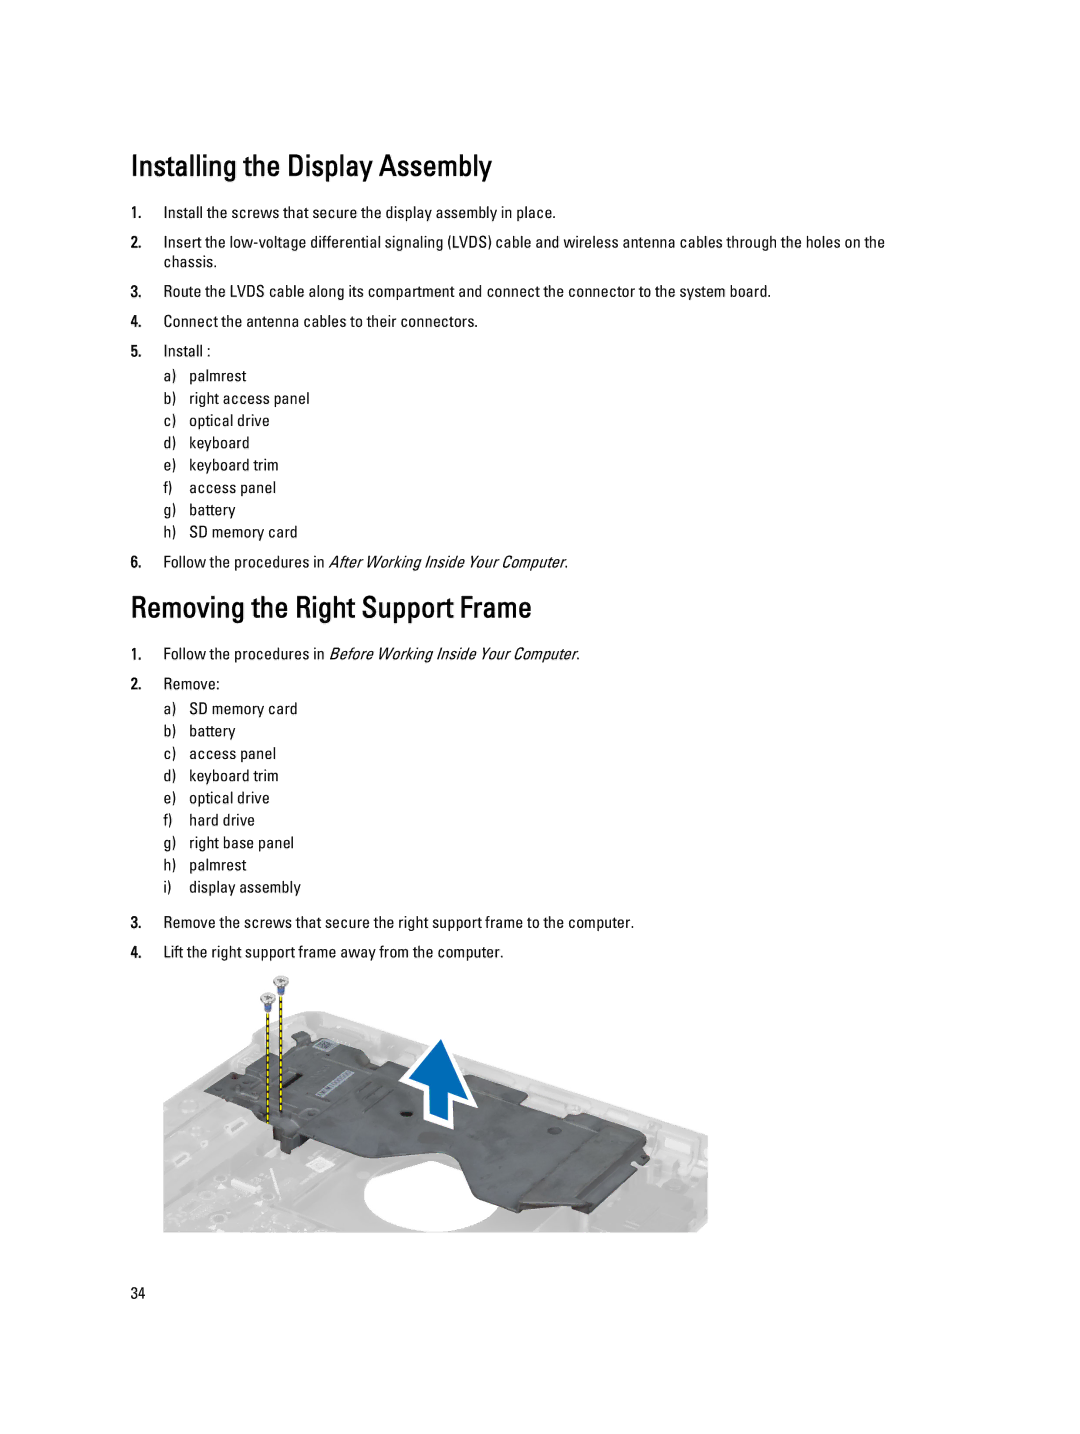
3.Remove the screws that secure the right support frame to the computer.
4.Lift the right support frame away from the computer.
34