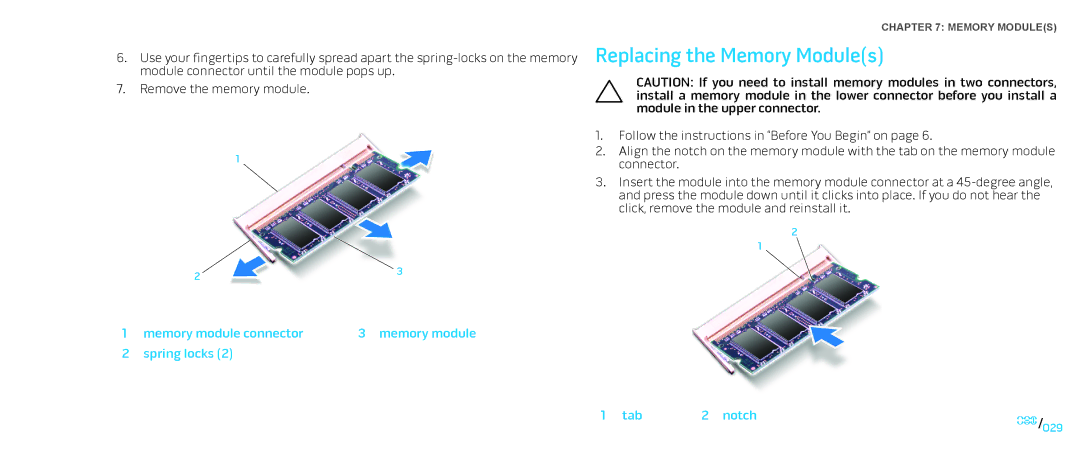
6.Use your fingertips to carefully spread apart the
7.Remove the memory module.
1
2 | 3 |
|
CHAPTER 7: MEMORY MODULE(S)
Replacing the Memory Module(s)
CAUTION: If you need to install memory modules in two connectors, install a memory module in the lower connector before you install a module in the upper connector.
1.Follow the instructions in “Before You Begin” on page 6.
2.Align the notch on the memory module with the tab on the memory module connector.
3.Insert the module into the memory module connector at a
2
1
1 | memory module connector | 3 memory module |
2 | spring locks (2) |
|
1 tab | 2 notch | 029/ |
|
| |
|
| 029 |