CHAPTER 9: KEYBOARD
Removing the Keyboard
1. | Follow the instructions in “Before You Begin” on page 6. |
|
2. | Remove the battery pack (see “Removing the Battery Pack” on page 11). |
|
3. | Remove the compartment door (see “Removing the Compartment Door” on |
|
| page 14). |
|
4. | Remove the center control cover (see “Removing the Center Control Cover” |
|
| on page 33). |
|
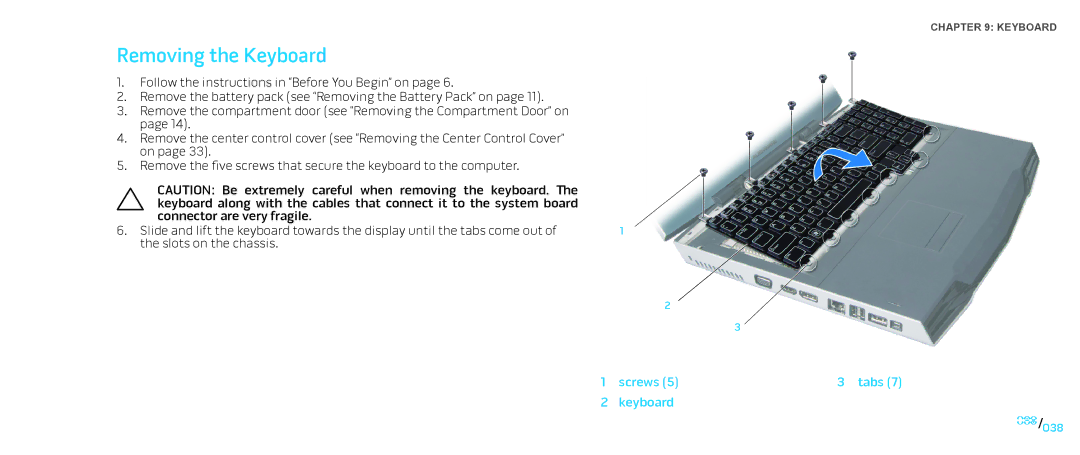
5. | Remove the five screws that secure the keyboard to the computer. |
|
| CAUTION: Be extremely careful when removing the keyboard. The |
|
| keyboard along with the cables that connect it to the system board |
|
| connector are very fragile. |
|
6. | Slide and lift the keyboard towards the display until the tabs come out of | 1 |
| the slots on the chassis. |
|
2
3
1 | screws (5) | 3 tabs (7) |
2 | keyboard |
|
038/038
