Removing the Optical Drive
1.Follow the instructions in “Before You Begin” on page 6.
2.Remove the battery pack (see “Removing the Battery Pack” on page 11).
3.Remove the compartment door (see “Removing the Compartment Door” on page 14).
4.Remove the center control cover (see “Removing the Center Control Cover” on page 33).
5.Remove the keyboard (see “Removing the Keyboard” on page 38).
6.Remove the palm rest (see “Removing the Palm Rest” on page 42).
7.Remove the left and right brackets (see “Removing the Brackets” on page 47).
8.Remove the magnesium cover (see “Removing the Magnesium Cover” on page 50).
9.Remove the input/output board (see “Removing the Input/Output Board” on page 64).
CHAPTER 15: OPTICAL DRIVE
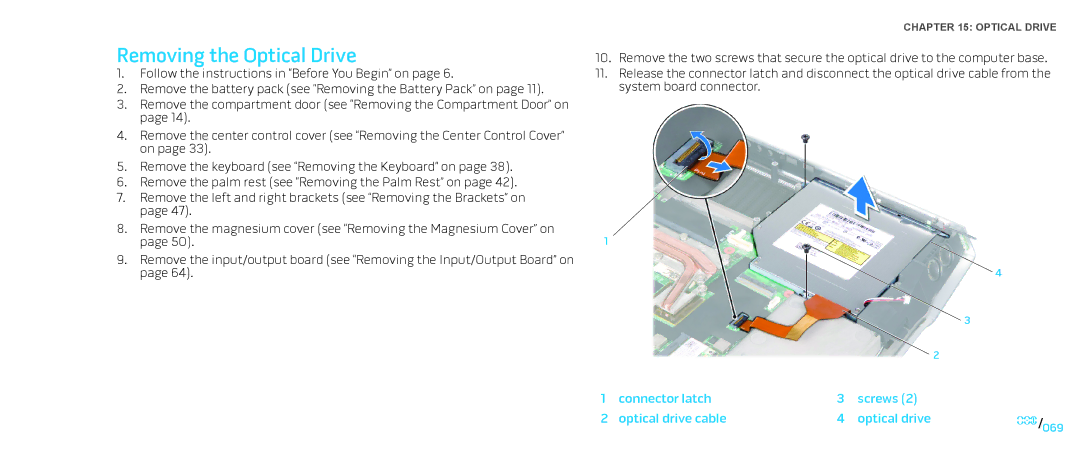
10.Remove the two screws that secure the optical drive to the computer base.
11.Release the connector latch and disconnect the optical drive cable from the system board connector.
1
4
|
|
|
| 3 |
|
|
|
| 2 |
1 | connector latch | 3 | screws (2) |
|
2 | optical drive cable | 4 | optical drive | 069/ |
|
|
|
| 069 |