ASSEMBLY
![]() To reduce the risk of injury, turn unit off and disconnect it from power source before installing and removing accessories, before adjusting or when making repairs. An accidental
To reduce the risk of injury, turn unit off and disconnect it from power source before installing and removing accessories, before adjusting or when making repairs. An accidental
ATTACHING LEGS TO THE EXTENSION TABLE
1.Lay the extension table upside down on the floor or on a bench.
NOTE: Lay the table on a blanket or piece of cardboard to protect the table surface.
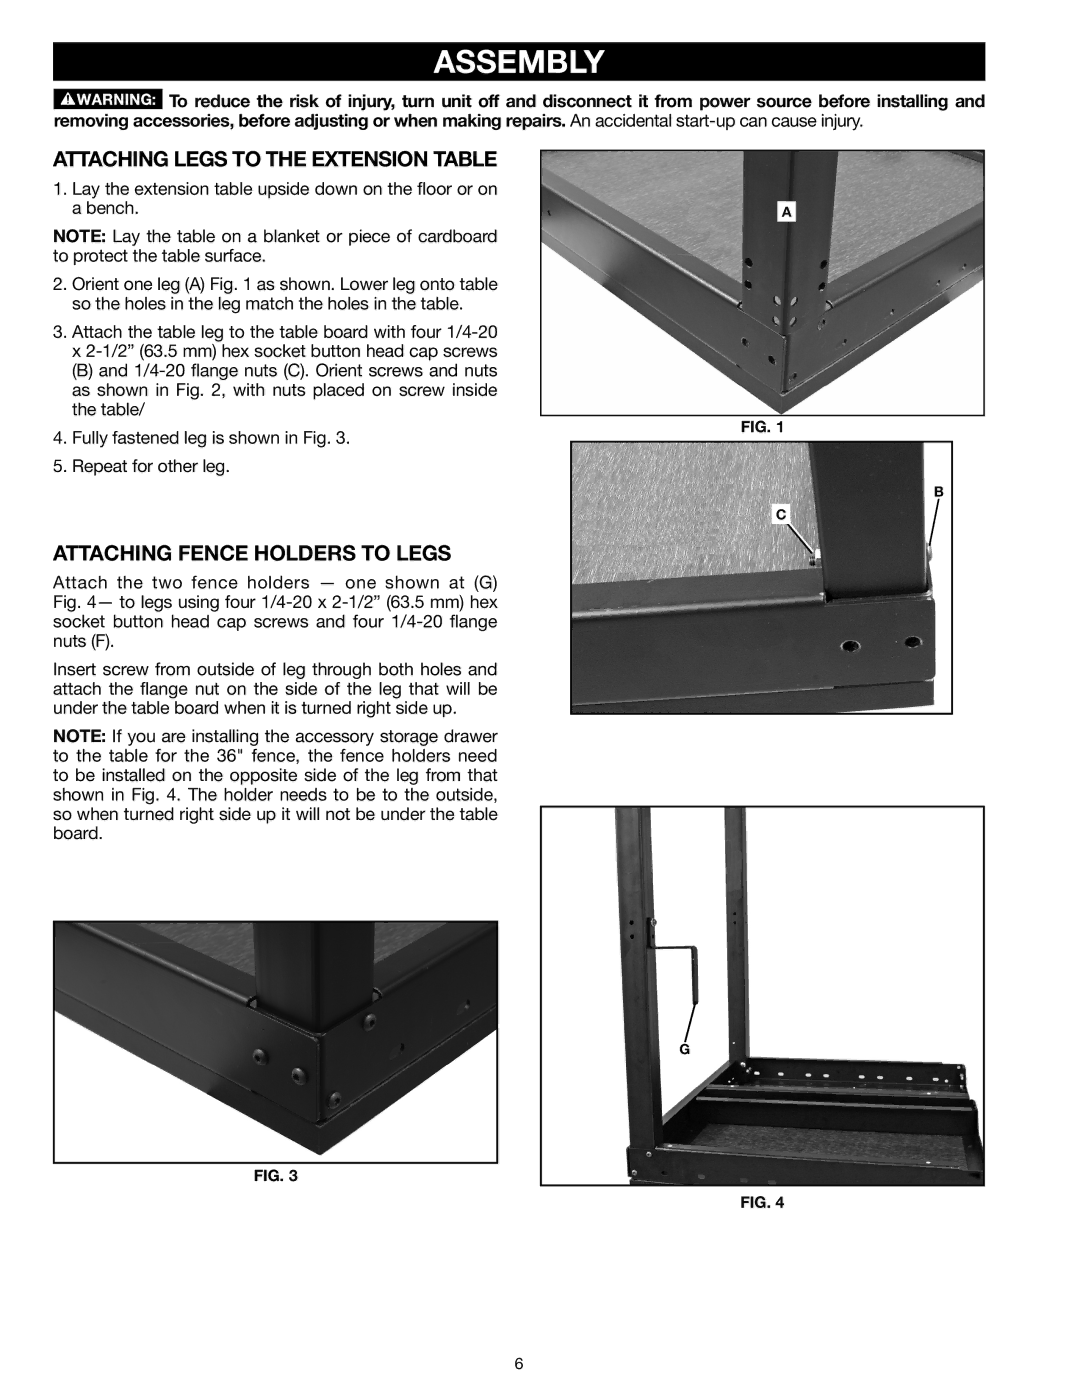
2.Orient one leg (A) Fig. 1 as shown. Lower leg onto table so the holes in the leg match the holes in the table.
3.Attach the table leg to the table board with four
(B) and
4.Fully fastened leg is shown in Fig. 3.
5.Repeat for other leg.
ATTACHING FENCE HOLDERS TO LEGS
Attach the two fence holders — one shown at (G) Fig. 4— to legs using four
Insert screw from outside of leg through both holes and attach the flange nut on the side of the leg that will be under the table board when it is turned right side up.
NOTE: If you are installing the accessory storage drawer to the table for the 36" fence, the fence holders need to be installed on the opposite side of the leg from that shown in Fig. 4. The holder needs to be to the outside, so when turned right side up it will not be under the table board.
A
Fig. 1
B
C
G
Fig. 3
Fig. 4
6