STAND ASSEMBY AND SET-UP (OPTIONAL)
Tools Required
Philips head screwdriver 4mm Allen wrench
14mm wrench or adjustable wrench
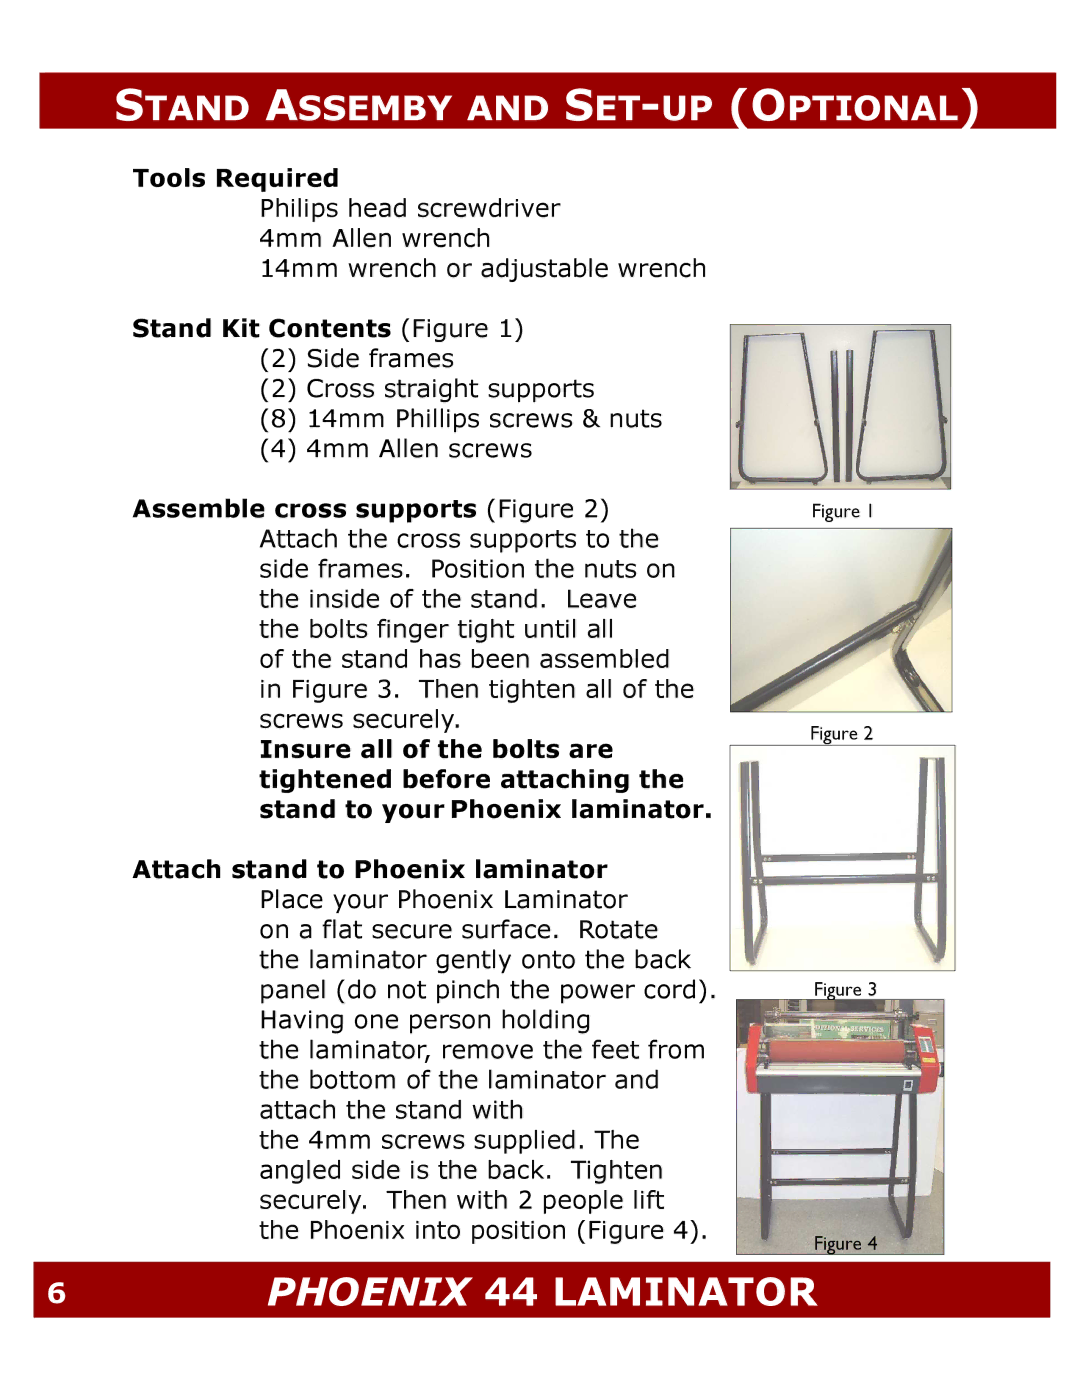
Stand Kit Contents (Figure 1)
(2)Side frames
(2)Cross straight supports
(8)14mm Phillips screws & nuts
(4)4mm Allen screws
Assemble cross supports (Figure 2) Attach the cross supports to the side frames. Position the nuts on the inside of the stand. Leave the bolts finger tight until all
of the stand has been assembled in Figure 3. Then tighten all of the screws securely.
Insure all of the bolts are tightened before attaching the stand to your Phoenix laminator.
Attach stand to Phoenix laminator Place your Phoenix Laminator on a flat secure surface. Rotate the laminator gently onto the back panel (do not pinch the power cord). Having one person holding
the laminator, remove the feet from the bottom of the laminator and attach the stand with
the 4mm screws supplied. The angled side is the back. Tighten securely. Then with 2 people lift the Phoenix into position (Figure 4).
Figure 1
Figure 2
Figure 3
Figure 4
