INSTALLATION
Continued
Pressure Testing Fireplace Gas
Connections
1. Open equipment shutoff valve (see Figure 16, page 15).
2. Open main gas valve located on or near gas meter for natural gas or open propane/LP supply tank valve.
3. Make sure control knob of fireplace is in the OFF position.
4. Check all joints from equipment shutoff valve to gas regulator
5. Correct all leaks at once.
6. Light fireplace (see Operating Fireplace, page
18). Check all other internal joints for leaks.
Receiver
BatteryTerminal
Wires Battery Clip
Figure 20 - Attaching Battery to Receiver
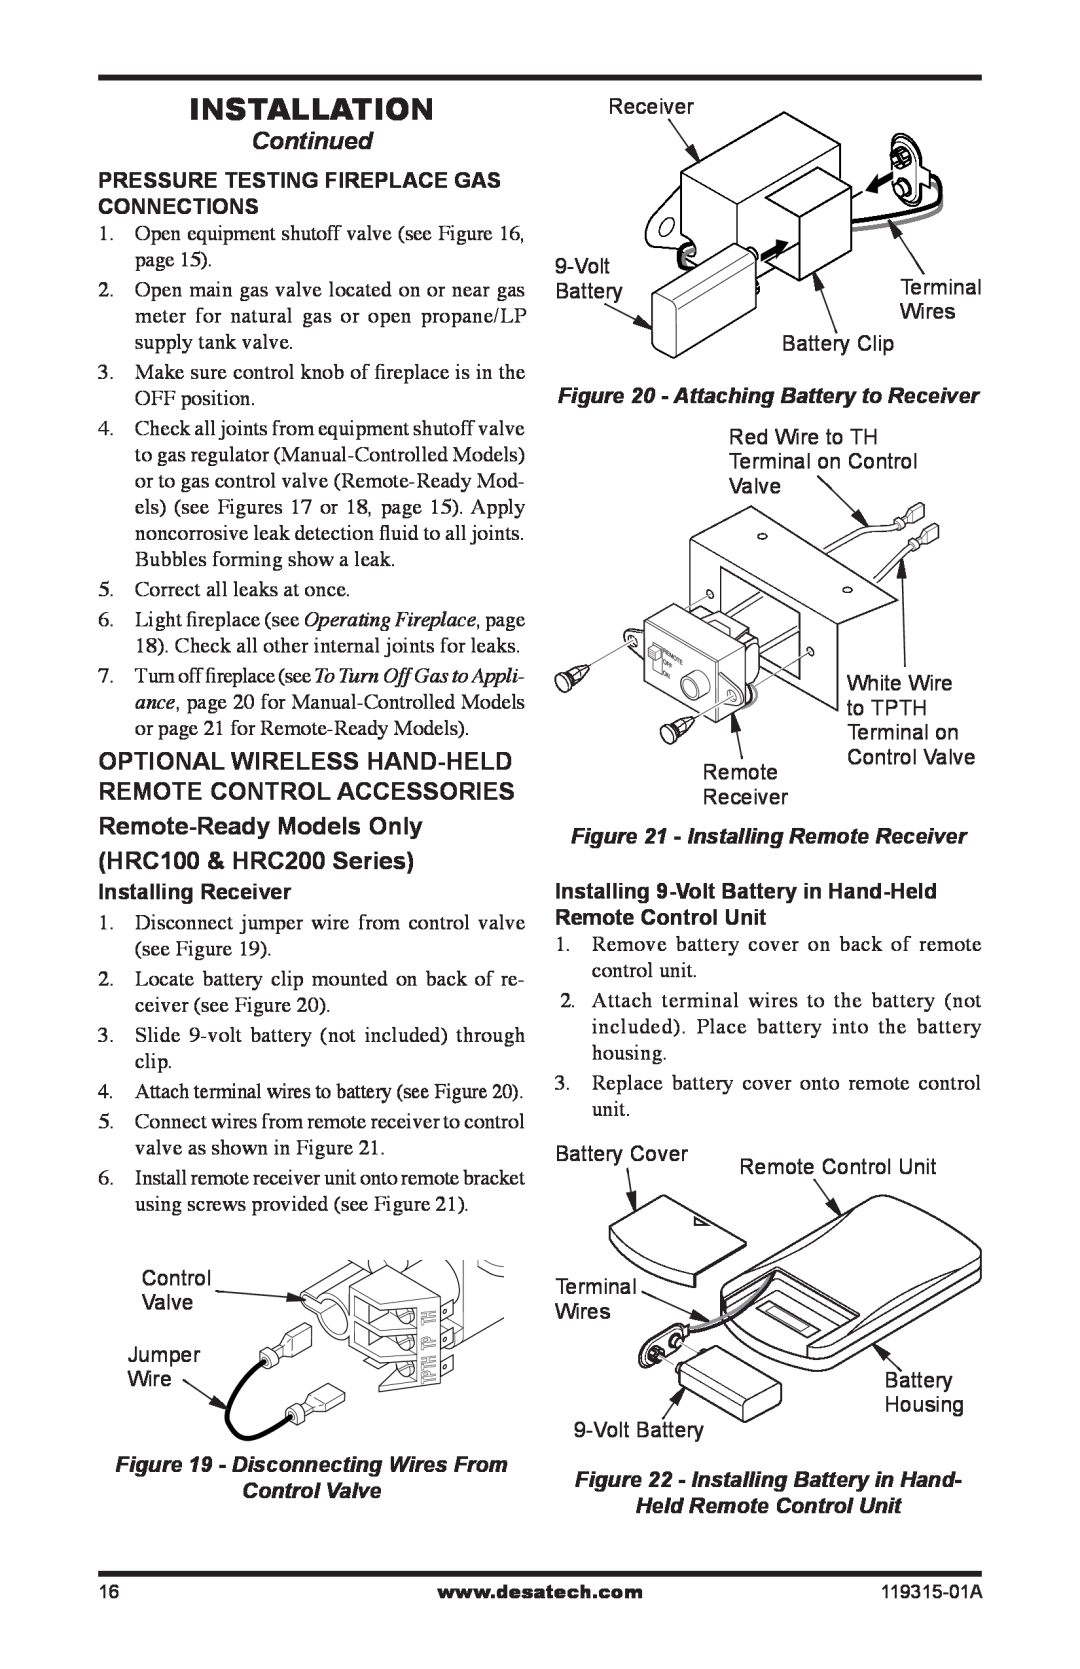
Red Wire to TH
Terminal on Control
Valve
7. Turn off fireplace (see To Turn Off Gas to Appli- ance, page 20 for
OPTIONAL Wireless
Remote Receiver
White Wire to TPTH Terminal on Control Valve
Remote-Ready Models Only
(HRC100 & HRC200 Series)
Installing Receiver
1.Disconnect jumper wire from control valve (see Figure 19).
2.Locate battery clip mounted on back of re- ceiver (see Figure 20).
3.Slide
4.Attach terminal wires to battery (see Figure 20).
5.Connect wires from remote receiver to control valve as shown in Figure 21.
6.Install remote receiver unit onto remote bracket using screws provided (see Figure 21).
Control
Valve
Jumper
Wire
Figure 19 - Disconnecting Wires From
Control Valve
Figure 21 - Installing Remote Receiver
Installing 9-Volt Battery in Hand-Held
Remote Control Unit
1. Remove battery cover on back of remote control unit.
2. Attach terminal wires to the battery (not included). Place battery into the battery housing.
3.Replace battery cover onto remote control unit.
Battery Cover | Remote Control Unit |
|
Terminal
Wires
Battery
Housing
Figure 22 - Installing Battery in Hand-
Held Remote Control Unit
16 | www.desatech.com |