INSTALLING HEATER
Continued
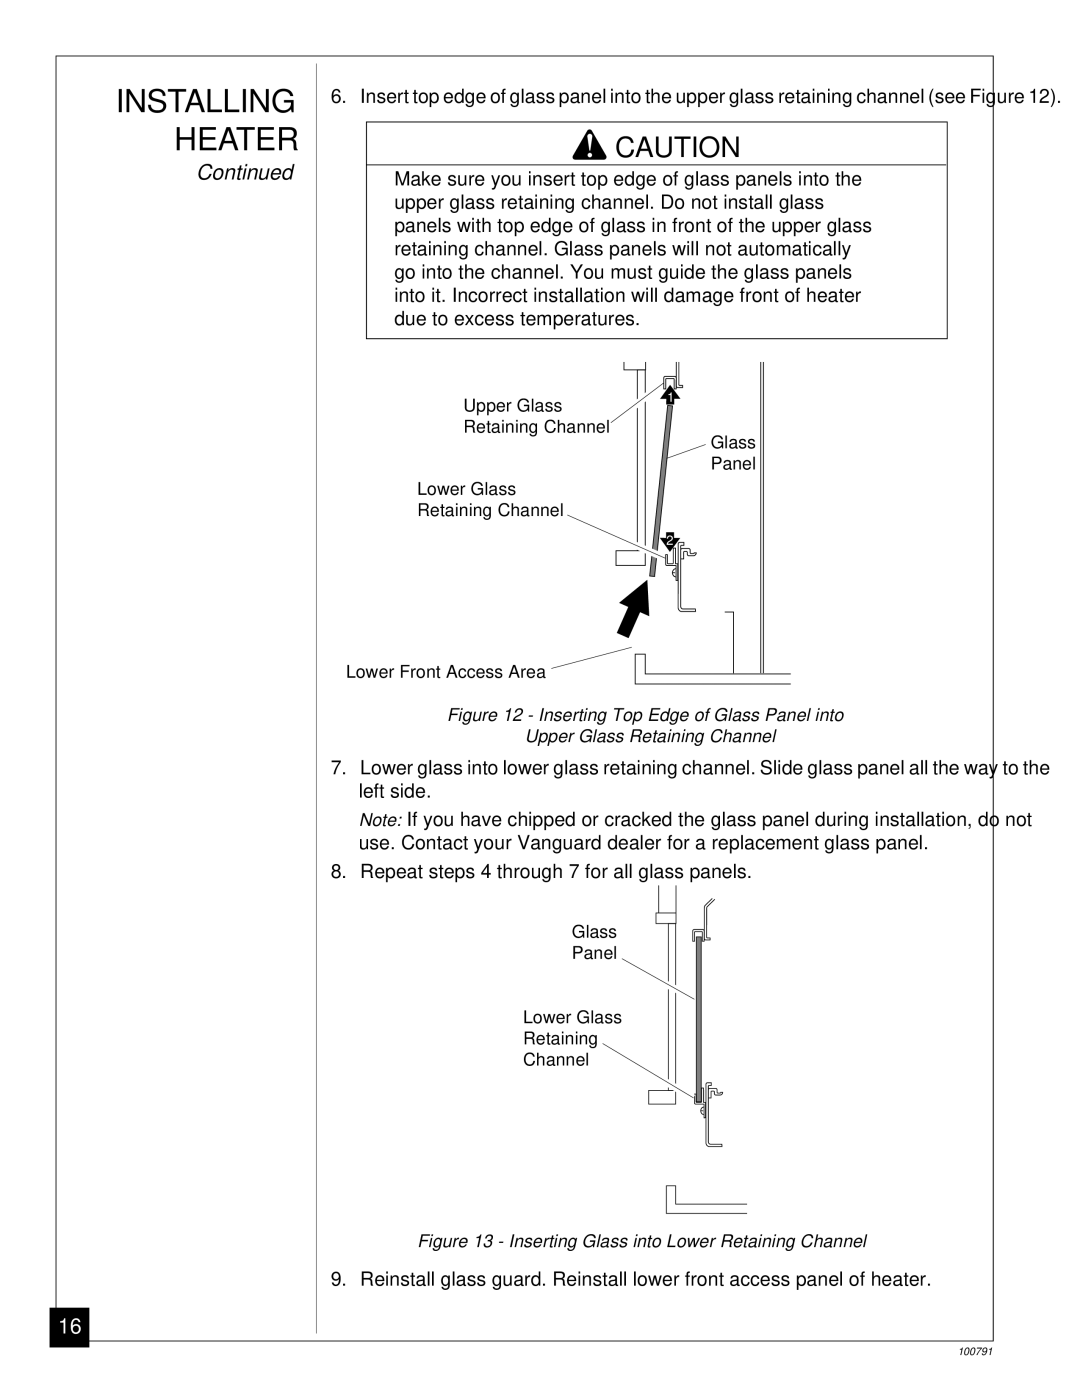
6. Insert top edge of glass panel into the upper glass retaining channel (see Figure 12).
CAUTION
WARNING ICON | G 001 |
Make sure you insert top edge of glass panels into the upper glass retaining channel. Do not install glass panels with top edge of glass in front of the upper glass retaining channel. Glass panels will not automatically go into the channel. You must guide the glass panels into it. Incorrect installation will damage front of heater due to excess temperatures.
Upper Glass
Retaining Channel
Lower Glass
Retaining Channel
Lower Front Access Area
1
Glass
Panel
2
16
Figure 12 - Inserting Top Edge of Glass Panel into
Upper Glass Retaining Channel
7.Lower glass into lower glass retaining channel. Slide glass panel all the way to the left side.
Note: If you have chipped or cracked the glass panel during installation, do not use. Contact your Vanguard dealer for a replacement glass panel.
8.Repeat steps 4 through 7 for all glass panels.
Glass
Panel
Lower Glass
Retaining
Channel
Figure 13 - Inserting Glass into Lower Retaining Channel
9. Reinstall glass guard. Reinstall lower front access panel of heater.
100791