INSTALLation
Continued
![]() CAUTION: This fireplace cre- ates warm air currents. These currents move heat to wall sur- faces next to fireplace. Installing fireplace next to vinyl or cloth wall coverings or operating fireplace where impurities (such as, but not limited to, tobacco smoke, aromatic candles, clean- ing fluids, oil or kerosene lamps, etc.) in the air exist, may discolor walls or cause odors.
CAUTION: This fireplace cre- ates warm air currents. These currents move heat to wall sur- faces next to fireplace. Installing fireplace next to vinyl or cloth wall coverings or operating fireplace where impurities (such as, but not limited to, tobacco smoke, aromatic candles, clean- ing fluids, oil or kerosene lamps, etc.) in the air exist, may discolor walls or cause odors.
IMPORTANT:
Note: When installing fireplace directly on carpet- ing, tile or other combustible material, other than wood flooring, the fireplace shall be installed on a metal or wood panel extending the full width and depth of the fireplace.
![]() CAUTION: If you install the fireplace in a home garage
CAUTION: If you install the fireplace in a home garage
•fireplace pilot and burner must be at least 18" above floor.
•locate fireplace where moving vehicle will not hit it.
For convenience and efficiency, install fireplace
•where there is easy access for operation, inspec- tion and service.
•in coldest part of room
An optional blower kit is available from your dealer. See Accessories, page 27. If planning to use blower, locate fireplace near an electrical outlet.
Built-In Fireplace Installation
| Actual | Framing |
Height | 26" | 26 7/8" |
Front Width | 26 3/4" | 26 7/8" |
Depth | 9 1/2" | 10 1/2" |
Bottom | 3/4" | 3/4" |
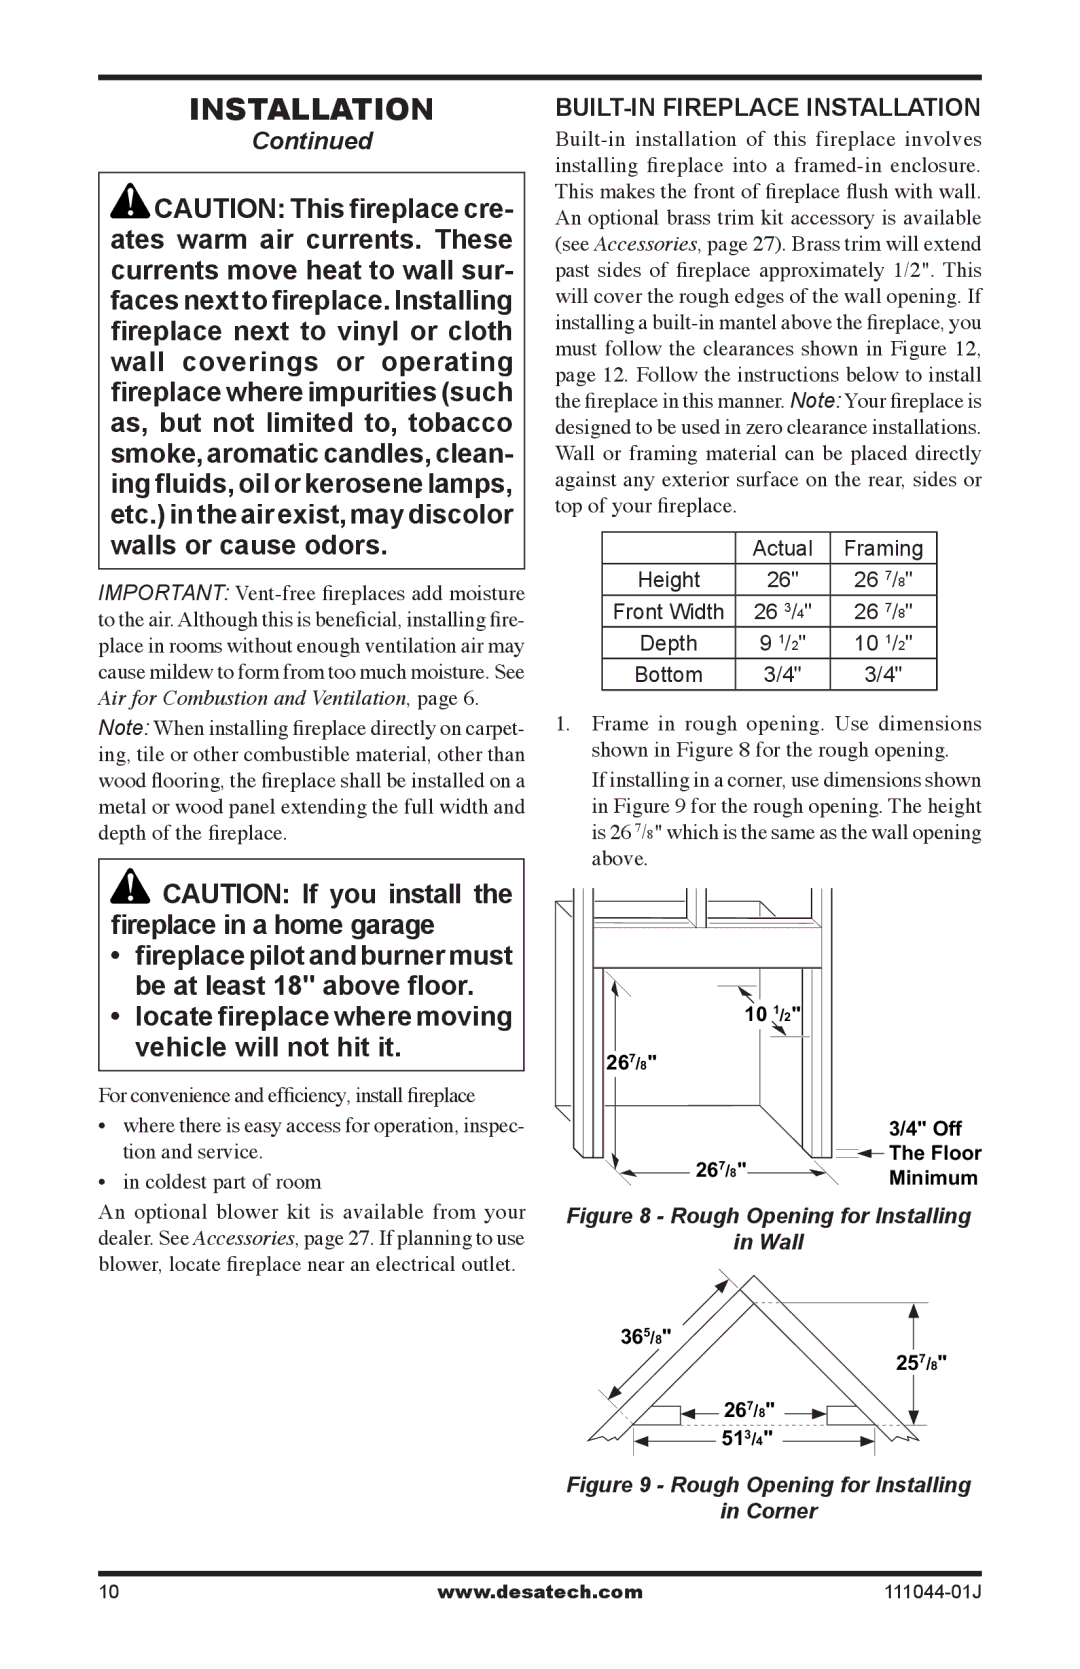
1.Frame in rough opening. Use dimensions shown in Figure 8 for the rough opening.
If installing in a corner, use dimensions shown in Figure 9 for the rough opening. The height is 26 7/8" which is the same as the wall opening above.
10 1/2"
267/8"
3/4" Off
![]()
![]() The Floor
The Floor
267/8"![]() Minimum
Minimum
Figure 8 - Rough Opening for Installing
in Wall
365/8"
257/8"
![]() 267/8"
267/8" ![]() 513/4"
513/4"
Figure 9 - Rough Opening for Installing
in Corner
10 | www.desatech.com |