Manuals
/
Desa
/
Household Appliance
/
Indoor Fireplace
Desa
UNVENTED (VENT-FREE) NATURAL GAS FIREPLACE Installing, Continued, heads and putty over
Models:
UNVENTED (VENT-FREE) NATURAL GAS FIREPLACE
1
12
36
36
Download
36 pages
49.36 Kb
9
10
11
12
13
14
15
16
Troubleshooting
Install
Parts list
Warranty
Accessories
Log Base Assembly
Manual Lighting Procedure
Cleaning and Mainte
How to
Safety
Page 12
Image 12
Page 11
Page 13
Page 12
Image 12
Page 11
Page 13
Contents
OWNER’S OPERATION AND INSTALLATION MANUAL
Save this manual for future reference
UNVENTED VENT-FREENATURAL GAS FIREPLACE
CONTENTS SAFETY INFORMATION
WARNINGS
DANGER
Safety Information continues on next page
SAFETY
INFORMATION
Continued
PRODUCT IDENTIFICATION
Figure 1 - Log Base Assembly
Figure 2 - Fireplace
LOCAL CODES UNPACKING PRODUCT FEATURES
Safety Device
Operation
Piezo Ignition System
AIR FOR COMBUSTION AND VENTILATION
PROVIDING ADEQUATE VENTILATION
AIR FOR
VENTILATION
COMBUSTION
Continued
AIR FOR COMBUSTION AND VENTILATION
Continued
VENTILATION AIR
Ventilation Air from Inside Building
INSTALLING
NOTICE
Continued
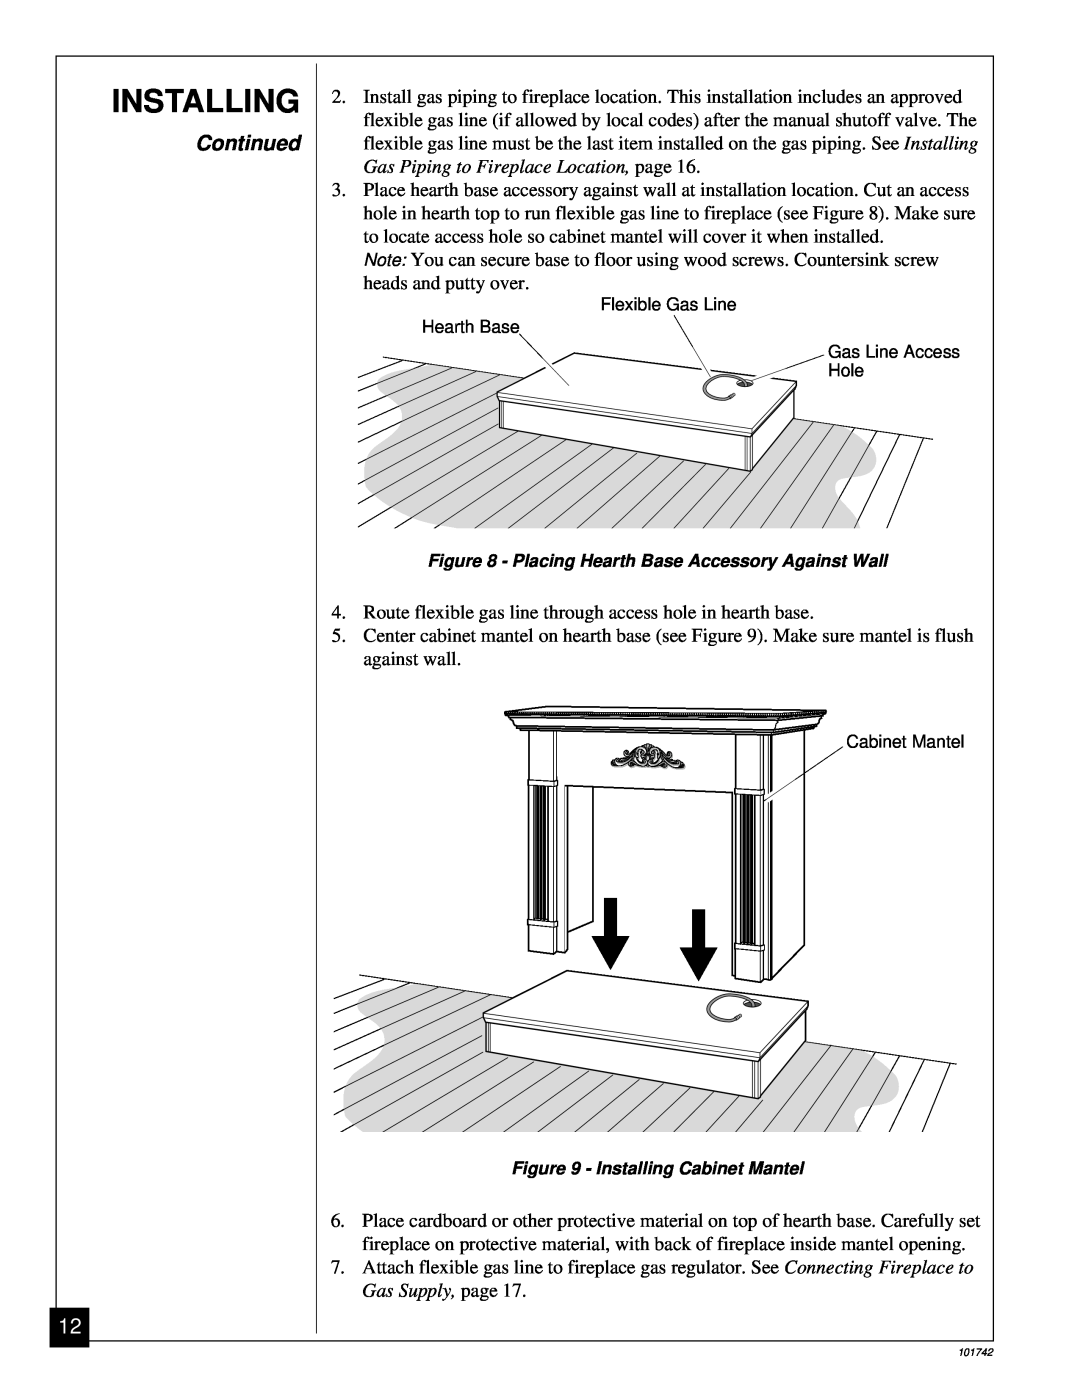
INSTALLING
Continued
ASSEMBLING AND ATTACHING BRASS TRIM
INSTALLING
INSTALLATION CLEARANCES
Continued
CONVENTIONAL FIREPLACE INSTALLATION
INSTALLING
Continued
heads and putty over
INSTALLING
BUILT-INFIREPLACE INSTALLATION
Continued
Continued
INSTALLING
Figure 13 - Attaching Nailing Flange Accessory
Continued
39 3/8 27 7/8 35 1/2 55 5/8
INSTALLING
Mantel Clearances for Built-InInstallation
Continued
Continued
INSTALLING
INSTALLING GAS PIPING TO FIREPLACE LOCATION
Installation Items Needed
NOTICE
INSTALLING
CONNECTING FIREPLACE TO GAS SUPPLY
Installation Items Needed
Continued
G 001WARNING
INSTALLING
NOTICE
Continued
INSTALLING
Pressure Testing Fireplace Gas Connections
Continued
Continued
INSTALLING
INSTALLING LOGS
Figure 21 - Installing Rear Log
Figure 22 - Installing Front Log
INSTALLING
Figure 23 - Installing Crossover Log
Continued
Continued
FOR YOUR SAFETY READ BEFORE LIGHTING
OPERATING FIREPLACE
INSTALLING
Continued
OPERATING
FIREPLACE
NOTICE
LIGHTING INSTRUCTIONS
MANUAL LIGHTING PROCEDURE
TO TURN OFF GAS TO APPLIANCE
VARIABLE OUTPUT CONTROL OPERATION
OPERATING FIREPLACE
INSPECTING
BURNERS
NOTICE
PILOT FLAME PATTERN
CLEANING AND MAINTENANCE TROUBLE SHOOTING
ODS/PILOT AND BURNERS
LOGS
TROUBLE- SHOOTING
Cleaning and Mainte
Continued
Continued
TROUBLE SHOOTING
Cleaning and Mainte
Cleaning and Mainte
Cleaning and Mainte
TROUBLE
SHOOTING
Continued
leaks see Checking Gas
TECHNICAL SERVICE SERVICE HINTS
REPLACEMENT PARTS SPECIFICATIONS
When gas pressure is too low
When gas quality is bad
ACCESSORIES
CABINET MANTEL GMC11F - Walnut Finished
GMC12U - Unfinished
HEARTH BASE GC3333F- Walnut Finished
Log Base Assembly
ILLUSTRATED
PARTS
BREAKDOWN
PARTS LIST
Log Base Assembly
PART NUMBER
DESCRIPTION
Fireplace
ILLUSTRATED
PARTS
BREAKDOWN
PARTS LIST
Fireplace
PART NUMBER
DESCRIPTION
WARRANTY INFORMATION
LIMITED WARRANTY VENT-FREENATURAL GAS FIREPLACE
KEEP THIS WARRANTY
Top
Page
Image
Contents