SELECTING LOCATION
Clearances
5
SELECTING LOCATION
Continued
7.Do not use this appliance if any part has been under water. Imme- diately contact a local service technician to examine the appliance and to replace any part(s) of the control ignition system and other related components that have submerged under water.
36"
(91cm)
Min.
WALL
36"
(91cm)
Min.
CEILING
0" Floor
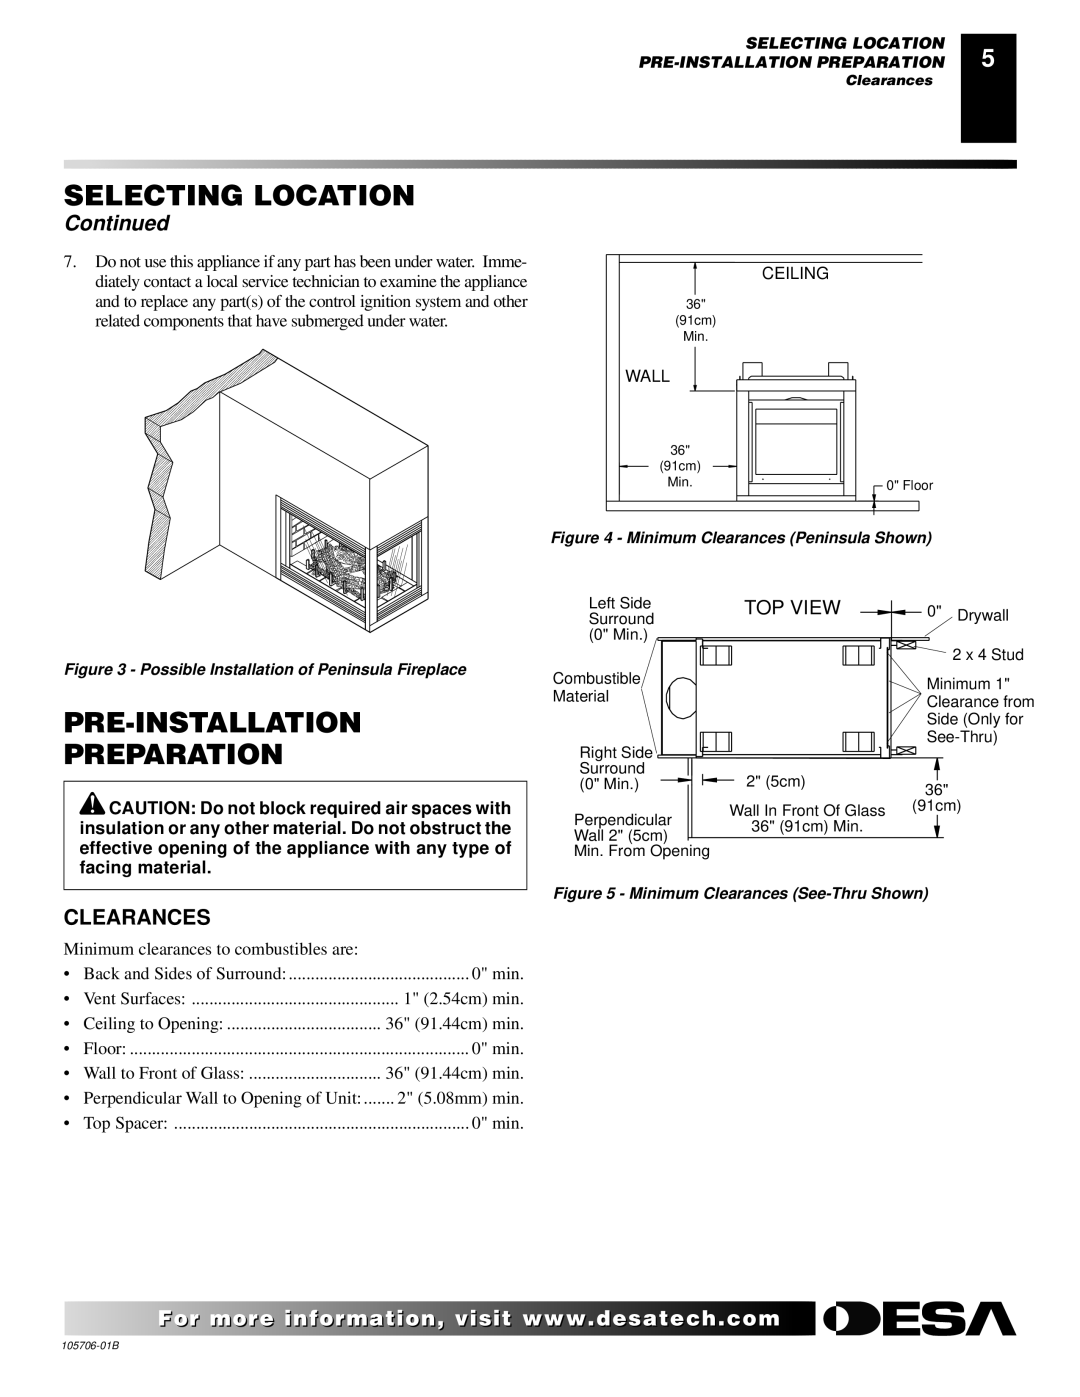
Figure 4 - Minimum Clearances (Peninsula Shown)
Figure 3 - Possible Installation of Peninsula Fireplace
PRE-INSTALLATION
PREPARATION
![]() CAUTION: Do not block required air spaces with insulation or any other material. Do not obstruct the effective opening of the appliance with any type of facing material.
CAUTION: Do not block required air spaces with insulation or any other material. Do not obstruct the effective opening of the appliance with any type of facing material.
CLEARANCES
Minimum clearances to combustibles are: |
| |
• Back and Sides of Surround: | 0" min. | |
• | Vent Surfaces: | 1" (2.54cm) min. |
• | Ceiling to Opening: | 36" (91.44cm) min. |
• | Floor: | 0" min. |
• Wall to Front of Glass: | 36" (91.44cm) min. | |
• Perpendicular Wall to Opening of Unit: | 2" (5.08mm) min. | |
• | Top Spacer: | 0" min. |
Left Side | TOP VIEW | 0" | Drywall |
Surround |
|
| |
(0" Min.) |
|
|
|
|
|
| 2 x 4 Stud |
Combustible |
| Minimum 1" | |
Material |
| ||
| Clearance from | ||
|
| ||
|
| Side (Only for | |
Right Side |
| ||
|
|
| |
Surround | 2" (5cm) |
|
|
(0" Min.) | 36" |
| |
|
|
| |
Perpendicular | Wall In Front Of Glass | (91cm) | |
|
| ||
36" (91cm) Min. |
|
| |
Wall 2" (5cm) |
|
| |
|
|
| |
Min. From Opening |
|
|
|
Figure 5 - Minimum Clearances (See-Thru Shown)
For more![]()
![]()
![]() visit www.
visit www.![]()
![]()
![]() .com
.com![]()
![]()
![]()
![]()
![]()
