Installation
Continued
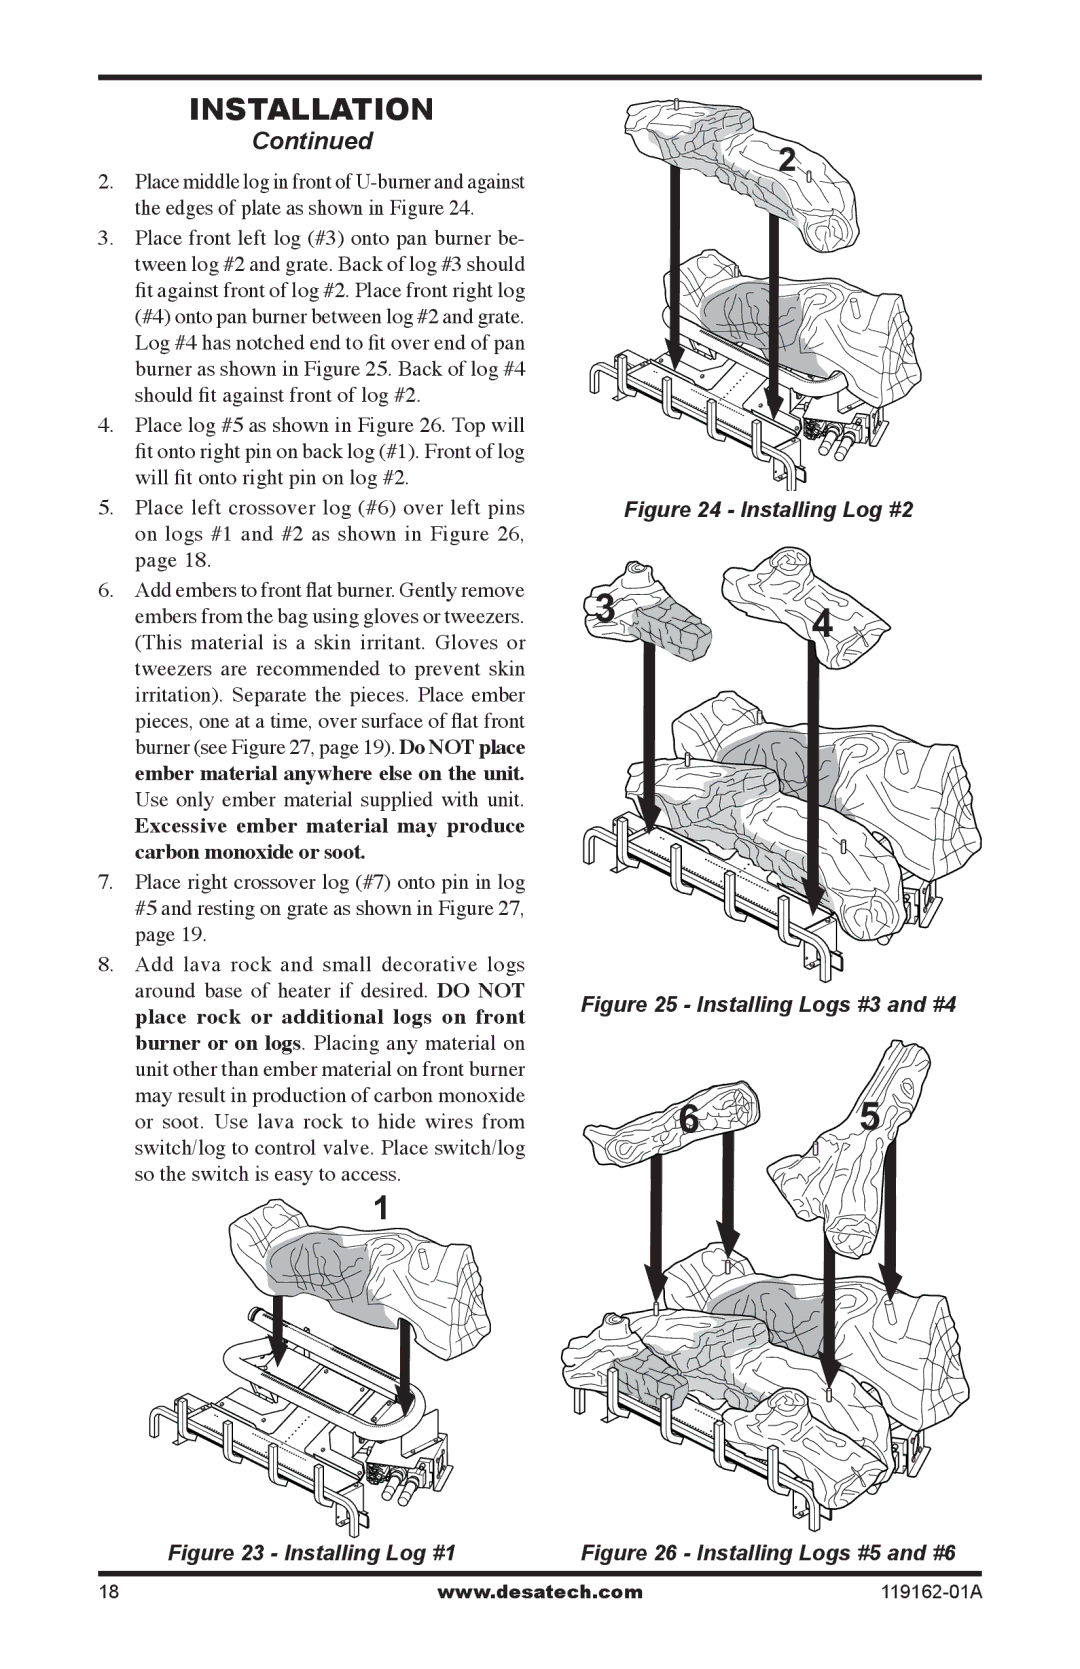
2.Place middle log in front of
3.Place front left log (#3) onto pan burner be- tween log #2 and grate. Back of log #3 should fit against front of log #2. Place front right log (#4) onto pan burner between log #2 and grate. Log #4 has notched end to fit over end of pan burner as shown in Figure 25. Back of log #4 should fit against front of log #2.
4.Place log #5 as shown in Figure 26. Top will fit onto right pin on back log (#1). Front of log will fit onto right pin on log #2.
5.Place left crossover log (#6) over left pins on logs #1 and #2 as shown in Figure 26, page 18.
6.Add embers to front flat burner. Gently remove embers from the bag using gloves or tweezers. (This material is a skin irritant. Gloves or tweezers are recommended to prevent skin irritation). Separate the pieces. Place ember pieces, one at a time, over surface of flat front burner (see Figure 27, page 19). Do NOT place ember material anywhere else on the unit.
Use only ember material supplied with unit.
Excessive ember material may produce carbon monoxide or soot.
7.Place right crossover log (#7) onto pin in log #5 and resting on grate as shown in Figure 27, page 19.
8.Add lava rock and small decorative logs around base of heater if desired. DO NOT place rock or additional logs on front burner or on logs. Placing any material on unit other than ember material on front burner may result in production of carbon monoxide or soot. Use lava rock to hide wires from switch/log to control valve. Place switch/log so the switch is easy to access.
1
Figure 23 - Installing Log #1
2
Figure 24 - Installing Log #2
3 | 4 |
|
Figure 25 - Installing Logs #3 and #4
6 5
Figure 26 - Installing Logs #5 and #6
18 | www.desatech.com |
